
Clear a Household Drain Without Forcing the Cable
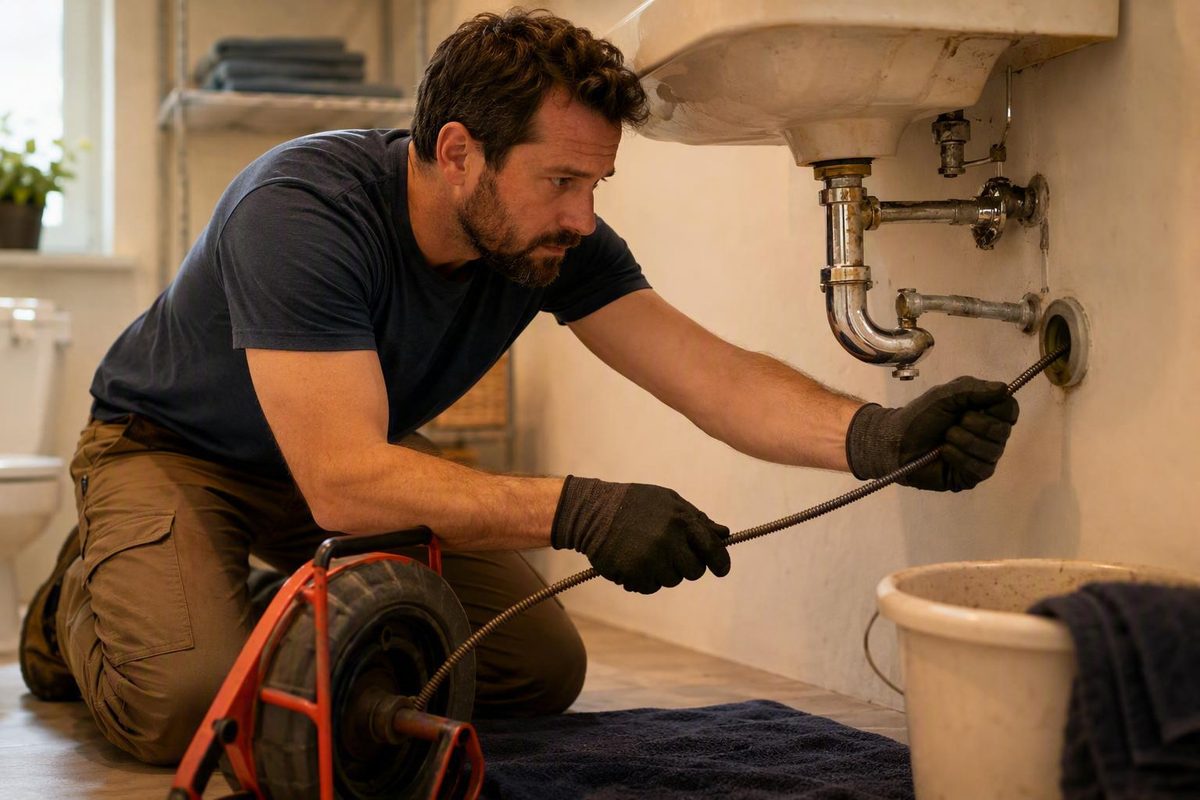
Choose the snake and access point for the fixture, then feed a short cable section at a time and rotate it according to the tool’s directions.
For a likely fixture-level clog, remove visible debris and try the appropriate plunger first. If that does not work, choose a snake made for the fixture, open the correct access point, feed only a short section of cable at a time, and rotate it as the tool’s instructions direct. Work resistance with gentle push-pull movements, retract the cable slowly, contain the debris, reassemble the drain, and test with plain water.
Stop if the cable binds, twists, loops, kinks, or becomes difficult to control. Do not begin if sewage is backing up, wastewater is rising rapidly, or several fixtures are affected.
Quick answer: Make sure this is a clog you should snake
A plumbing snake, also called a drain auger, is a flexible coiled cable used to dislodge, break up, or retrieve material blocking a drain. It is most useful when the obstruction is accessible through a fixture drain, bathtub overflow, trap connection, or another suitable opening.
Before using one:
- Remove visible hair, soap buildup, or other reachable debris.
- Try the appropriate plunger.
- Confirm that the problem appears limited to one fixture.
- Select a snake intended for that fixture and drain.
- Feed and rotate the cable gently.
- Withdraw it under control, remove the debris, and test with water.
The number of affected fixtures is an important diagnostic clue. One slow or blocked sink, tub, shower, or toilet often suggests a localized obstruction. Several fixtures backing up together may indicate a branch-line, main-sewer, or septic-system problem rather than a clog directly below one drain. Do not begin snaking if wastewater is rising rapidly, sewage is entering another fixture, or several drains are affected; stop using water where practical and arrange professional diagnosis. General drain-snaking guidance distinguishes localized clogs from broader backup symptoms.
A fixture snake is intended for an accessible obstruction. It is not a repair for a confirmed collapsed or damaged pipe, significant root intrusion, or a full septic tank.
Choose the correct tool and entry point
Use the access point that gives the cable a reasonably direct route without risking damage to the fixture. One tool should not be treated as suitable for every drain.
| Fixture | First access point | Alternate access | Appropriate tool |
|---|---|---|---|
| Bathroom or kitchen sink | Drain opening after removing the stopper or cover | Exposed wall drain after removing the P-trap | Compatible hand snake |
| Bathtub | Overflow opening after removing the overflow plate | Professional access if that route is unsuitable | Compatible hand snake |
| Shower | Drain opening after removing the strainer and visible debris | Suitable accessible trap or cleanout | Compatible hand snake |
| Toilet | Bowl outlet through the auger’s protected guide | Drain-line access is outside this fixture-level procedure | Dedicated toilet auger |
For a sink, begin by removing the stopper or drain cover. If the configuration prevents the cable from passing, place a bucket beneath the P-trap, loosen the slip nuts, and remove the trap. Empty and inspect it before inserting the snake into the exposed wall drain. This avoids repeatedly driving the cable against the trap bend.
If the wall line will remain open for more than a brief period, loosely cover it with a removable rag to limit sewer-gas entry. Keep part of the rag outside the pipe, and never push or leave it inside the drain. This precaution and the wall-line access method are described in The Home Depot’s drain-auger guidance.
For a bathtub, remove the overflow plate and use the overflow opening rather than forcing the cable through the tub-floor drain. For a shower, remove the strainer and pull out visible hair or debris first.
Use a dedicated toilet auger through the bowl. Its protective guide or sleeve keeps the cable away from exposed porcelain; a bare standard drain snake can scratch the bowl. If the work shifts to a separate drain-line cleanout, a toilet auger is no longer the appropriate tool. Use only a compatible drain-line machine under its instructions or seek professional help.
Match the cable, head, and tool to the fixture, drain size, and manufacturer’s compatibility guidance. There is no universal cable diameter, length, or cutter for every household drain.
Prepare for cable, chemical, and contamination hazards
Before opening the drain or extending the cable, prepare:
- Eye protection
- Close-fitting, tool-appropriate gloves
- A bucket for wastewater and debris
- Towels or another washable work-area covering
- Adequate lighting and clear footing
With the tool stopped and the cable retracted, inspect it for wear, corrosion, fraying, kinks, or other damage. Do not use a visibly damaged cable. Check the access opening, consider the likely pipe route, and clear objects that could interfere with the crank or cable.
Determine whether chemical drain cleaner may still be present before starting. Snaking can splash corrosive cleaner and contaminated drain contents toward the operator. If you cannot determine whether the drain can be worked safely, do not open or snake it. Manufacturer guidance also calls for cable inspection and additional precautions where chemicals, bacteria, or other hazardous material may be present. See the Milwaukee M12 drain-snake operator’s manual.
Glove requirements vary by tool. For a manual snake, use close-fitting gloves appropriate for the tool and contamination risk.
Tie back long hair, secure loose clothing, remove jewelry that could reach the mechanism, and keep children, pets, and bystanders away. Never hold a rag around a cable while it is rotating.
How to use a manual plumbing snake step by step
These steps apply to a hand-operated snake. Follow the tool’s instructions if its locking mechanism, rotation direction, or operating sequence differs.
1. Open the selected access point. Remove the sink stopper, shower strainer, bathtub overflow plate, or other required cover. If using a sink’s wall-drain route, place a bucket below the P-trap, remove the trap, and inspect it first.
2. Insert the cable slowly. Guide the tip into the opening while keeping the cable aligned with the drain. Apply only enough pressure to advance it. If it immediately refuses to enter, stop and check the angle, access point, and tool compatibility.
3. Keep the unsupported section short. Advance approximately 6 to 12 inches at a time as a practical hand-snake technique. Lock the collar or cable clamp if the tool has one, work that section, and then release more cable. Manual-auger instructions support using these short cable increments.
4. Rotate as the tool directs. Turn the handle in the direction specified by the manufacturer while feeding gradually. Clockwise rotation is common in general guides, but it is not a universal rule for every design.
5. Work resistance gently. Hold the cable under control and use small rotating and push-pull movements. Resistance may be the obstruction, but it may also be an ordinary pipe bend.
6. Withdraw the cable slowly. When resistance gives way or the head captures material, pull the cable back under control. Guide debris into the bucket or onto the protected work surface instead of dragging the cable across flooring or cabinets.
7. Remove debris only after the cable stops. Do not wrap a rag around a moving cable. Once the tool is stationary, remove captured hair or debris carefully and place it in the trash rather than washing it back into the drain.
8. Reassemble and test. Reinstall the stopper, strainer, overflow plate, or P-trap. Make sure trap washers and slip nuts are correctly seated, then test drainage and check for leaks using plain water.
For a bathroom sink, that means removing the pop-up stopper, pulling out reachable hair, feeding the cable in short increments, working light resistance gently, retrieving the debris, reinstalling the stopper, and testing the flow. If the cable repeatedly catches on the stopper mechanism or an unfavorable bend, reconsider the access route rather than pushing harder.
What the resistance is telling you
Resistance is information, not an instruction to apply maximum force. There is no definitive DIY test that proves whether the tip has reached a clog or a pipe bend.
| Observation | Likely meaning | Response |
|---|---|---|
| Resistance yields with light movement | Ordinary bend or soft obstruction | Continue slowly while maintaining control |
| Resistance remains firm | Dense clog, unsuitable route, or pipe feature | Use gentle push-pull rotation; stop if it does not yield |
| Exposed cable begins looping or twisting | Too much unsupported cable or a binding tip | Stop pushing and rotating; relieve tension |
| Cable will not advance or retract safely | Cable may be bound, kinked, or caught | Stop operating and seek trained assistance |
A pipe bend can produce a similar sensation. Neither response proves what is ahead, so additional force is not a useful diagnostic method.
If the cable binds, loops, twists, kinks, or knots, stop pushing and rotating. Maintain your grip, relieve tension carefully, and retract the cable slowly. Excess unsupported cable can loop, kink, whip, break, or snap back toward the operator; powered-tool safety guidance likewise warns against excessive distance, twisting, kinking, overbending, and forcing the cable. See the Milwaukee M12 operator’s manual cited above.
If the cable cannot be safely controlled or retrieved, stop.
Do not rely on a universal number of attempts or insertion distance. Drain layouts and snake designs vary, so the symptoms, cable behavior, and tool instructions should determine when you stop.
Powered drain snakes require their own operating manual
The manual-snake procedure above is not a substitute for an electric or battery-powered machine’s operator manual. Before startup, identify the exact model, read its manual, install only compatible cables and attachments, and use the specified eye and hand protection.
Inspect both the machine and cable. Position the unit and cable exactly as directed, and follow the model-specific requirement for controlling the switch and cable. For example, Milwaukee’s M18 instructions require one operator to control both.
Do not apply generic advice about rotation direction, reverse mode, speed, or working distance. Those controls and restrictions vary by model. Manufacturer manuals warn against twisting, kinking, overbending, or forcing cables and may restrict reverse operation when a cable is bound. The Milwaukee M18 drain-snake manual provides model-specific cable, glove, inspection, and reverse-operation rules.
If you cannot identify the model, understand its controls, or follow its safety instructions, do not operate it. A larger or powered machine does not make an uncertain clog safer to tackle.
Test the result, clean the tool, and know when to stop
After reassembling the fixture, run plain water and observe the drain. Smooth flow without standing water is a practical sign that the immediate obstruction has cleared, but it does not prove that recurring buildup, a damaged pipe, or another underlying defect has been resolved.
If drainage remains slow, recheck the stopper, strainer, P-trap, and symptom pattern. Do not automatically apply more force or switch to a larger machine.
Retract the cable completely and contain the debris. With the tool stopped, clean the cable according to its instructions, inspect it for new damage, dry it, and store it correctly. Do not return a wet, dirty, or kinked cable to service.
Stop DIY work and seek professional diagnosis if you encounter:
- Multiple fixtures backing up
- Sewage entering a sink, tub, shower, toilet, or floor drain
- Rapidly rising wastewater
- A recurring clog
- Persistent slow drainage after a controlled attempt
- Sewage odor associated with a backup or widespread drainage trouble
- Suspected tree roots
- An obstruction you cannot access
- A cable you cannot safely advance or retrieve
- Old, corroded, fragile, or visibly damaged piping
An unsuitable snake or excessive force may damage old or fragile piping. Professional guidance also identifies recurring clogs, continued slow drainage, inaccessible obstructions, foul odors, and sewage backups as reasons to stop rather than force the tool. These stop conditions are summarized in fixture-level drain-snake guidance.
Root cutting may restore flow temporarily, but it does not repair the opening or damaged line that allowed the roots to enter. The affected pipe still requires evaluation and may need repair, as noted in The Home Depot’s drain-auger guidance.
A controlled manual attempt is reasonable when the symptoms point to one manageable fixture-level clog. Match the tool and access point to the fixture, keep the cable controlled, and work resistance gently. Widespread, recurring, or unsafe symptoms—and any loss of cable control—mean it is time to stop.