
How to Diagnose and Clean a Smelly Drain Safely
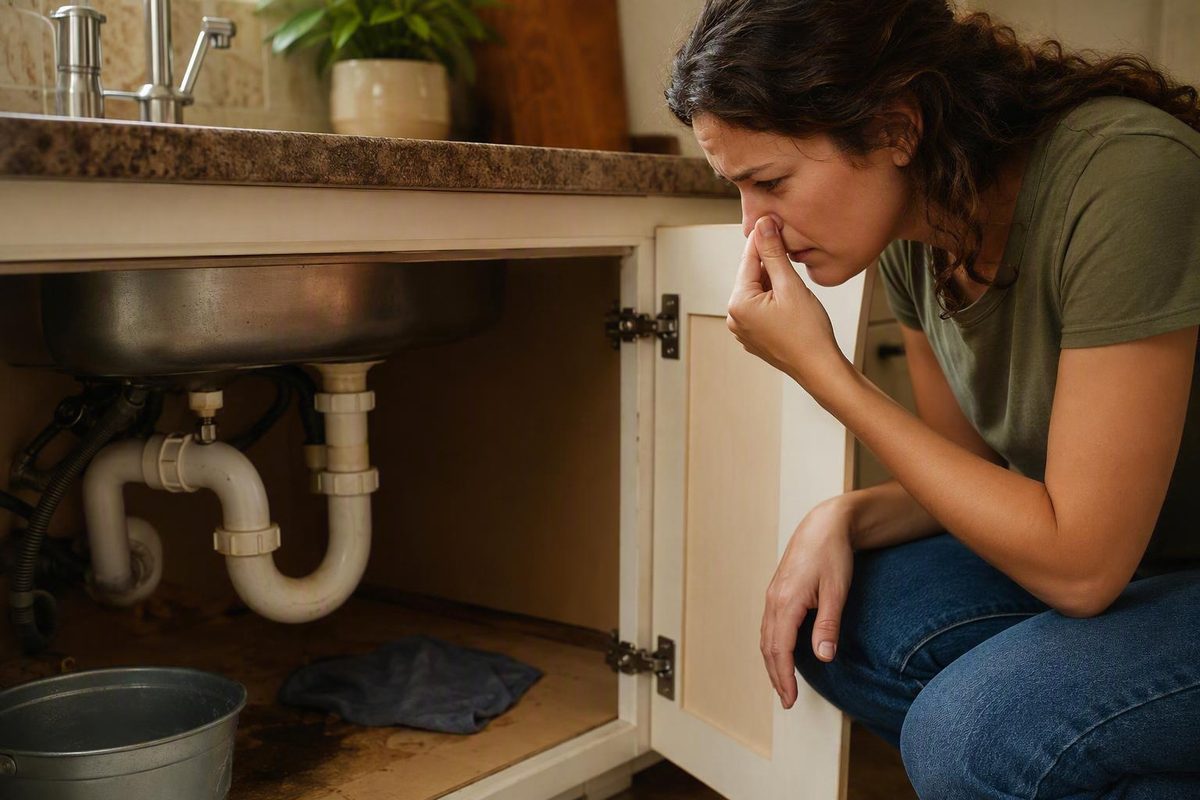
Begin with what you can observe and reach safely. An underused drain may need only running water. Remove visible hair, food or grime before flushing.
Overview
To clean a smelly drain, first identify whether the odor points to surface buildup, a dry P-trap, a drainage or vent problem, or the water itself. Apply the least invasive matching action, check the odor and drainage afterward, and stop when the problem clears. Persistent sewage odor, leaks, or gurgling require further investigation.
A successful cleaning removes the odor while water continues to drain normally. It should not leave leaking joints, worsening drainage, or unresolved gurgling. Cleaning ingredients cannot repair a damaged trap, leaking pipe, or ventilation defect, so diagnosis matters more than applying every possible treatment.
Begin with what you can observe and reach safely. An underused drain may need only running water. Visible hair, food, or grime should be removed before flushing. If buildup appears to remain, hot tap water or an optional household treatment may help. Removing a sink P-trap belongs later in the sequence and only makes sense if you are confident you can reassemble it without leaks.
Diagnose the likely source of the smell
Treat descriptions such as musty, rotten, or sulfur-like as clues, not definitive diagnoses. The drain’s recent use, visible condition, water flow, and sounds provide more useful direction. Organic material can support bacteria and biofilm without producing a complete blockage, while an empty P-trap can let sewer gases travel through an otherwise open drain (Drano).
Use this decision matrix to choose your first check:
| What you observe | What it may indicate | Least invasive first action | What to check next |
|---|---|---|---|
| Visible food, hair, slime, grease, or grime around the opening | Accessible organic buildup or biofilm | Remove and clean the accessible debris | Check whether the opening is clear, the odor is weaker, and water drains normally |
| One drain has been unused for an extended period | A dry P-trap that no longer blocks sewer gas | Run water through the drain | Stop if the odor diminishes; reassess if it remains |
| Slow drainage or standing water accompanies the smell | Buildup or a clog may be restricting flow | Remove surface debris, then observe the flow after flushing | Escalate the diagnosis if drainage remains restricted |
| The drain gurgles | A possible ventilation or plumbing-flow problem | Listen for recurrence while nearby fixtures are used | Seek plumbing help if gurgling persists |
| Water itself smells when collected away from the drain | The odor may not originate in the drain | Compare glasses of water collected in two rooms | If both smell, investigate the water source rather than repeatedly cleaning one drain |
| Only one glass of water or one fixture smells | A localized drain or faucet-area problem is more likely | Inspect and clean accessible parts at that fixture | Recheck the water and drain separately |
For the two-glass comparison, collect water from the suspect room and another room, then smell each glass away from its drain. If both samples smell, the water is the more likely source. If only one does, the problem is probably localized, although buildup around the faucet may also be involved (Drano).
Gurgling deserves separate attention. It can occur when plumbing flow pulls air through a drain, which may indicate compromised ventilation (Drano). It is a diagnostic clue, not proof of a particular obstruction or permission to dismantle a vent.
Before you start: set a safe boundary
Identify the drain type, the parts you can reach, and whether any drain product has already been used. Restrict the work to actions you can perform confidently. For a sink, accessible parts may include the stopper, strainer, drain opening, disposal flaps, and the P-trap below the basin. Shower and floor drains may offer less access, so do not assume every procedure applies equally.
Do not improvise mixtures of bleach, commercial drain cleaners, or household ingredients. Both supplied sources warn that bleach can damage pipes and create dangerous or toxic gases, but they do not establish comprehensive rules for chemical combinations or exact waiting periods between products. and do not establish comprehensive rules for chemical combinations or exact waiting periods between products. One source warns that bleach can harm pipes or create toxic gases in this context (Service Experts); another warns that a drain chemical can release dangerous gases if it remains in the drain and encounters ammonia (Mr. Rooter). Those warnings support avoiding improvised combinations, but they do not provide a universal compatibility chart. If a product has already entered the drain, use its manufacturer’s instructions rather than adding another treatment.
Temperature guidance also requires restraint. An IPEX PVC data sheet gives PVC a maximum service temperature of 140°F (60°C) under pressure and says PVC drainage applications can handle near-boiling temperatures under intermittent-flow conditions. The company’s broader vinyl piping manual gives the same 140°F (60°C) maximum service temperature for PVC under pressure.
These manufacturer figures describe particular PVC systems and service conditions. They do not establish one safe household pouring temperature for every PVC or ABS pipe, metal line, joint, garbage disposal, or porcelain fixture. A consumer drain guide also cautions against pouring boiling water into PVC because it may soften or damage the material (Drano). The bounded choice for this procedure is hot tap water, not a pot of boiling water.
Before continuing, stop if you find a leaking or damaged fitting, a missing trap, or plumbing you cannot confidently reassemble. Cleaning can remove deposits, but it cannot correct a physical defect.
Clean the drain in cause-matched steps
Follow only the steps that fit your observations. After each action, check the odor and water flow before proceeding. Do not automatically refill the trap, apply ingredients, and dismantle the plumbing in one uninterrupted sequence. Once the odor clears and drainage is normal, further treatment adds no diagnostic value.
Location affects access. A kitchen drain may collect food and grease, a bathroom drain may hold hair or residue, and an underused shower or floor drain may have a dry trap. Use the shared least-invasive sequence while limiting the work to parts that are accessible.
Step 1: Refill an underused P-trap
If the fixture has not been used recently, start by running water through it. The curved P-trap is designed to retain water, creating a seal between the room and the sewer line. When that water dries out, sewer gas can rise through the drain (Mr. Rooter).
Running water is the only input required for this check. Let enough water pass through the drain to restore water to the trap, then stop the faucet and reassess the odor. A smell that diminishes after the trap is refilled supports the dry-trap explanation. No chemical cleaning is necessary if the odor clears and the drain behaves normally.
If the odor continues, do not assume the trap needs more water or that buildup must be the cause. A leak can also allow a trap to lose its seal, and other plumbing defects can produce similar symptoms. Continue the diagnosis by looking for accessible debris, restricted drainage, gurgling, or leakage.
Step 2: Remove accessible debris
Clean what you can see before pouring anything into the drain. Depending on the fixture, this may mean removing and cleaning the stopper or strainer, clearing hair or food from the opening, wiping grime from the surrounding surface, or cleaning reachable disposal flaps. Surface cleaning is the recommended starting point before deodorizing remedies (Drano).
Organic particles, grease, and other residue can support microorganisms that produce unpleasant odors as they feed (Service Experts). Biofilm can also develop without forming a complete blockage, so a drain may smell even when water still moves through it (Drano).
The immediate goal is a visibly cleaner, unobstructed opening. Replace any part you removed, run water, and check both flow and odor. If the smell clears, stop. If the opening is clean but the smell or slow drainage remains, buildup may be farther inside, or the original diagnosis may be wrong.
Step 3: Flush, then decide whether to try baking soda and vinegar
After removing accessible debris, flush the drain with hot tap water. Avoid substituting boiling water when the pipe material and complete plumbing assembly are uncertain. Observe whether water drains freely and whether the odor weakens after the flush.
Baking soda and vinegar are optional, not a universally validated formula. Multiple sources report using them for drain odor, but their quantities and dwell times conflict. Service Experts describes one cup of baking soda followed by two cups of hot vinegar (Service Experts). Mr. Rooter describes letting a mixture fizz and flushing it with hot tap water after one hour (Mr. Rooter), while the supplied community source reports a much shorter five-to-ten-minute wait. That disagreement does not support presenting one recipe or waiting period as uniquely correct.
If you choose this household method, use it only when no incompatible drain product is present and without adding bleach or another cleaner. Keep expectations narrow: it is an attempt to loosen or deodorize organic residue, not a repair for a dry trap, leak, missing vent, or damaged pipe.
Afterward, check the drain rather than judging success by fizzing. Success means the odor is reduced or gone and water drains normally. No improvement means you should reassess the cause instead of repeating treatments automatically.
Step 4: Clean the P-trap only when buildup remains
Consider removing a sink P-trap only after accessible cleaning and flushing fail, and only if the suspected buildup is below the drain. This step applies to a reachable sink trap, not every shower, floor drain, or concealed plumbing assembly.
Place a bucket beneath the curved section of pipe before loosening it, as recommended by Mr. Rooter. The bucket catches retained water and material from the trap. Remove the trap only if you understand how its connections return to their original positions.
Empty the contents into the trash, rinse the pipe, and reassemble the plumbing. Both Service Experts and Mr. Rooter describe emptying or rinsing the trap before reassembly. Once it is connected, run water and inspect every disturbed joint.
Successful completion has two parts: the odor or restricted flow improves, and no water leaks from the reassembled connections. If a joint leaks, stop using the fixture until the connection is corrected. If you are uncertain about disassembly, cannot reseal the trap, or discover damage, call a plumber rather than continuing.
Worked example: a seldom-used bathroom drain
Suppose a bathroom sink begins to smell after the room has gone unused. The drain is not visibly dirty, water does not stand in the basin, and there is no gurgling or accessible leak. Usage history makes a dry P-trap the strongest initial explanation.
Run water through the sink, then turn it off and reassess the odor. If the smell clears, the result supports a restored trap seal. There is no reason to add baking soda, vinegar, bleach, or a commercial cleaner because the evidence points to water loss, not deposits.
If the smell returns despite renewed use, the dry-trap explanation is incomplete. Check for leakage and other plumbing symptoms rather than repeatedly refilling or chemically treating the drain.
Verify the result and troubleshoot what remains
Verification distinguishes a resolved source from an odor that has merely been masked. Recheck the fixture after each action, using the same observable clues that guided the diagnosis.
- Smell near the drain after running water, then smell a collected water sample away from the basin if the source remains unclear.
- Observe whether water drains normally or leaves standing water.
- Listen for gurgling during drainage or when nearby fixtures operate.
- Inspect accessible joints, especially a reassembled P-trap, for dripping or moisture.
- Note whether the odor stays isolated to one drain or appears elsewhere.
If the odor remains localized but the flow is normal, inspect the accessible stopper, opening, and faucet area again. The two-glass comparison can help separate a localized fixture problem from odor present in the water itself (Drano).
Persistent slow flow or standing water suggests that the restriction was not removed. Repeated gurgling points away from simple surface grime and toward a possible ventilation or plumbing-flow problem. A leak after trap cleaning means the procedure is not complete, even if the smell has improved.
Do not continue dismantling concealed plumbing to chase an uncertain odor. If the supported checks do not isolate the source, the appropriate next step is a professional diagnosis rather than another unverified treatment.
When to call a plumber
Stop DIY cleaning when the evidence points to a plumbing fault rather than removable residue. Persistent sewage odor deserves prompt attention, especially when refilling the trap and cleaning accessible buildup do not resolve it. Drano’s drain guidance specifically says sewage smell should be addressed immediately and recommends professional help when the cause is uncertain or the reader is not confident performing the work (Drano).
Call a plumber when the odor persists after cause-matched cleaning, a trap will not remain filled, or you find a leak, missing trap, damaged pipe, or suspected vent problem. Rotting drain tubes, absent traps or vents, and leaks can all contribute to drain odor (Mr. Rooter). Recurring drainage trouble, unresolved gurgling, or plumbing that cannot be reassembled without leakage also exceeds the boundary of routine deodorizing.
Do not climb onto a roof to inspect a vent unless you are trained and equipped to do so. Although one supplied source describes roof access as a possible vent check, it also directs readers who are not comfortable with that work to a plumber (Drano).
The supplied evidence does not establish medical symptom thresholds or a complete evacuation protocol for suspected sewer-gas exposure. It supports prompt attention and professional plumbing assessment, but not a more specific emergency rule. Do not invent such a threshold from odor intensity alone.
Prevent the odor from returning
Prevention focuses on keeping organic material out of the drain and preserving the P-trap’s water seal. Match the habit to the location and likely cause rather than routinely applying cleaning ingredients.
- Use a mesh strainer to catch food, hair, and other debris before it enters the drain. Service Experts specifically recommends strainers for intercepting food particles and debris (Service Experts).
- Keep oil and grease out of kitchen sinks and garbage disposals. Grease can contribute to clogs and microbial growth (Drano).
- When using a garbage disposal for food waste, operate it with the faucet running. Mr. Rooter advises running the disposal and faucet for 20 seconds when disposing of food (Mr. Rooter).
- Periodically remove grime from accessible stoppers, strainers, drain openings, and disposal flaps.
- Run water through seldom-used sinks, showers, or other trapped drains so the P-trap retains its water seal (Service Experts).
These habits reduce common inputs to odor, but they cannot prevent every vent defect, leak, or damaged plumbing component. If the smell repeatedly returns despite debris control and regular trap refilling, treat recurrence as diagnostic evidence and arrange a plumbing inspection.