
Find the Cause of a Weak or Incomplete Flush Before You Replace Anything
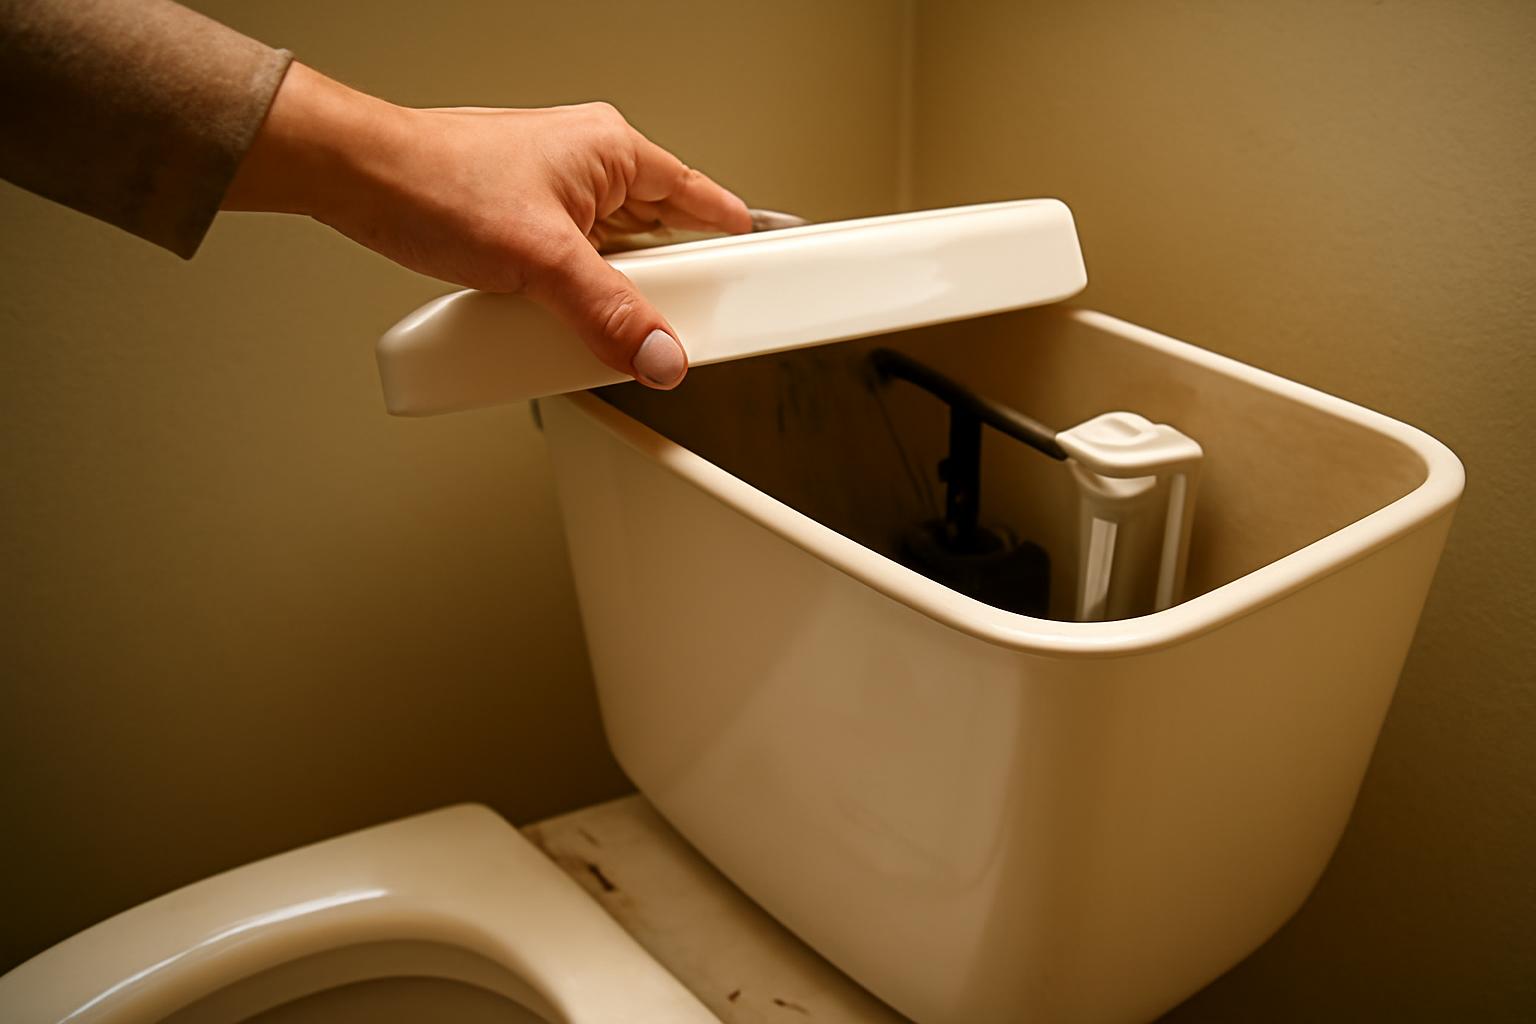
A weak surge followed by normal drainage points first to tank level, bowl refill, the chain, flapper or mineral-restricted bowl passages.
When a toilet is not flushing properly, diagnose the symptom before replacing parts or treating every poor flush as a clog. The bowl’s movement, the tank’s water release and refill, and the behavior of other fixtures can usually narrow the problem.
A bowl that rises and drains slowly points toward a restriction. A weak surge followed by otherwise normal drainage supports checking the tank level, bowl refill, chain, flapper, and mineral-restricted bowl passages first. If several fixtures are slow, bubbling, or backing up, the problem may extend beyond the toilet.
Work from the least invasive check to the more involved repair. Stop if water cannot be controlled, sewage is present, the toilet does not use conventional components, or the work requires equipment or skills you do not have.
First, prevent an overflow or sewage backup
If bowl water is rising, do not flush again to see whether it clears. Another flush can release more tank water into a bowl already close to overflowing.
If the tank lid is accessible, lift it carefully with both hands and place it on a stable, padded surface. If you can safely reach the flapper, press it closed to stop additional tank water from entering the bowl. If water continues entering the tank or bowl, close the toilet’s supply valve, normally found on the wall or floor behind the toilet.
Turn the valve gently without forcing it. Stop if it is corroded, stuck, or begins leaking. Many tank repairs also require closing the supply and draining most of the tank. Do not overtighten fasteners or fittings: excessive force can crack porcelain or damage plastic hardware, as outlined in Lowe’s toilet-repair precautions.
Keep people and pets away and avoid direct contact. Sewage, a substantial release, or contamination of porous flooring or other absorbent materials warrants professional cleanup or remediation rather than ordinary surface cleaning.
Get urgent professional help if:
- Sewage is backing up into the toilet, tub, shower, or another fixture.
- Water is spilling onto the floor and you cannot stop it.
- Water is leaking from the toilet base.
- Flooring is swollen, soft, stained, or visibly damaged.
- Several fixtures are backing up at once.
- The shutoff valve will not close, breaks, or begins leaking.
- The toilet or tank is cracked.
Minimize toilet flushing and other household water use until a suspected shared drain, sewer, or septic problem has been assessed. These conditions can exceed the safe scope of a homeowner repair (review overflow and escalation precautions).
Do not try to stop a leak by aggressively tightening tank bolts, handle hardware, supply fittings, or plastic nuts.
Use the symptom pattern to choose the right troubleshooting path
A conventional gravity toilet works in a short sequence: the handle moves a lift arm, the chain raises the flapper, and tank water enters the bowl. That water carries the bowl contents through the built-in trapway and into the drain. The flapper closes, and the fill valve then replenishes the tank and bowl.
A failure at any stage can look like “the toilet won’t flush,” but the visible symptom identifies the safest place to begin.
| What you observe | Most useful first checks |
|---|---|
| Handle is loose or produces no response | Handle, lift arm, chain attachment, and flapper lift |
| Weak surge, but bowl then drains normally | Tank level, bowl refill, chain adjustment, flapper timing, rim holes, and bowl jet |
| Bowl rises and drains slowly | Partial restriction in the toilet trapway or nearby drain |
| Toilet works only on the second attempt | Tank refill, bowl refill, early flapper closure, and possible partial restriction |
| Tank refills unusually slowly | Supply-valve position, fill-valve adjustment, and supply or valve restriction |
| Toilet keeps running | Flapper seal, chain tension, tank level, refill tube, and fill valve |
| Several fixtures are affected | Shared branch drain, main drain, sewer, vent, or septic system |
No response from the handle
A loose handle or one that moves without initiating a flush points first to the mechanism inside the tank. The lift arm may be broken or disconnected, the chain may have come loose, or excessive slack may prevent the flapper from lifting.
Do not assume the drain is clogged when the tank is not releasing water. Restore the mechanical connection first, then evaluate the resulting flush.
Weak surge with normal drainage
If tank water enters the bowl weakly but the bowl does not rise or drain abnormally slowly, inspect the water-delivery side before plunging. Too little tank water, inadequate bowl refill, an early-closing flapper, or restricted rim and jet passages can reduce the volume and direction of the flush.
This pattern does not rule out a partial obstruction, but tank operation and bowl passages are the lower-risk starting points.
Bowl rises and drains slowly
A rising bowl followed by slow drainage suggests a restriction in the toilet trapway or nearby drain. It does not reveal whether the obstruction is inside the toilet, immediately beyond its outlet, or farther along the branch line.
Stop flushing if the level approaches the rim. Once the water recedes enough to work safely, begin with a toilet plunger rather than changing tank parts at random.
The second flush works
Success on the second attempt is a useful clue. The first flush may begin with too little water in the tank or bowl. The flapper may close before enough tank water is released, or a partial restriction may allow a later surge to finish moving the contents.
Let the toilet refill completely before comparing flushes.
Slow refill or continued running
A slow refill can leave the next flush underpowered. Check whether the supply valve is fully open and whether the fill valve stops at the intended level.
Continued running may mean the flapper is not sealing, the chain is holding it open, or the fill valve is not shutting off. Water lost between uses can leave too little in the tank for the next flush.
Several fixtures show symptoms
Check other toilets, bathroom sinks, tubs, showers, and nearby laundry or utility drains. Ask:
- Are other toilets flushing poorly?
- Is a tub or shower draining slowly?
- Does a tub or shower bubble when the toilet flushes?
- Are several fixtures gurgling?
- Is water backing up elsewhere?
- Is there a sewer odor?
Normal operation elsewhere makes a toilet-specific mechanism, passage, or local trapway problem more likely. Simultaneous symptoms broaden the concern because fixtures can share branch and main drain lines. Bubbling and gurgling are warning clues, however—not proof of a specific vent, sewer, or drain blockage.
Inspect the handle, chain, and flapper while the toilet flushes
Carefully remove the tank lid and place it where it cannot fall. If the bowl is at its normal level and there is no immediate overflow risk, perform one flush while watching the mechanism. Keep your fingers away from moving components during this first observation.
Look for this sequence:
- The handle and lift arm move without binding.
- The chain pulls upward rather than slipping or falling loose.
- The flapper rises fully from the flush-valve opening.
- It remains open long enough for an adequate amount of water to leave.
- It returns to the correct position and reseals.
Adjust chain slack conservatively
Excessive slack can use most of the handle’s movement before the flapper starts to rise, resulting in only a partial lift. A chain that is too short can hold the flapper slightly open and cause continuous or intermittent running.
Retain slight slack when the flapper is closed while ensuring that normal handle movement lifts it fully. Follow model-specific instructions rather than relying on a universal measurement. Also check that the chain cannot slip under the flapper or catch on another component.
Do not force a stiff handle. Toilet handle hardware can differ from ordinary household nuts and bolts.
Examine the flapper
Turn off the supply before handling components when necessary. Check whether the flapper:
- Is warped, cracked, stiff, or deteriorated
- Sits squarely over the flush-valve opening
- Is attached at the correct mounting points
- Closes before enough water leaves the tank
- Fails to seal after flushing
- Allows intermittent running or refilling between uses
A visible defect may justify replacement, but the new part must match the toilet design and flush-valve size. Parts advertised as universal do not necessarily fit every toilet, particularly some one-piece or less common models.
Try the hold-the-flapper-open test
Use this test only if the bowl is draining normally and is not close to overflowing. Initiate a flush and manually keep the flapper open while the tank releases its flush water. Continue watching the bowl and be prepared to close the flapper or supply valve if the water rises unexpectedly.
A substantially stronger flush means the normal cycle is releasing too little water. It does not prove that the flapper alone is defective. Possible explanations include:
- The flapper closes too early.
- The chain does not lift it completely.
- The installed flapper is incompatible with the toilet.
- An adjustable flapper is set incorrectly.
- The tank starts with too little water.
Flapper timing, tank level, and restricted bowl passages should be evaluated separately rather than treated as one interchangeable fault (see Fluidmaster’s weak-flush guidance).
If holding the flapper open makes little difference and the tank starts at the correct level, inspect the bowl refill, rim and jet passages, and possible drainage restrictions before buying another tank part.
Know when generic flapper advice does not apply
Find the toilet’s model number and use its parts diagram and adjustment instructions. Do not force or disassemble an unfamiliar mechanism based on directions intended for a standard gravity toilet. If the correct procedure or component cannot be identified, stop and consult the manufacturer or a plumber.
Check both tank refill and bowl refill
Tank water and bowl water serve different purposes. The tank stores the water released during the next flush. The bowl must also return to its intended standing-water level after the previous cycle. Too little water in either location can contribute to an incomplete flush.
Confirm the tank’s starting level
Let the toilet finish refilling, then compare the water with the manufacturer’s fill mark inside the tank. That mark takes priority over a generic measurement.
If there is no visible mark and no model-specific instruction is available, roughly one-half to one inch below the top of the overflow tube is a general reference, not a universal requirement (see compatible tank-level guidance). Do not raise the water above the intended level or high enough that it continuously enters the overflow tube.
If the tank stops filling too low:
- Confirm that the float moves freely and does not contact the tank wall or another part.
- Follow the toilet or fill-valve manufacturer’s adjustment procedure.
- Consider sediment or restriction if filling is unusually slow.
- Consider a faulty fill valve if the specified level cannot be restored by proper adjustment.
Do not bend, cut, or modify components unless the manufacturer expressly directs you to do so.
Check the water supply
If the tank refills slowly, confirm that the toilet supply valve is fully open. Turn it gently and stop if it is seized or starts leaking.
A fully open valve with persistently slow filling may indicate a restriction in the supply connection or fill valve. Servicing the fill valve commonly requires shutting off the supply, flushing to drain most of the tank, and removing the remaining water before disassembly.
If the shutoff valve cannot be operated reliably, do not disconnect the fill valve or supply line.
Inspect the refill tube and bowl level
The small refill tube generally directs water into the overflow tube during refilling. That water travels to the bowl and restores its standing level. If the tube is loose, pinched, misdirected, or incorrectly installed, the tank may appear full while the bowl remains underfilled.
Secure it exactly as the toilet or fill-valve manufacturer specifies. After filling stops, confirm that the bowl has returned to its normal standing-water level.
Inadequate bowl refill deserves particular attention when the first flush fails but a later flush succeeds. The later attempt may begin with more water available in the tank or bowl.
Retest only after a complete refill
After an adjustment:
- Restore the supply.
- Let the tank stop filling.
- Confirm that the tank reaches the intended level.
- Confirm that the bowl returns to its normal standing level.
- Check for running or seepage.
- Perform one test flush.
Use the same starting condition for each comparison. Rapid back-to-back tests can produce misleading results.
Clear a suspected local clog with the least invasive tool first
Choose the clog-clearing path when the bowl rises, drains slowly, or fails to empty. A weak surge followed by normal drainage is not, by itself, a reason to snake the toilet.
Start with a flange-style toilet plunger
A toilet plunger has a flange that extends into the bowl outlet to help form a seal. A flat-bottom cup plunger is intended primarily for flat drains such as sinks and may not seal a toilet outlet effectively. A flange plunger is the usual first tool, with a toilet auger reserved for a restriction that careful plunging does not clear (compare the tools and their uses).
To use the plunger:
- Wait until the water is safely below the rim.
- Keep enough water in the bowl to cover the plunger lip.
- Position the flange in the toilet outlet.
- Press gently at first to expel trapped air and limit splashing.
- Establish a consistent seal.
- Use controlled push-and-pull strokes without striking the porcelain.
- Stop and let the bowl settle before checking whether drainage improved.
If careful plunging produces no improvement, do not repeat the same effort indefinitely.
Do not pour boiling water into a toilet because abrupt temperature change can damage porcelain. Do not rely on household mixtures as confirmed clog removers; a solid foreign object or compacted obstruction will not necessarily dissolve.
Move to a toilet-specific auger when appropriate
A toilet or closet auger has a protective sleeve intended to reduce contact between its cable and the porcelain. Do not substitute an ordinary sink or tub snake, which may scratch the bowl or be poorly suited to the toilet trapway.
Follow the auger manufacturer’s instructions:
- Position the protective section correctly in the bowl outlet.
- Feed and rotate the cable gently.
- Keep control of the cable so it does not whip or kink.
- Retract it slowly.
- Stop if it binds, kinks, or repeatedly meets hard resistance.
Do not force the cable. Improper auger use can scratch the fixture, damage the tool, or move an obstruction without clearing it.
Call a plumber if:
- A toy, wipe, hygiene product, or other foreign object may have been flushed.
- The clog keeps returning.
- Careful plunging and proper auger use do not restore normal drainage.
- The auger repeatedly meets hard resistance.
- Clearing the obstruction would require removing the toilet.
- Another fixture is slow or backing up.
- The toilet cannot be worked on without overflow or sewage exposure.
Investigate hard-water scale and restricted bowl passages
A gravity toilet depends on water entering the bowl in the intended volume and direction. Openings beneath the rim distribute water around the bowl, while a bowl jet supports flushing action on many designs.
Calcium, lime, rust, sediment, and debris can restrict these passages, producing an uneven or weak surge even when the tank contains enough water and the bowl drains normally. Hard water and visible scale are supporting clues, not proof that deposits are the cause.
Inspect before cleaning
First confirm that:
- The tank reaches the correct fill mark.
- The flapper lifts fully and remains open long enough.
- The refill tube is positioned correctly.
- The bowl returns to its normal standing level.
- The bowl does not rise and drain slowly.
Then observe one flush. Look for areas beneath the rim with little or no flow, an uneven circular wash, visibly encrusted openings, or deposits around the bowl jet. Use a flashlight and mirror if needed, but do not place your face directly over the bowl during a test.
Use a compatible cleaning procedure
Identify the toilet manufacturer and follow its care instructions. Use only a cleaner and application method compatible with the fixture’s surfaces and internal components.
Depending on the approved procedure, cleaning may require you to:
- Shut off the supply.
- Drain most of the tank.
- Apply the permitted cleaner only where directed.
- Follow the product label for ventilation and protective equipment.
- Keep cleaner out of the tank unless the instructions permit tank contact.
- Use a non-damaging tool approved for the fixture.
- Rinse as directed before restoring the supply.
Do not substitute wire, metal picks, or abrasive tools unless the manufacturer’s procedure permits them. Highly corrosive acid, including muriatic acid, is not a routine homeowner treatment for restricted toilet passages.
Mineral cleaning is different from pouring chemical drain cleaner into a clogged toilet. Passage cleaning targets identified deposits in water-delivery openings. Drain cleaner may remain concentrated in the bowl or trapway, fail to reach a foreign object, affect seals or surfaces, and expose anyone who later plunges, augers, or removes the toilet.
Fluidmaster specifically warns that certain in-tank bleach or chlorine tablets can damage its tank components and affect warranty coverage. Check the instructions for both the toilet and installed components before placing any cleaner in the tank.
Check for a shared drain, vent, sewer, or septic problem
A problem affecting only one toilet is more likely to be local, but that distinction is not absolute. Fixtures connect through branch and main drain lines, so a downstream restriction can affect several locations.
Check:
- Other toilets
- Bathroom sinks
- Tubs and showers
- Lower-level fixtures
- Nearby laundry or utility drains
Pay attention to whether symptoms occur together.
Warning clues beyond the toilet
Concern for a shared drainage problem increases when you observe:
- Several toilets or drains operating poorly
- Water backing up into another fixture
- A shower or tub bubbling during a toilet flush
- Widespread gurgling
- Sewer odors
- Wastewater appearing at a low fixture
These clues broaden the possible problem but do not identify an exact cause remotely. Branch restrictions, main-drain obstructions, vent faults, sewer problems, and septic malfunctions can produce overlapping symptoms.
Plumbing vents help balance air pressure as wastewater moves through the drainage system. Because roof access introduces fall and tool hazards, vent investigation should generally be left to a qualified professional.
While a shared-line problem remains unresolved, minimize flushing, bathing, laundry, dishwasher use, and other water discharge to reduce backup risk. Guidance for homes with multiple affected fixtures likewise recommends limiting drain use until the cause is assessed (see Angi’s discussion of whole-house symptoms).
If the property uses a septic system
Do not assume a weak toilet means the fixture needs replacement. Broader warning signs include:
- Multiple slow fixtures
- Sewage backing up indoors
- Odors near the septic system
- Wet, unusually lush, or sewage-affected ground over the drain field
These conditions call for plumbing and septic-system evaluation. An upstream plumbing blockage can resemble septic trouble, while a septic malfunction can affect indoor fixtures. A documented diagnosis should come before major septic work (review the diagnostic considerations).
Verify the fix—and know when repair should stop
After any adjustment, cleaning, or clog-clearing attempt, restore the supply and allow the toilet to refill completely. Perform several spaced test flushes under normal conditions.
Between tests, verify that:
- The tank reaches the intended fill level.
- The fill valve shuts off.
- The bowl returns to its normal standing-water level.
- The flapper reseals.
- The toilet does not continue running.
- The bowl does not rise or drain slowly.
- Other fixtures remain unaffected.
Check around the tank, tank bolts, supply valve, supply connection, and toilet base for new moisture.
Stop DIY work and call a licensed plumber for recurring clogs, several affected fixtures, sewage backup or persistent sewer odors, a suspected foreign object, a base leak, damaged flooring, inaccessible vent work, an inoperable shutoff valve, or a repair requiring toilet removal. Professional help is also appropriate when replacement-part compatibility is uncertain or the basic tank, refill, passage, and clog checks fail.
Replacement should be a final option. First evaluate serviceable causes involving the handle, chain, flapper, tank level, bowl refill, fill valve, refill tube, rim holes, bowl jet, trapway, and downstream drain. Replacing the toilet will not correct a fault in a branch drain, main drain, vent, sewer, or septic system.
Repair-versus-replacement decisions are necessarily qualitative. Consider the fixture’s condition, compatible-part availability, design complexity, possible concealed damage or internal objects, and the labor needed for further diagnosis. Local costs and access conditions vary.
The practical sequence is simple: control an overflow, determine whether the bowl drains slowly or merely flushes weakly, inspect tank release and refill, use the correct tool for a suspected local restriction, and check the rest of the home before condemning the toilet. After any repair, allow a full refill and check operation and leaks. Recurring, widespread, sewage-related, or unresolved symptoms require professional evaluation before more parts—or the entire toilet—are replaced.
Frequently asked questions
Why does my toilet flush properly only on the second try?
The first flush may begin with too little water in the tank or bowl, the flapper may close too early, or a partial restriction may be present.
Let the toilet refill completely, check the marked tank level and bowl level, observe the flapper, and inspect the refill tube. Do not judge the problem using immediate back-to-back flushes.
What does it mean if the toilet flushes normally when I hold the flapper open?
It means the normal cycle is releasing too little tank water. It does not identify the defective component by itself.
Check the tank’s starting level, chain movement, flapper timing, adjustment, and part compatibility.
How can I tell a tank problem from a partial toilet clog?
A weak surge followed by normal drainage points first toward tank level, bowl refill, flapper operation, or restricted rim and jet passages.
A bowl that rises, stays high, or drains slowly points more strongly toward a trapway or nearby drain restriction. Other affected fixtures raise concern for a shared drainage problem.
Should I use a plunger or a toilet auger first?
Start with a flange-style toilet plunger when the bowl rises or drains slowly. If careful plunging does not improve drainage, use a toilet-specific auger with a protective sleeve.
Stop if the auger binds, kinks, or meets hard resistance. Recurring clogs and known foreign objects justify professional help.
Can I use chemical drain cleaner in a toilet that will not flush?
It is safer not to. The chemical may remain concentrated in the bowl or trapway, fail to reach the obstruction, affect components or surfaces, and create an exposure hazard during later mechanical clearing.
Do not mix drain chemicals with other cleaners. If a product has already been added, stop and tell the plumber exactly what was used before anyone plunges, augers, or removes the toilet.