
How to Fix a Loose Toilet Handle in Minutes Without Calling a Plumber
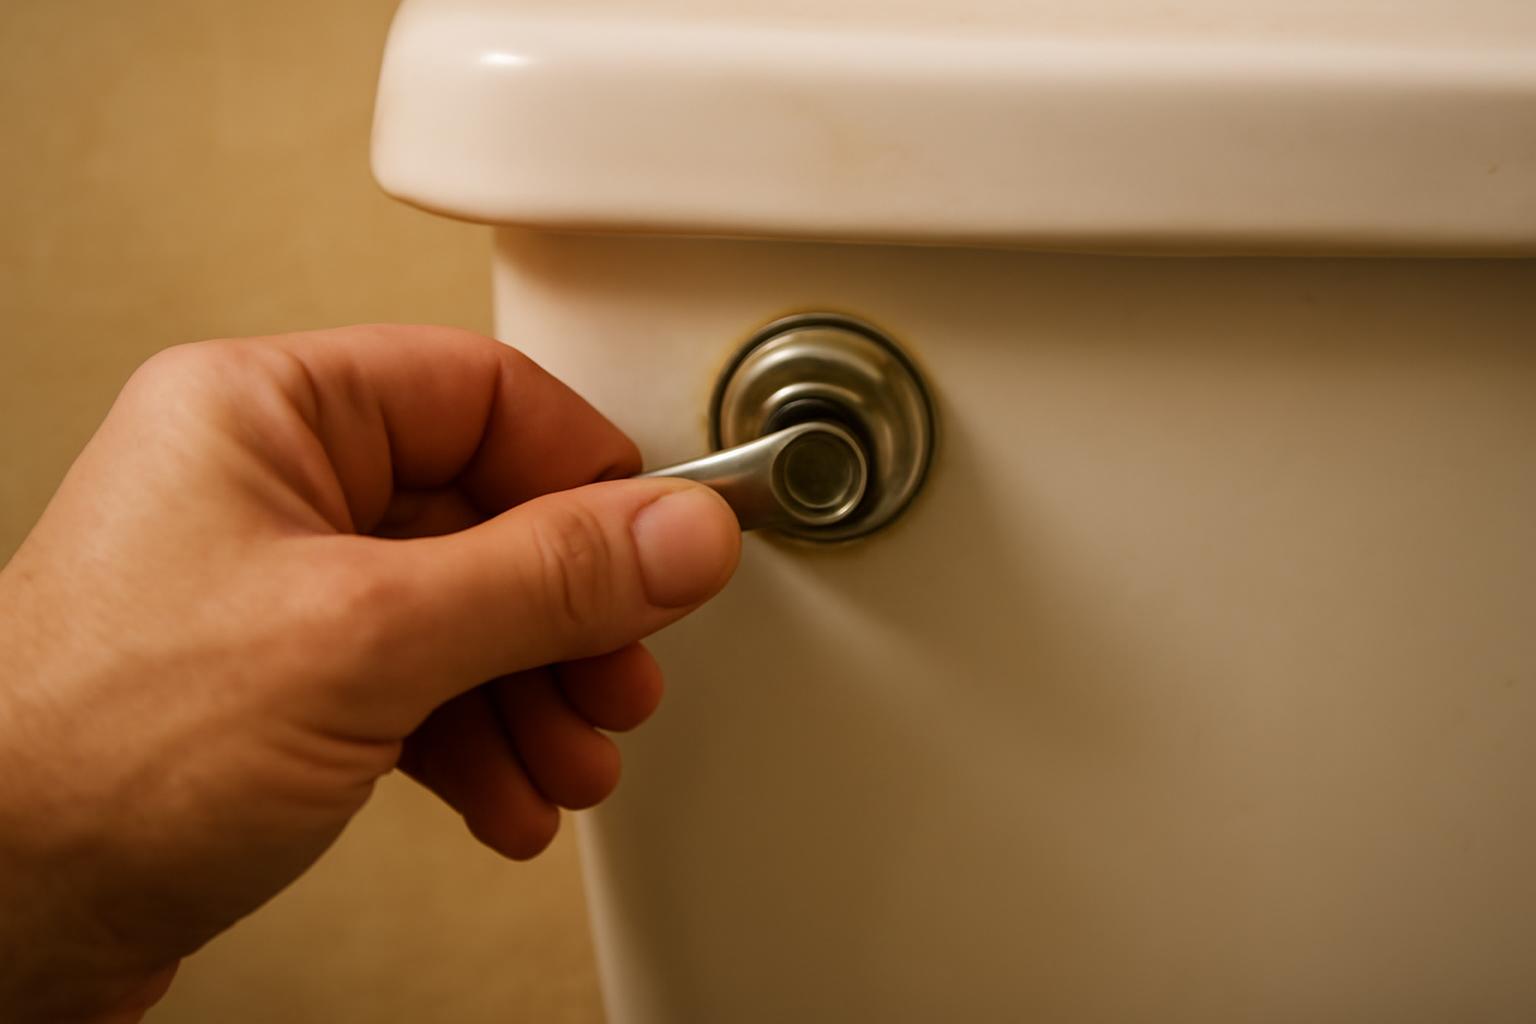
A loose or disconnected chain can make the handle feel loose even when the mounting nut is fine, because pressing it does not immediately lift the flapper.
A loose toilet handle usually looks worse than it is.
That matters because the first repair step is almost never “replace everything.” In most cases, you can solve the problem with basic hand tools, a careful inspection, and a few minutes of work. You do not need to remove the toilet. You usually do not need specialized plumbing tools. And you should not start forcing parts or buying replacements before you know whether the handle is actually loose, the chain is disconnected, or the handle assembly itself is worn out.
The basic path is simple:
- shut off the water
- remove the lid carefully
- flush the tank empty
- inspect the nut, lever arm, and chain
- tighten or adjust only what is actually causing the symptom
- replace the handle only if tightening no longer holds
If you approach it in that order, the job stays small. If you skip straight to wrenching on parts, it gets bigger than it needs to be.
Common Causes of a Loose Toilet Handle
If your toilet handle feels wobbly, the most common cause is the mounting nut on the inside of the tank. That nut holds the handle shaft tight against the porcelain. With normal daily use, it can slowly back off, which lets the handle shift side to side. Other common causes include wear on plastic parts, corrosion on metal parts, a chain that has come loose or worn out, and less commonly, improper installation or stripped threads (J Sewer & Drain Plumbing).
The easiest way to think about the problem is by matching the symptom to the likely part:
- Handle wiggles but still flushes: usually the mounting nut
-
Handle wiggles and nothing flushes: often the chain is off, stretched, or broken
-
Handle feels rough, stiff, or inconsistent: look for mineral buildup, corrosion, or a damaged lever arm
- Handle loosens again soon after tightening: suspect worn threads, a cracked handle body, or a lever assembly that is reaching end of life
That symptom-first approach matters because “loose” can mean slightly different things. Sometimes the handle is physically wobbly at the tank wall. Sometimes it only feels loose because pressing it does not lift the flapper soon enough. Sometimes it is neither of those and the real issue is a handle that was tightened too aggressively, so it binds instead of swinging freely.
Wear is the background cause behind most of those scenarios. Toilet handles get used constantly. Plastic levers flex. Threads wear. Moisture inside the tank can leave corrosion or mineral crust that keeps the nut from seating cleanly. Once that starts, the handle may feel loose one day, stiff the next, and finally fail to flush well at all.
A second important point: a loose handle does not always mean a broken toilet. It often means the mechanism is slightly out of adjustment. That is good news for a homeowner, because adjustment is much easier than replacement. The challenge is simply figuring out which part needs attention before you touch anything.
Tools and Materials You’ll Need
For most loose toilet handle repairs, the tool list is short: an adjustable wrench or pliers for the mounting nut, and optional rubber gloves if you prefer cleaner hands while working in the tank. If the handle itself is worn, a replacement handle kit is the standard next step, and some toilets may also use screws or related trim that make a screwdriver helpful rather than essential (Flood Brothers Plumbing).
That means this is usually a drawer-tool repair, not a project that sends you shopping for specialty gear. In many homes, you can diagnose the problem with no tools at all and then decide whether you even need pliers.
A practical setup looks like this:
- Adjustable wrench or pliers: for a stubborn nut
- Your hand first: especially if the nut is plastic and only slightly loose
- Replacement handle kit: if the lever arm is cracked, the threads are stripped, or the handle keeps loosening
- Small brush and white vinegar: helpful if the nut area has visible lime or rust buildup
- Rubber gloves: optional, but many people prefer them for tank work
It also helps to understand what you are not looking for. You do not need a power drill. You do not need pipe sealants for a normal repair. And if someone suggests tape on stripped threads, treat that as a temporary get-it-working measure rather than a real fix. If the handle hardware no longer threads together securely, replacement is usually the cleaner answer.
If you expect to replace the handle, check three fit questions before you buy:
- Does the handle mount on the front or the side of the tank?
- Is the lever shaped for a left- or right-oriented setup?
- Does your toilet brand or tank shape need a more specific replacement than a generic “universal” label suggests?
That small compatibility check prevents a lot of frustration. A universal handle may fit many tanks, but “many” is not the same as “all.”
Safety Prep: Shut Off Water and Drain Tank
Start by shutting off the water supply valve behind the toilet near the base, usually by turning it clockwise until it stops. Then remove the tank lid with two hands, set it on a flat stable surface, and flush the toilet to empty most of the tank.
Even when the repair itself is small, the setup is worth doing. A drained tank is easier to read at a glance. You can see whether the chain is hanging correctly, whether the lever arm is moving in a smooth arc, and whether the flapper is lifting and resealing the way it should.
If you know toilets well, you might be tempted to skip prep and reach straight for the nut. For a publication-grade default, that is not the better habit. Turning off the water adds almost no time, and it gives you a calmer, cleaner work area.
A few safety basics are easy to overlook:
- Lift the lid with both hands. Tank lids are heavier and more fragile than they look.
-
Set the lid somewhere flat. Not on the seat edge, not against a wall, not where it can slide.
-
Keep your force light. Toilet handle repairs fail more often from over-tightening than from under-tightening.
If you are adjusting the chain or replacing the handle, a mostly empty tank is especially useful. You can see the full lever travel, the chain slack, and the flapper action without water obscuring the connection points.
Diagnose: Inspect Nut, Lever Arm, and Chain
Once the lid is off and the tank is drained, pause before you touch anything. Move the handle slowly and watch the mechanism.
Start at the tank wall where the handle passes through. Is the shaft wobbling inside the hole? Does the nut look loose, crooked, or partly backed off? Do you see white crust, rust, or obvious grime that might keep the nut from sitting flat?
Then follow the lever arm inward. Check for:
- cracks
- bends
- rubbing against the tank
- a lever that sits at an odd angle
- a handle that stays partly depressed instead of returning to rest
Finally, inspect the chain from the lever arm down to the flapper. Ask four simple questions:
- Is the chain still attached?
- Is it tangled or snagged?
- Is it so loose that the handle moves before the flapper starts lifting?
- Is it so tight that the flapper cannot fully reseal?
This is the stage where a loose-handle problem often becomes clear in seconds. If the handle body moves at the tank but the lever still lifts the flapper normally, the nut is the likely fix. If the handle moves and the lever swings, but the flapper barely opens or does nothing, the chain is the more likely issue. If the handle feels sticky and does not return, the problem may be alignment or over-tightening rather than looseness at all.
A quick decision tree helps:
- Wobbly handle, normal flush: tighten the mounting nut first
- Wobbly handle, weak or no flush: inspect the chain connection next
- Handle stays down: loosen and realign before tightening again
- Handle keeps working badly after adjustment: inspect for stripped threads, cracked lever arm, or corrosion
Pay attention to feel as much as movement. A truly loose handle feels vague and sloppy. A disconnected chain often makes the handle feel like it swings through empty space. A too-tight or crooked assembly tends to feel sticky, rough, or resistant.
Before you fix anything, cycle the handle a few times and memorize the current motion. That gives you a clear before-and-after comparison once you tighten or adjust the part.
Step-by-Step: Tighten the Mounting Nut
If the handle wiggles but the toilet still generally flushes, tightening the mounting nut is the right first repair.
On many standard toilet handle assemblies in the U.S., the nut is reverse-threaded, so counterclockwise tightens it. Tighten only until the hardware feels snug, then stop. Pushing past resistance can crack the porcelain tank or leave the handle so tight that it binds instead of moving freely (Hanover Supply).
Use this process:
- Reach inside the tank and find the nut directly behind the handle.
- Try it gently by hand first, especially if it is plastic.
- If hand pressure is not enough, use pliers or an adjustable wrench with light force.
- Turn in small increments rather than one big twist.
- Stop as soon as the wobble is gone and the handle still swings smoothly.
The word snug matters here. Snug does not mean cranked down. It means:
- the handle no longer shifts around at the tank wall
- the lever arm still moves freely
- the handle returns normally after you press it
- nothing grinds, sticks, or feels forced
If you are uncertain about thread direction on your specific handle, the safest verification method is simple: start with very light finger pressure before you reach for pliers. The correct direction will usually feel like the nut is seating more firmly, not walking away from the tank. If it resists sharply right away or seems to worsen the looseness, stop and reassess instead of forcing it.
After tightening, test the handle motion a few times with the water still off. You are not looking only for less wobble. You are also checking for good return and clean lever movement. A handle that is now rigid but sticky is not fixed; it is over-tightened or misaligned.
If the handle feels too tight after your adjustment, back off slightly and test again. A small correction often solves that instantly.
What to do if the nut still will not seat properly
If tightening does not hold, do not keep adding force. That usually means one of these is happening:
- the threads are worn or stripped
- the handle body is cracked
- the lever assembly is damaged
- mineral or corrosion buildup is preventing the nut from sitting flush
Visible buildup often looks like white crust, scale, or rust staining around the mounting area. If you see that, remove what you can gently with a small brush and a little vinegar, then dry the area and test again. The goal is not aggressive scraping. The goal is simply to clear enough residue that the nut can sit flat.
If the nut still will not tighten cleanly after that, you are probably at replacement rather than adjustment.
Adjust or Reconnect the Flapper Chain
If the handle moves but the toilet does not flush properly, the chain is the next thing to inspect and correct.
A loose or disconnected chain can make the handle feel loose even when the mounting nut is fine, because pressing the handle does not immediately lift the flapper. Reconnecting the chain to the lever arm, or adjusting it so it has slight slack at rest, is a standard fix path. Guidance for basic DIY toilet problems also notes that a loose or broken chain is a common reason a wiggly handle will not flush (Experts in Your Home).
The target is slight slack when the handle is at rest.
That phrase matters because both extremes cause problems:
- Too much slack: you push the handle farther than normal before the flapper starts lifting
- Too little slack: the flapper may not sit flat and can fail to reseal properly after a flush
A good chain setup usually looks like this:
- the flapper sits fully closed when the handle is at rest
- the chain is not drooping into a tangle
- the chain is not pulled guitar-string tight
- the lever starts lifting the flapper soon after you press the handle
Use this adjustment method:
- Make sure the flapper is fully seated.
- Rehook the chain to the lever arm if it has come off.
- Check how much droop the chain has while everything is at rest.
- Move the hook to another hole or notch on the lever if you need to shorten or lengthen the effective chain.
- Test the handle several times and watch the flapper open and close.
Chains are simple parts. Once they fail, replacement is usually easier than fussing with them.
Also watch the path of the chain. A chain that is technically the right length can still snag if it twists around the lever arm, hooks onto nearby parts, or pulls from a poor angle. That is why testing with the lid off is so useful. You can see the full movement instead of guessing.
One good flush test tells you a lot:
- Does the flapper lift high enough for a full flush?
- Does it fall back cleanly?
- Does the handle return on its own?
- Does the chain settle without tangling?
If yes, the chain adjustment is probably done.
When and How to Replace the Toilet Handle
Tightening is the first fix. Replacement is the right fix when tightening no longer solves the problem.
Replace the handle assembly if the nut will not stay tight, the threads are stripped, the handle or lever arm is cracked, corrosion is significant, or the handle still feels floppy or sticky even after a careful adjustment. Those are standard signs that the part itself is worn rather than merely loose (Jim Needham).
The replacement job is still straightforward:
- Shut off the water and drain the tank.
- Remove the lid and set it safely aside.
- Unhook the chain from the old lever arm.
- Remove the old handle assembly.
- Insert the new handle in the same general orientation.
- Install and gently snug the new mounting nut.
- Reconnect the chain with slight slack.
- Turn the water back on and test several flushes.
The one part that deserves extra patience is removal and fit.
First, verify orientation before you buy
Do not assume a universal handle automatically fits your toilet well. Before buying a replacement, check:
- whether the handle mounts on the front or side
- whether the lever arm shape matches your current one closely enough
- whether your tank layout leaves room for the new arm to swing freely
- whether your toilet brand or model calls for a more specific replacement
If not, take clear photos of:
- the outside handle position
- the inside lever arm
- the chain attachment point
- any brand or model information you can find in the tank or under the lid
That small step prevents the classic “universal but not really” problem.
Second, be careful about thread direction during removal
Many standard toilet handle nuts are reverse-threaded, but published DIY guidance is not perfectly consistent across every source and model. So for replacement work, the best practical rule is not “force it in the expected direction.” It is “test direction gently, and stop if it binds.”
In other words:
- use hand pressure first
- confirm that the nut is actually loosening before adding tools
- once it starts moving the correct way, keep the force light
That approach protects both the porcelain and the replacement part.
Third, treat chain setup as a test-and-adjust step, not a fixed measurement
What matters after installation is not an exact number. What matters is function:
- the flapper seals fully at rest
- the handle engages promptly
- the flapper lifts enough for a full flush
- the handle returns normally after use
So install the new handle, reconnect the chain with slight slack, and then fine-tune from actual flush tests.
When replacement still does not solve it
If you install a new handle and the problem remains, the issue may not be the handle at all. At that point, look again at the flapper, the chain path, the lever travel, and any unusual wear around the tank opening. If the hardware mount itself seems damaged, or if the internal mechanism does not match a standard handle-and-chain layout, stop there rather than improvising.
Prevention and When to Call a Plumber
Once the handle is fixed, prevention is simple: inspect the tank parts occasionally before a small wobble turns into a no-flush problem.
A quick maintenance glance every so often should include:
- whether the chain still has slight slack
- whether the flapper is sealing normally
- whether the handle nut has started backing off
- whether rust, scale, or white mineral buildup is appearing around the mount
- whether the lever arm is rubbing or sitting at a strange angle
Use also matters. Flush with normal downward pressure. Avoid pushing the handle sideways. Avoid holding it down longer than necessary unless your toilet specifically needs that for a full flush. Extra force does not make the mechanism better; it just adds wear to the handle shaft, nut, and lever.
It also helps to keep the toilet doing only toilet work. Proper flushing habits matter: waste and toilet paper only.
Call a plumber when the repair stops being a simple handle adjustment and starts looking like fixture damage or a broader internal problem. Good stop points include:
- the mounting area will not tighten securely
- the threads or handle body are clearly damaged
- the tank hardware is badly corroded
- the toilet still will not flush correctly after you correct the nut and chain
- the mechanism inside the tank is unfamiliar or does not respond like a standard handle-and-chain setup
That is the right DIY boundary. If the basic handle repair fails, more force usually does not help. It usually just moves the problem from “minor annoyance” to “broken part.”
DrainFinder breaks down residential drain problems by symptom, location, and cause DrainFinder.
Which way do I turn the nut to tighten a loose toilet handle?
On many standard toilet handles, the mounting nut is reverse-threaded, which means counterclockwise tightens it. Morgan Inspection Services demonstrates that opposite-thread setup in its quick toilet-handle video and recommends tightening only until the nut is snug, not forced (Morgan Inspection Services).
If you are unsure on your own toilet, do not guess with pliers first. Try light finger pressure and confirm that the nut is actually seating tighter before you add more force. If it feels wrong immediately, stop and reassess rather than risking damage.
Is shutting off the water always necessary for this fix?
For a safe default, yes: shut off the water before you work on the handle. Hanover Supply’s step-by-step guide puts that first, followed by removing the lid and flushing the tank empty for easier access (Hanover Supply).
Practically speaking, that prep gives you a clearer tank, better visibility, and less chance of a messy interruption while you are adjusting the chain or testing the handle. It is a small step that makes the rest of the repair easier.
How much slack should the flapper chain have?
It should have slight slack when the handle is at rest. Family Handyman’s toilet handle walkthrough describes reconnecting the chain with a little slack so the flapper can lift properly without being held open at rest (Family Handyman on YouTube).
A simple real-world test is better than chasing an exact measurement: press the handle, make sure the flapper lifts fully, then watch it fall back and seal cleanly. If the handle has too much empty travel, shorten the chain slightly. If the flapper will not settle flat, lengthen it slightly.
What if the nut is stripped or the handle keeps loosening?
If the nut will not stay tight, the threads may be worn, the handle body may be cracked, or the whole assembly may simply be worn out. Jim Needham’s toilet-handle guide treats repeated loosening and ongoing wobble as signs that tightening alone may no longer be enough (Jim Needham).
A temporary thread workaround may get you through the day, but it is not the long-term answer. If the hardware cannot hold a stable adjustment, replacing the handle assembly is usually the cleaner repair.
Are universal replacement handles compatible with my toilet?
Sometimes, but not automatically. Flood Brothers notes that replacement parts should match the toilet model where needed, even though universal handles are commonly sold (Flood Brothers Plumbing).
That means you should still verify mount location, lever orientation, and basic fit before buying. “Universal” is best read as “widely compatible,” not “guaranteed to fit every tank.”
A loose toilet handle is usually a quick DIY win: inspect first, tighten gently, correct the chain if needed, and replace the handle only when the part itself is worn out. If the handle works through several test flushes after refill, you are done. If not, stop there and treat it as a part-failure or plumbing-diagnosis problem rather than a tightening problem.