
Choosing a Linear Shower Drain Starts With the Floor and Plumbing
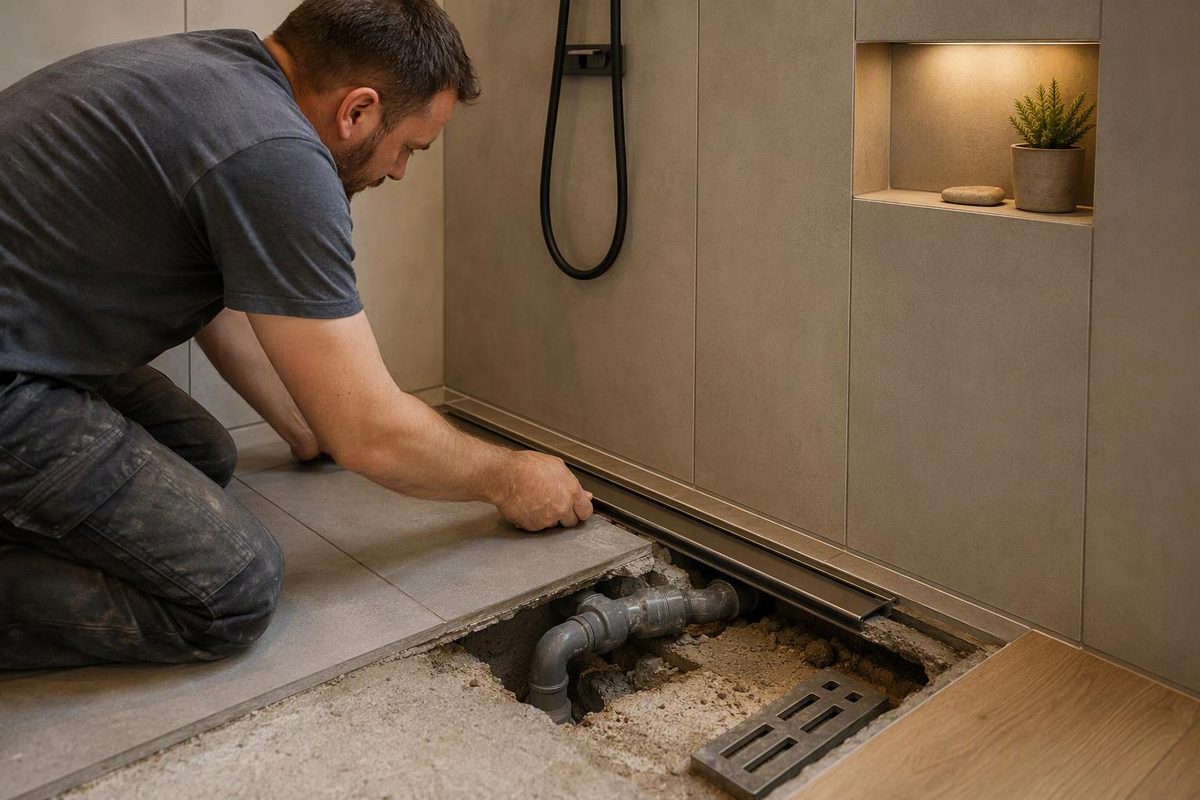
Check slope, waterproofing, outlet position and cleaning access before choosing a linear shower drain—or diagnosing one that drains slowly.
If your linear shower drain is slow, first note where the water stops: on the tile, inside the channel or backing up from the outlet. Replacing the drain is not the first diagnostic step.
A linear drain for a shower collects water along a narrow channel rather than through a small point drain. Its main advantage is floor layout: a suitable design lets the shower floor slope in one direction, making large-format tile easier to use. It does not remove the need for slope, waterproofing or routine hair removal. Schluter’s KERDI-LINE product guidance describes this single-plane arrangement.
What changes compared with a center drain?
A conventional center drain requires the surrounding floor to pitch inward from several directions. A wall-positioned linear drain can receive water from one continuous sloping plane. Water enters through a grate or around a tile-covered insert, collects in the channel and exits through its outlet.
That makes a linear drain worth considering during a shower rebuild when you want larger floor tiles or a particular drain location. It is not automatically a better-draining replacement for a working center drain. The floor layout, outlet and waterproofing still have to work together. Infinity Drain’s planning guide explains how existing waste-line location affects placement.
Check these four things before buying
1. Floor slope and finished height
Plan the floor slope before choosing the visible drain finish. For example, Schluter specifies a mortar-base slope toward KERDI-LINE of 1/4 inch per 12 inches. Across a four-foot run, that means a one-inch elevation change—not the total thickness of the shower floor. Follow the selected system’s instructions and locally applicable requirements. Schluter’s installation handbook gives that slope specification.
A linear drain does not make a flat floor drain properly. Nor does it make a shower curbless by itself. A curbless design must account for floor heights, water containment and waterproofing beyond the shower where water can reach. Recessing the floor must preserve structural safety; do not cut joists simply to make the drain fit. Schluter’s curbless-shower details address these constraints.
2. Waterproofing compatibility
Choose the drain body and waterproofing method together. A bonding-flange drain integrates with a compatible surface-applied membrane; other channel systems use a traditional clamping drain and pan liner. Similar-looking drains are not necessarily interchangeable.
Ask for the exact drain model, membrane and connection detail—not just “a stainless linear drain.” Tile and grout are not the waterproofing system. Infinity Drain’s waterproofing guidance explains model-to-membrane compatibility and the waterproof layer beneath the tile assembly.
Before tile covers the work, arrange the specified water test after the required curing period. Schluter strongly recommends testing its waterproofed assembly before tiling and specifies at least 24 hours after membrane installation before testing; other systems may differ. Follow the manufacturer and local inspection requirements. Installation handbook
3. Length, outlet position and water flow
Measure against the finished wall surfaces, allowing for the drain’s flange and required clearances. Wall-to-wall installations need accurate dimensions; only cut a drain on site if its model permits it. Infinity Drain’s planning guide distinguishes site-sizeable drains from fixed-length models.
Also confirm the outlet’s position, connection type and available space beneath the floor. An offset outlet may avoid a joist, but moving the trap or waste pipe needs an installation plan. KERDI-LINE’s product details illustrate how outlet location and flange dimensions affect fit.
Do not choose capacity by channel length alone. Have the installer compare the selected drain’s rated performance with all shower outlets that can run simultaneously. Ratings have test conditions: Infinity Drain, for example, bases its published flow guidance on a 1/2-inch head of water. That is not a guarantee of identical performance in every shower. Linear-drain planning and flow guidance
4. Cleaning access
Before buying, check how the grate or tile insert lifts out, whether it needs a key and whether a compatible hair basket is available. Infinity Drain’s parts guidance lists model-specific hair catchers and lift-out keys. Both the channel and outlet must remain accessible for maintenance. For catcher fit, see how to choose a shower hair catcher.
If an existing linear drain is slow
Use this order:
- Check the fixture pattern. If other fixtures are also slow, pause shower testing and use the main-line versus branch-drain guide. If flushing a toilet makes water rise in the shower, stop using water and call a plumber. Municipal guidance likewise advises stopping water use during a backup to avoid worsening it.
- Clean accessible parts. If chemical drain cleaner has been added and the blockage remains, do not reach into the drain; tell the plumber what was used. Poison Control warns that caustic drain cleaners can burn skin. Otherwise, remove the cover as instructed, wear gloves and lift out reachable hair and debris. Clean the basket and channel without loosening the drain body or disturbing waterproofing.
- Reassemble and briefly test. Watch where water accumulates; stop before overflow.
A channel that fills despite accessible parts being clean warrants a plumber’s check of the outlet, downstream drainage and installation—not an automatic assumption that the channel needs replacement. A puddle that remains on one patch of tile while the channel empties warrants checking floor pitch or a local low spot rather than assuming a pipe clog.
Use the finish manufacturer’s approved cleaner. For KERDI-LINE, Schluter excludes abrasive or alkaline cleaners and cleaners containing hydrochloric acid, hydrofluoric acid or chlorides. Its grate is removable for cleaning. Care instructions
Stop using the shower if water leaks below it. Give the plumber or shower installer the drain model, pooling location, affected fixtures and any cleaner already used. Cleaning a channel cannot repair a leaking drain connection or failed waterproofing.