
How to Unclog a Garbage Disposal Safely
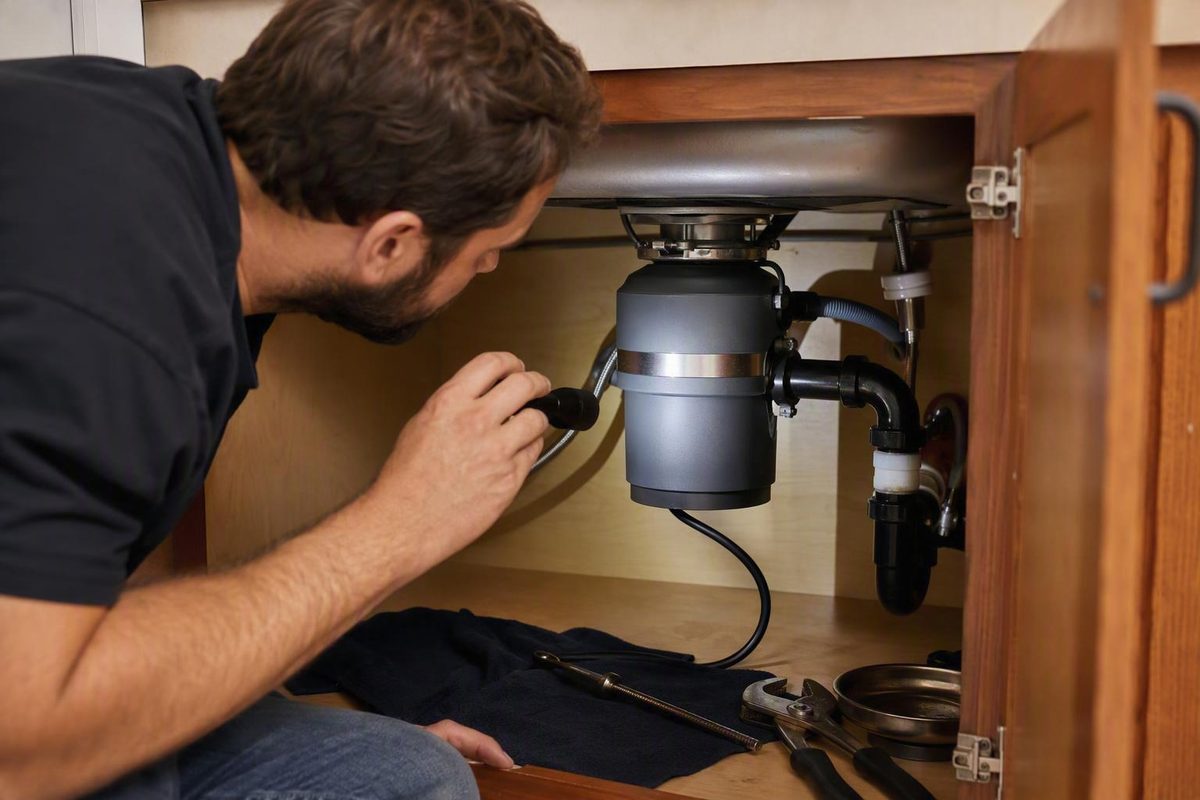
If the P-trap is clear but the sink remains clogged, the next DIY step is a hand-operated auger in the exposed drain line leading into the wall.
Overview
To unclog a garbage disposal, disconnect its power, keep your hands out of the chamber, and identify whether the obstruction is jamming the mechanism or blocking the downstream drain. Remove visible debris with long-handled tools, free a jam manually if necessary, and move to the P-trap or wall drain if the disposal spins but water remains backed up.
A successful repair has two parts: the disposal moves and operates normally, and water drains without leaking beneath the sink. A working motor does not prove that the drain is clear. When the disposal spins freely but the sink drains slowly or not at all, the blockage is more likely in the drain piping, according to Bob Vila’s troubleshooting guidance and a documented spinning-but-not-draining demonstration.
Begin with the least invasive physical check. Inspect the chamber, remove any visible object, and verify manual movement. Only then should you test the unit or work farther downstream.
Prepare the work area and disconnect power
Turn off and disconnect power before inspecting the disposal, inserting a tool, pressing the reset button, or opening drain piping. Switch off the wall control, then unplug the unit or switch off its circuit breaker if it is hardwired. Both Roto-Rooter and Bob Vila place electrical isolation before any attempt to clear the appliance.
Even after disconnecting power, do not put your hand into the disposal. A flashlight and long-handled pliers or tongs let you inspect and retrieve debris without reaching into the chamber.
Prepare the few tools needed for the branch of troubleshooting you may follow:
- A flashlight and long-handled pliers or tongs for chamber inspection
- A 1/4-inch hex wrench for a unit with a bottom hex socket
- A bucket and towels before loosening the P-trap
- A hand-operated drain auger if the trap is clear but the wall drain remains blocked
Keep the bucket directly beneath the trap before opening either connection. Water retained in the sink or piping can spill when the trap is loosened, as shown in the P-trap clearing demonstration. The work area is ready when power is disconnected, the chamber can be viewed without reaching inside, and spill-control materials are positioned beneath the piping.
Identify where the blockage is
Use the disposal’s behavior and the pattern of the backup to choose your first action. These symptoms are clues, not perfect diagnoses. Confirm the likely location through inspection and manual movement before operating or dismantling anything.
| Symptom | What it may indicate | Best first action | What to verify |
|---|---|---|---|
| The motor hums, but the mechanism does not turn | An obstruction may be jamming the chamber | Disconnect power, inspect for visible debris, and work the mechanism manually | The mechanism moves freely back and forth before power is restored |
| The disposal spins, but water does not drain | The blockage is more likely in the P-trap or drain line | Confirm free manual movement, then inspect the downstream drain | The trap or wall drain is cleared and normal flow returns |
| Water drains slowly after the disposal runs | Food or grease may be obstructing piping farther downstream | Check the trap and drain path rather than repeatedly running the disposal | Flow improves without abnormal operation or leaks |
| Standing water or water backing up in both bowls | The trap or shared branch drain may be blocked | Keep power off, assess the sink configuration, then inspect the trap or use an appropriate physical drain-clearing method | Both bowls drain normally |
| The disposal makes no sound | Power, the breaker, or overload protection may need checking | With the chamber inspected and all tools removed, check the power supply and reset control | The unit responds normally without immediately tripping again |
| The unit leaks or makes unusual metallic sounds | A connection, housing, or internal component may be damaged | Stop operating the unit and inspect only within your ability | Do not resume use unless the cause is identified and safe operation is restored |
The humming, two-bowl backup, no-response, and leak patterns are described in this symptom-based disposal guide. The distinction between free spinning and a downstream blockage is also supported by Bob Vila and the spinning-disposal demonstration.
Do not keep switching on a humming disposal to test it. If the chamber can be freed manually, follow the chamber procedure. If it already moves freely but the sink remains backed up, skip repeated chamber work and move to the downstream-drain procedure.
Clear an obstruction in the disposal chamber
Use this sequence when inspection reveals an object or the disposal hums and will not move. Power must remain disconnected until the chamber is clear, all tools have been removed, and the mechanism turns manually.
- Illuminate the chamber and remove only debris that you can retrieve with long-handled pliers or tongs. Verify that no visible object remains.
- Use the disposal’s supported manual turning point to work the mechanism back and forth. Verify free movement rather than forcing a hard stop.
- Remove every tool, use the reset control if applicable, restore power, and perform a controlled water-and-operation test. Verify both normal operation and normal drainage.
If the mechanism turns but water still collects in the sink, the chamber-clearing sequence is complete. Continue with the downstream drain checks instead of repeatedly resetting or running the unit.
Remove visible objects without reaching inside
With power still disconnected, shine a flashlight through the sink opening and inspect the chamber from above. Look for an object that can be securely grasped without inserting your fingers. Roto-Rooter recommends using pliers for a visible obstruction, while Bob Vila specifies long-handled tongs or pliers.
Grip the object and lift it out carefully. Do not loosen nuts or bolts visible inside the grinding chamber. The Home Depot procedure notes that these fasteners hold the unit together and are not clog-clearing controls.
Reinspect the chamber with the flashlight after removing the obstruction. Success at this stage means the visible object is gone and no retrieval tool remains inside. It does not yet prove that the mechanism is free or that the downstream drain is open.
Work the mechanism free with the correct manual tool
Check the bottom center of the disposal for a hex socket. If the unit has one, insert a 1/4-inch hex wrench and turn it back and forth. The goal is to loosen the obstruction and obtain free movement in both directions, not to force the wrench through a hard mechanical stop. The bottom-socket method and wrench size are described in the Home Depot disposal guide.
If the unit has no bottom hex socket, one documented alternative is to place a wooden dowel or broom handle through the drain opening and use it against the internal mechanism to rotate it manually, as described in this community troubleshooting procedure. Keep the power disconnected and keep your hand outside the chamber.
Use only the manual access method appropriate to the unit. Do not improvise by dismantling the grinding chamber or applying a powered auger through it. The result to look for is smooth back-and-forth manual movement. If the mechanism remains locked or the manual tool will not move it, stop rather than applying increasing force.
Reset, restore power, and verify the result
Remove the wrench, pliers, tongs, flashlight, and any other object from the sink and chamber. Confirm once more that the mechanism moves freely. If the disposal has an overload reset button, press it before restoring power, following the sequence described by Roto-Rooter and Home Depot.
Restore power only after the work area is clear. Run cold water, briefly test the disposal, and watch the sink rather than judging the repair by sound alone. The chamber problem is resolved if the unit operates normally and the water drains freely.
If the disposal spins but water remains slow or stationary, stop testing the motor. That outcome points toward the sink’s drain piping, so continue with the P-trap and drain-line checks.
Clear a downstream drain blockage
Follow this path when the disposal moves freely or runs normally but the sink still drains slowly, holds standing water, or backs up. The spinning-disposal demonstration identifies this pattern as a likely piping obstruction rather than a chamber jam.
- Check whether the sink configuration makes plunging appropriate, keeping disposal power off throughout the attempt. Verify whether drainage changes.
- If the backup remains, place a bucket beneath the P-trap, remove it, and inspect it. Reassemble and check both flow and connections.
- If the trap is clear, access the drain line leading into the wall with a hand auger. Reassemble the piping and verify restored flow without leaks.
Work downstream in that order. Once normal drainage returns, stop dismantling additional piping.
Check the sink configuration before plunging
A sink plunger can be used as a physical attempt to dislodge a drain obstruction, but first keep the disposal disconnected from power and examine how the sink and dishwasher are connected. Roto-Rooter includes plunging among its nonchemical clearing methods.
For a double sink, seal the opening in the other bowl with a stopper before plunging the disposal-side opening. Sealing the second bowl allows the pressure change to act on the drain path rather than escaping through the neighboring opening. This configuration-specific step appears in the symptom-based disposal procedure.
Dishwasher-connected sinks require more caution because the supplied sources do not establish one universal precaution. Bob Vila instructs readers to clamp the rubber dishwasher drain line, while the other plunging guidance does not consistently state the same requirement. That disagreement is not enough to justify a rule for every disposal and dishwasher arrangement.
Before plunging a dishwasher-connected sink, follow the disposal and dishwasher manufacturers’ instructions for that configuration. If those instructions are unavailable or the connection cannot be identified confidently, skip plunging and inspect the removable P-trap instead, or call a plumber. After an appropriate plunging attempt, check whether water drains normally. If it does not, move downstream rather than repeating the attempt indefinitely.
Remove and inspect the P-trap
The P-trap is the curved section of drain piping below the sink. It is an accessible place to check when a freely operating disposal is paired with slow or stopped drainage, as explained in the P-trap demonstration.
Use a bucket, towels, and an appropriate hand wrench only if the connections cannot be loosened by hand. Keep disposal power disconnected throughout the work.
- Position the bucket directly under the trap. Confirm that it covers the area beneath both trap connections.
- Loosen the connections carefully and lower the trap into the bucket. Expect retained water to escape when the piping opens.
- Inspect the removed trap for food, grease, or a lodged object. Clear the material into an appropriate waste container rather than putting it back through the disposal.
- Refit the trap and secure both connections without forcing them. Restore water flow and watch each joint for leakage.
- Test drainage. If water flows normally and the connections remain dry, the obstruction was removed or displaced. If the trap was clear and the sink remains backed up, continue to the wall drain.
A documented forum case recommends removing and cleaning the trap as the first downstream check. The same case also shows why the result matters diagnostically: finding a clear trap does not rule out an obstruction farther along the drain.
Do not restore disposal power merely to test an open or partly assembled drain. Complete the connections first, check them with water, and only then test the disposal if a motor test is still necessary.
Access the wall drain with a hand auger
If the P-trap is clear but the sink remains clogged, the next supported DIY step is to use a hand-operated auger in the exposed drain line that leads into the wall. The auger belongs downstream of the disposal, not inside its grinding chamber. The community troubleshooting guidance specifically warns against feeding a powered auger into the disposal chamber.
Leave the P-trap removed and guide the hand auger into the wall-side drain opening. Advance and operate it according to the tool’s instructions, allowing it to work against material within the drain line. The available evidence does not support a universal insertion distance or one operating technique for every pipe layout, so do not force the cable when it will not advance normally.
Withdraw the auger, remove any retrieved material, and reassemble the P-trap. Run water while watching both trap connections. Success means the water drains at its normal rate and the reassembled joints remain dry.
If flow does not return, the cable cannot be advanced safely, or the work requires equipment or pipe access beyond your experience, stop. The forum troubleshooting case treats drain-line augering as work that may be performed as DIY or assigned to a plumber.
Worked example: the disposal spins but the sink stays backed up
In one documented kitchen-sink case, the disposal ran normally and no obvious object was visible, but water drained slowly. That combination shifted the investigation away from a motor jam and toward the downstream piping.
The first action was to remove the P-trap. It was clear, so cleaning or repeatedly reinstalling it would not have addressed the remaining blockage. The next action was to put a drum-style hand auger into the drain pipe leading toward the wall. The auger did not retrieve much material, but it disrupted enough of the obstruction for water to begin draining.
This is one scenario, not a guaranteed diagnosis. Its useful lesson is the sequence of verification: normal disposal operation led to a trap check, a clear trap led to the wall drain, and restored flow confirmed that downstream work had changed the blockage.
Treat household remedies and drain cleaners cautiously
Do not let a household mixture replace inspection and physical removal of an obstruction. The supplied sources disagree about baking soda and vinegar. The Home Depot guide presents equal parts baking soda and vinegar as a method that may help break down a clog, while another disposal-clearing guide says vinegar should not be treated as a substitute for clearing the actual blockage.
That disagreement does not demonstrate that the mixture can remove a foreign object, release a mechanically jammed plate, clear a packed P-trap, or open a blocked wall drain. If the disposal hums, the mechanism must still be inspected and freed. If the disposal spins while water remains backed up, the drain path must still be checked.
Avoid harsh chemical drain cleaners as a first response. Roto-Rooter says not to use chemical drain cleaners when unclogging a disposal, and the community procedure warns that harsh chemicals can damage the disposal and pipes.
Use the evidence-supported physical sequence instead: disconnect power, retrieve visible material, free the mechanism with the appropriate manual tool, and inspect the downstream piping if drainage remains poor. If you have already added a drain-cleaning chemical, do not open the trap or begin hands-on drain work without accounting for the chemical exposure and following its safety instructions.
Troubleshoot failure signs and know when to call a plumber
Stop DIY troubleshooting when the result points to a mechanical failure, a leak, or a drain obstruction that the supported physical sequence has not cleared. Repeatedly energizing a humming or abnormal-sounding disposal does not establish where the problem is and can expose the unit to further operation while it remains stuck.
Call a plumber or other appropriately qualified repair professional when you encounter any of these outcomes:
- The disposal continues to hum without rotating after visible debris is removed and supported manual freeing has been attempted.
- The mechanism remains locked and the manual wrench or supported turning tool will not move it normally.
- The breaker trips repeatedly after the chamber is clear, tools are removed, and the unit has been reset.
- You hear metallic grinding or other abnormal mechanical sounds, or you can see damaged internal parts.
- The disposal housing or its connections leak and the source cannot be corrected through straightforward reconnection.
- The P-trap is clear, hand-auger work does not restore drainage, or the clog keeps returning.
- The required pipe disassembly, dishwasher precautions, or drain access is outside your ability to identify and complete safely.
Persistent humming, metallic sounds, visible internal damage, and leaks are identified as stop conditions in the community troubleshooting guidance. Repeated breaker trips, a wrench that cannot move the plate, and recurring drainage problems after trap cleaning are also listed as escalation signs in this symptom-based guide. Bob Vila similarly directs severe disposal clogs to a professional plumber.
The practical stopping threshold is the result of the supported sequence. If you cannot obtain free manual movement, normal drainage, and leak-free reassembly without forcing a component or expanding into unfamiliar pipe work, discontinue the DIY attempt.
Prevent another disposal clog
Prevention depends on limiting how much difficult waste enters the unit and moving processed material through the drain with sufficient water. These practices can reduce clog risk, but they do not guarantee that a disposal or drain line will remain clear.
Use the disposal with the following habits:
- Run plenty of cold water while processing food waste. Both Roto-Rooter and the community disposal guidance emphasize adequate water flow.
- Process small amounts at a time rather than loading the chamber all at once.
- Cut oversized food pieces into smaller chunks before placing them in the disposal, as recommended by Bob Vila.
- Keep fibrous waste such as celery and onion skins, starchy waste such as potato peels, grease, and very hard waste such as large bones out of the unit, following the examples in the community guidance.
Watch the drainage pattern during normal use. If the disposal operates but water begins draining slowly, treat that change as a possible downstream restriction. Check the drain path before repeatedly adding more waste, allowing a small blockage to become a full sink backup.