
Assessing French Drain Installation for a Wet Basement
Water during dry periods suggests groundwater rather than runoff. That clue helps screen the source before an interior or exterior system and outlet are chosen.
Overview
A French drain can help a wet basement when subsurface water is moving toward or beneath the foundation. Before installation, identify the likely water source and compare interior and exterior drainage, outlet options, foundation conditions, construction disruption, and local requirements. Wetness alone does not prove that a French drain is the right repair.
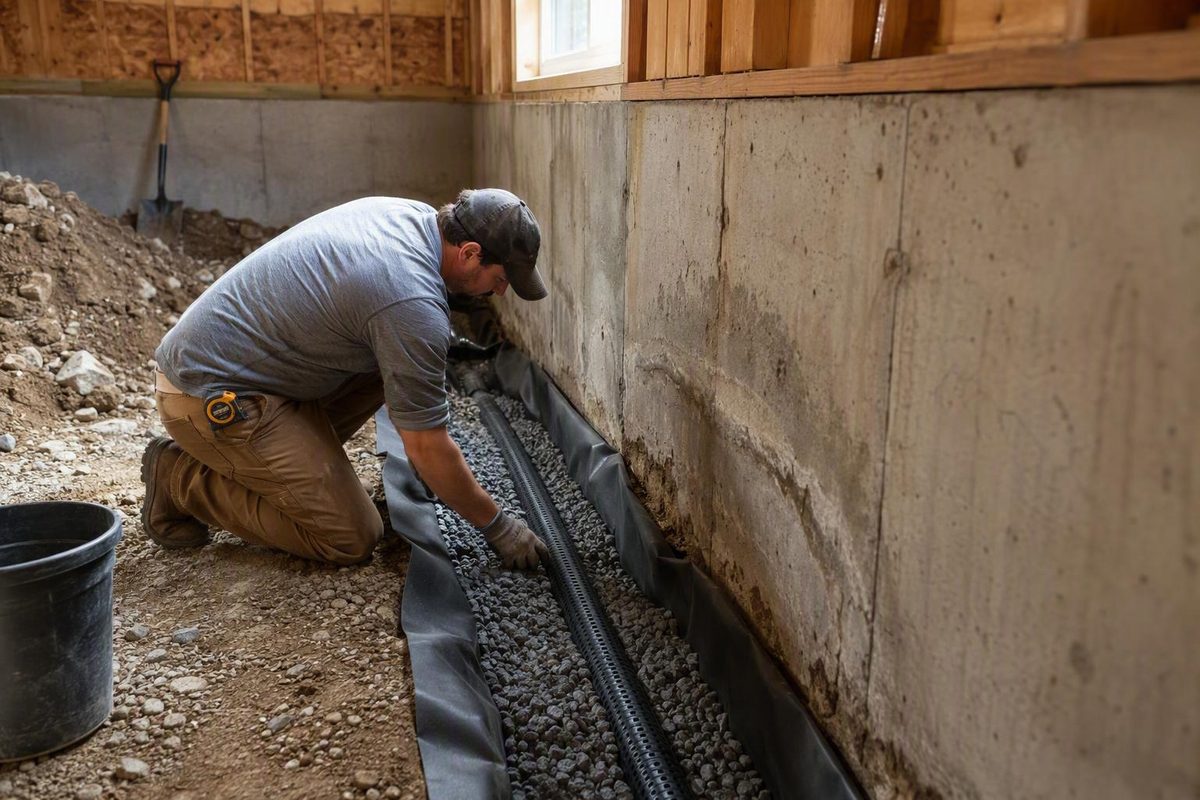
A basement French drain uses a gravel-filled trench and perforated pipe to collect water and convey it to a lower discharge point or sump. An exterior system intercepts water outside the foundation, while an interior system collects water from beneath the basement-floor perimeter. Michaelis Corporation’s basement drainage guide describes both arrangements but notes different costs and construction paths.
Start with diagnosis, not excavation. Runoff, leaking underground pipes, cracks, window-well problems, and other defects can require different corrections. The available sources do not establish a universal diagnostic test, basement drain specification, discharge rule, or pump size. Those decisions must be verified for the property.
How a Basement French Drain Works
A French drain creates an easier route for water moving through soil or aggregate around a basement. Instead of allowing that water to collect against the foundation or beneath the floor, the system admits it through openings in a perforated pipe and carries it toward an outlet.
The basic assembly described by Michaelis Corporation is a trench containing perforated pipe surrounded by gravel. Water passes through the aggregate, enters the pipe, and travels to a safe drainage area or sump. The source characterizes this as a way to reduce water pressure by giving water a more accessible path.
This collection function is different from waterproofing a wall surface. An exterior perimeter drain is intended to intercept groundwater before it reaches the basement wall. An interior perimeter drain is placed beneath the floor along the inside of the basement and manages water that has already reached the structure or the area below the slab. HomeBuddy’s cost and system guide makes the same distinction between exterior interception and interior management.
The drain still needs somewhere to send the collected water. Gravity can work only when the system can run from a higher collection elevation to a viable lower outlet. When that route is unavailable, an interior system may connect to a sump so a pump can lift the water to an approved discharge point. The drain collects and conveys water; the pump provides powered removal. They can be complementary parts of one wet basement drainage system.
Identify the Water Source Before Choosing a Drain
Recurring puddles, persistent musty odors, mold growth, or white mineral deposits on basement surfaces can indicate a moisture problem. BasementRemodeling.com identifies those conditions as warning signs associated with basement water. They do not, by themselves, reveal whether the cause is groundwater, runoff, plumbing, a window well, or a specific foundation defect.
Use the timing and location of the water to organize the investigation:
- Record whether the water appears only during or shortly after rain, or also during dry periods.
- Check whether it enters at one opening, crack, pipe penetration, or window well, or appears broadly along the wall-floor joint.
- Examine visible plumbing and consider concealed supply or drainage leaks before assuming the water comes from the ground.
- Review whether roof runoff and surface grading are directing water toward the building.
- Note whether the moisture is isolated to one wall or distributed around several parts of the basement.
These observations are screening information, not a complete diagnosis. Michaelis Corporation says gutters and grading address rainwater runoff but cannot control water moving through soil layers toward a foundation. The same source says water appearing during dry periods suggests groundwater rather than surface runoff. That is a useful distinction, but “suggests” should not be converted into proof.
Plumbing deserves a separate check because drainage excavation will not repair a leaking pipe. The Home Depot’s French-drain installation guide specifically advises confirming that the water problem is not leakage from an underground pipe that needs repair.
If the evidence points to runoff, correct the runoff path before treating a basement drain as the first response. If water enters through one localized defect, investigate that defect rather than assuming a full perimeter drain is necessary. If broad seepage persists after simpler sources have been addressed, subsurface collection becomes a more plausible option.
The supplied evidence does not provide an independent method for conclusively separating groundwater from every other source. If the cause remains unclear, the next useful step is a site-specific assessment that traces the entry path and explains why the proposed drain addresses it. A defensible proposal should connect the observed symptom to a water path, not simply prescribe a French drain because the basement is wet.
Interior vs. Exterior French Drains
Interior and exterior drains are different interventions. An exterior system attempts to intercept groundwater before it reaches the foundation wall. An interior system collects water along the inside perimeter, generally after it has reached the foundation or the area below the slab. Neither location is universally superior because access, foundation condition, outlet feasibility, disruption, and the diagnosed water path vary by property.
| Decision factor | Interior French drain | Exterior French drain |
|---|---|---|
| Collection location | Beneath the basement floor along the inside perimeter | Around the outside perimeter of the foundation |
| Water-management point | Manages water after it reaches the structure or the area below the slab | Intercepts water before it reaches the wall |
| Main construction path | Cut and remove a strip of concrete, excavate the trench, install the drain, and restore the floor | Excavate outside the foundation, install the drain, backfill, and restore affected exterior surfaces |
| Typical disruption | Basement contents, flooring, dust control, concrete removal, and slab restoration | Soil excavation plus possible disturbance to landscaping, decks, paths, or other exterior features |
| Outlet implication | Often routed to a sump when no lower gravity outlet is viable | Requires a workable gravity route or another approved means of discharge |
| Important uncertainty | Floor construction, concealed utilities, footing relationship, and sump arrangement | Excavation depth, access, buried utilities, foundation stability, and exterior restoration |
The installation locations are supported by BasementRemodeling.com, which describes exterior drains around the foundation and interior drains beneath the basement floor. It also says an interior trench is resealed with concrete, while an exterior trench is restored with soil or decorative gravel.
Exterior work can be considerably more disruptive than the phrase “dig around the house” suggests. Basement Systems notes that landscaping, decks, and walkways may need to be removed to install exterior drain pipe. HomeBuddy likewise describes retrofitting an exterior perimeter drain as excavation down to the footing, in contrast with installing the system while a foundation is already exposed during construction.
Interior work avoids excavating the entire outside perimeter, but it moves the disruption indoors. Concrete cutting, trench excavation, material handling, dust control, pipe routing, sump work, and floor patching all become part of the scope. Interior installation also manages water from inside rather than keeping all water away from the exterior wall.
Ask each contractor to mark the proposed collection line and outlet on a drawing. The proposal should explain where water is believed to come from, when the system intercepts it, what surfaces will be removed, and how those surfaces will be restored. That comparison is more useful than selecting a system solely because one bid has a lower headline price.
Old or Uncertain Foundations Change the Risk Calculation
An old fieldstone, rubble, shallow-footing, or otherwise uncertain foundation makes exterior excavation a structural question as well as a drainage question. Removing soil beside a foundation changes the conditions around it, and the supplied evidence does not establish a universal safe excavation sequence, depth, or setback for these foundation types.
The available source for this issue is a DoItYourself.com forum discussion about a 100-year-old basement. A forum can reveal real homeowner concerns, but it is not authoritative structural guidance. It should not be used to prescribe how far to dig, whether to expose a footing, or how to support historic masonry.
Treat uncertainty as a reason to obtain project-specific review before exterior excavation begins. The review should identify the foundation type and condition, what excavation would expose, and whether the proposed sequence could affect support. This does not automatically make an interior system correct. Interior cutting also requires a known relationship among the slab, wall, and footing. The practical conclusion is narrower: when the foundation is old or poorly documented, do not let a generic drainage detail substitute for an assessment of the actual structure.
Plan the Drainage Path and Installation
A basement French drain installation should be planned as one continuous water path: collection area, aggregate, perforated pipe, conveyance route, outlet, and restored surface. Choosing pipe and stone before confirming the outlet reverses that logic. If collected water cannot leave safely, the trench is not a complete drainage system.
The supported general sequence is:
- Establish the likely collection perimeter and a viable discharge destination.
- Locate utilities and identify the slab, wall, footing, and exterior features affected by construction.
- Open the interior slab or excavate the exterior trench along the approved route.
- Place filter material, washed aggregate, and perforated pipe in the specified configuration.
- Connect the pipe to the gravity outlet or sump arrangement.
- Add the remaining aggregate and restore concrete, soil, landscaping, or other disturbed surfaces.
This is an installation framework, not a universal construction specification. Michaelis Corporation supports the core relationship among the trench, gravel, perforated pipe, and a safe outlet or sump. BasementRemodeling.com supports the distinction between resealing an interior trench with concrete and restoring an exterior trench.
Filter fabric and washed aggregate are intended to separate the collection space from surrounding material while allowing water to reach the pipe. Their inclusion does not eliminate clogging risk. Pipe routing, joints, outlet protection, and access for later inspection still affect whether the system remains serviceable.
The restoration scope belongs in the installation plan, not as an afterthought. For an interior project, clarify who removes and replaces flooring, wall finishes, stored items, and the concrete strip. For exterior work, define what happens to excavated soil, planting, hardscape, decks, and access routes. A bid that stops at “install drain” leaves a large part of the real project undefined.
Gravity Outlet or Sump Pump
Use gravity only when the drain can run from a higher collection point to a lower, viable outlet. The Home Depot describes this higher-to-lower relationship and recommends a minimum 1 percent slope in its general French-drain instructions. That figure is useful evidence for gravity drainage generally, but it is not a complete basement-specific design rule.
An interior perimeter drain may need a sump when surrounding grades do not provide a lower outlet. The drain directs water into the sump basin, and the pump lifts it to a discharge route. In that arrangement, a French drain and sump pump are not competing remedies. The drain is the collection network; the sump system removes the collected water.
The evidence pack does not support a universal sump-basin size, pump capacity, backup-power arrangement, alarm configuration, check-valve specification, or discharge-pipe size. Those choices depend on the expected inflow, elevation change, route, electrical conditions, and local requirements. A proposal should state those inputs and identify who is responsible for the electrical and discharge work.
A gravity proposal should show the elevation relationship and termination point. A sump proposal should show where the basin and discharge line will go. In either case, the outlet must be resolved before installation begins.
Specifications That Must Be Verified for the Project
The general anatomy of a French drain is well supported, but the supplied sources do not agree on every technical detail. Generic articles and forum discussions present different approaches to drain depth and pipe-perforation orientation. They also do not establish universal basement-specific footing clearance or show how the general 1 percent slope guidance should apply to every interior perimeter layout.
Do not turn one illustration into a project specification. Verify the following details on the contractor’s drawing: trench location and depth, relationship to the footing, pipe material and diameter, orientation of the perforations, aggregate type, filter-fabric arrangement, pipe fall, connection details, cleanout access, and restoration method.
This verification matters because the installation must collect water without undermining the foundation or creating an unusable route. Michaelis Corporation, The Home Depot, BasementRemodeling.com, and a House-Improvements forum discussion do not collectively establish one basement detail that fits every foundation.
Require project-specific dimensions and routing in writing. If a detail affects foundation support or conflicts with observed construction, seek qualified review instead of relying on a generic trench diagram.
Utilities, Permissions, and Discharge Constraints
Before digging or cutting concrete, identify what may be in the work path and whether the proposed outlet is permitted. A drainage route that conflicts with utilities, property constraints, or discharge rules must be redesigned before construction.
For exterior excavation, The Home Depot advises calling 811 several days before digging in the United States. That service is region-specific, so use the applicable utility-location process where the property is located. Public utility marking may not identify every private line on a site.
The same guide advises checking zoning restrictions and obtaining necessary permissions. The evidence pack does not establish which permit, inspection, storm-sewer connection, sump discharge, backflow, easement, or property-line rules apply in a particular jurisdiction. Verify those questions with the relevant local authority rather than assuming that a contractor’s usual outlet is allowed.
Confirm these matters before approving the route:
- Who locates public and private electrical, gas, water, sewer, irrigation, and communications lines?
- Which permits or inspections apply to excavation, plumbing, electrical work, or discharge?
- May the water enter the proposed outlet, and is any connection approval required?
- Will the discharge remain on the property without creating a problem at a boundary or adjacent property?
- Is the outlet accessible for inspection and protected from blockage?
Document the accepted outlet location and the party responsible for approvals. “Discharge to yard” or “connect to drain” is not enough detail for a final scope.
Cost, Disruption, Maintenance, and Installation Responsibility
Evaluate the project as more than a pipe price. The full burden includes diagnosis, access, excavation or concrete removal, utility protection, drainage materials, sump or outlet work, permits, disposal, surface restoration, future maintenance access, and the possibility of disruptive repairs.
Interior and exterior bids may include fundamentally different scopes. One may include a sump and concrete replacement while another excludes electrical work, finish-floor replacement, exterior waterproofing, or landscaping. Compare the same collection length, outlet plan, restoration standard, and maintenance provisions before comparing totals.
Installation responsibility should follow the hazards and uncertainty in the scope. Concrete cutting, concealed utilities, foundation exposure, outlet elevation, and local requirements can make a seemingly straightforward trench a coordinated drainage, structural, electrical, and restoration project.
Use Published Costs as Planning Ranges, Not Quotes
Published French-drain prices vary enough that they should be used to frame questions, not set a final budget. The sources are cost guides and contractor-authored material, and their figures cover different system types, lengths, depths, locations, and inclusions.
HomeBuddy’s 2026 guide reports a broad professional-installation range of $1,650 to $12,250. It lists interior basement drains at $40 to $100 per linear foot and exterior perimeter systems for existing homes at $25 to $65 per linear foot. The guide identifies length, depth, soil conditions, sump or dry-well needs, concrete removal, waterproofing, landscaping repair, and permits as cost drivers.
HomeAdvisor publishes a wider $400 to $27,000 professional-project range and $10 to $100 per linear foot across drain categories. For interior basement drains, it reports $40 to $100 per linear foot and $5,000 to $18,000 total. These figures overlap with HomeBuddy’s interior range but differ at the whole-project level.
Cost to Renovate gives a typical project range of $2,500 to $10,000 and a $5,000 national average. It also estimates $40 to $75 per linear foot for interior work. That source explicitly says its calculator is a planning range, not a quote, and that project conditions, location, contractor availability, and material choices can change the result.
The disagreement is the point: “French drain cost” is not one comparable scope. Request an itemized local quote that separates diagnosis, drain length, excavation or concrete cutting, hauling, pipe and aggregate, filter material, sump components, electrical work, discharge line, waterproofing, permits, concrete patching, flooring, landscaping, and other restoration. Also ask which conditions allow a change order. The useful comparison is not merely total price; it is total price for a defined and equivalent result.
Failure Modes and Maintenance Access
A French drain can fail when water cannot enter, move through, or leave the system. Basement Systems warns that silt, sediment, and other debris can clog a drain pipe and cause overflow or backup into a basement. Poor fall, obstructed connections, or a blocked outlet can also interrupt the intended path.
A sump-connected system adds another dependency: the collection pipe may remain open while powered removal is unavailable. The evidence pack supports the relationship between drains and sumps, but it does not establish maintenance intervals, pump service life, or expected repair costs. Those items should be specified for the installed equipment rather than inferred from a generic drainage article.
Access affects the severity of a failure. The Home Depot recommends regularly inspecting and cleaning the inlet grate and outlet and flushing debris when needed. It also notes that a broken or clogged drain may require part of the system to be excavated for inspection or repair.
For a basement system, ask how the installer will make inspection and cleaning possible. The design should identify accessible cleanouts, sump access, visible discharge termination, and any inlet or outlet that can accumulate debris. Exterior restoration should not permanently conceal the only practical repair point. Interior finishes should not make the sump or service points inaccessible.
After installation, observe the system during conditions that previously produced water. Check whether water reaches the sump or outlet, whether the termination remains open, and whether basement symptoms change. This is not proof of permanent performance, but it can reveal an immediate routing, blockage, or discharge problem. Keep the final layout and photographs of concealed work so a future repair does not begin with guesswork.
DIY or Professional Installation
DIY suitability depends on the actual scope, not on whether you can dig a trench. A short exterior drain in open ground presents different work from cutting a finished basement slab, excavating beside an uncertain foundation, or installing a sump and discharge line.
BasementRemodeling.com characterizes installation as labor-intensive and requiring knowledge of grading, building codes, foundation protection, and permitting. Michaelis Corporation identifies concrete cutting, concealed electrical conduits, plumbing, gas lines, and incorrect cutting near structural elements as hazards.
Concrete-cutting dust controls and protective equipment should be determined from applicable project-specific safety guidance. That supports treating dust control and protective equipment as core work controls, not optional cleanup. A DIY plan also needs safe equipment operation, spoil removal, aggregate handling, concrete restoration, and a verified utility map.
DIY work is more defensible when the water source is reasonably understood, the route is accessible, the outlet is resolved, utilities are located, the foundation relationship is known, and the installer can perform the work under applicable permissions. Professional help becomes more appropriate when the project involves:
- Cutting or removing structural or basement concrete without a verified detail.
- Excavating beside an old, damaged, fieldstone, rubble, or uncertain foundation.
- Working near concealed gas, electrical, plumbing, sewer, or other utilities.
- Designing a sump, electrical supply, long discharge route, or regulated connection.
- Establishing elevations, footing clearance, or drainage specifications that are not documented.
- Coordinating permits, inspections, waterproofing, flooring, landscaping, or extensive restoration.
Hiring a contractor does not remove the need to examine the design. Ask for the diagnosed water path, drain location, dimensions, outlet, utility controls, dust controls, restoration scope, maintenance access, and itemized price in writing. If structural or electrical questions fall outside the drainage contractor’s scope, identify who will resolve them before work begins.
A sound french drain installation for a wet basement starts with a supported explanation of where the water comes from and ends with a maintainable, permitted outlet. The trench and pipe are only the middle of that system.