
Undermount Sink Brackets: Selection, Installation, and Repair Limits
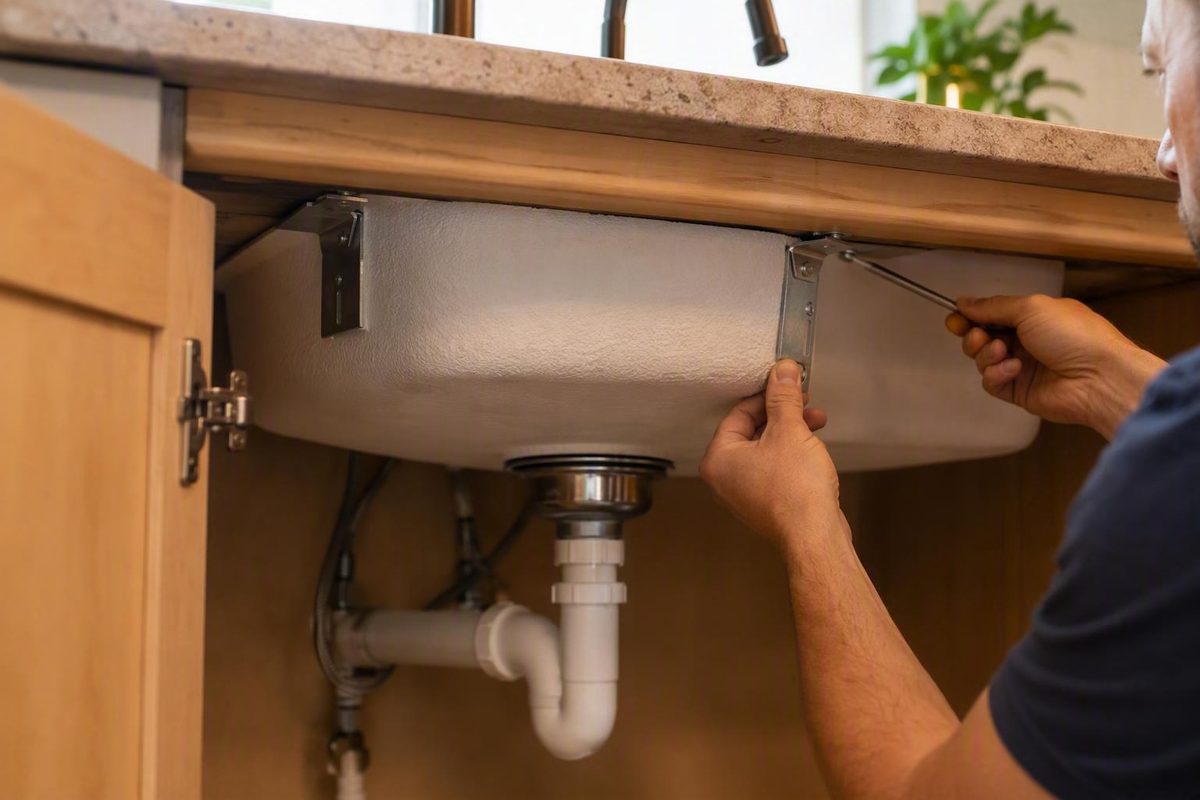
Clips support the sink rim at multiple points, while structural brackets spread load across wider spans. Compare countertop rules, cabinet fit and retrofit access.
Overview
Undermount sink brackets are one form of mechanical support, alongside perimeter clips, cabinet-mounted rails, and adjustable poles. Choose among them by considering how the system distributes the sink’s load, what the countertop manufacturer permits, where the hardware attaches, whether it fits around plumbing, and whether installation occurs before or after countertop placement.
The central distinction is between point support and distributed support. B.B. Industries’ sink-mounting guide describes clips as individual fasteners placed around the sink rim, while structural brackets span more of the opening and distribute weight across a wider area. Its guidance associates clips with lighter porcelain and stainless-steel sinks and wider structural support with heavier cast-iron, fireclay, farmhouse, or large basins.
That does not create a universal weight cutoff. The appropriate undermount sink mounting hardware still depends on the particular sink, countertop, cabinet, and support instructions. A manufacturer’s permitted attachment method matters more than a generic claim that one hardware category fits every installation.
Clips, Brackets, Rails, and Support Poles Compared
The main support systems differ in where they carry the load and what part of the installation they depend on. Clips engage the sink perimeter at multiple points. Structural brackets or rails spread support over longer spans and can transfer the load to cabinet walls. Adjustable poles transfer it vertically to the cabinet floor.
| Support system | How it supports the sink | Typical attachment location in the supplied evidence | Retrofit and access considerations | Main fit question |
|---|---|---|---|---|
| Perimeter clips | Apply support at multiple points around the sink rim | Underside of the countertop, where the material and manufacturer permit it | Access is needed around the rim and at each fastening point | Can the countertop accept the required clips, and can you reach the full perimeter? |
| Structural brackets | Span a wider portion of the opening and distribute the load more broadly | Countertop structure, cabinet, or another approved supporting assembly, depending on the system | Wider support can suit heavier or larger basins, but the bracket must clear the bowl and connections | Does the system provide the required span without conflicting with the sink or plumbing? |
| Cabinet-mounted rails or brackets | Transfer the sink load into the cabinet walls rather than relying only on countertop attachment | Front, rear, or side cabinet walls | Some documented systems can be installed after countertop placement | Does the cabinet have suitable attachment surfaces, depth, and access? |
| Adjustable support poles | Press between the sink underside and cabinet floor | Cabinet floor beneath the sink | The cited pole system is drill-free and marketed for new installations or sagging-sink support | Is the vertical adjustment range correct, and is the floor and pole location stable and protected from displacement? |
The B.B. Industries guide supplies the point-support versus wider-distribution distinction. For cabinet attachment, Chemical Concepts describes an E-Z system whose front and rear brackets mount directly to cabinet walls and fit an adjustable, nominal 24-inch cabinet depth.
The cited adjustable-pole listing uses another load path. Its supports stand beneath the sink and adjust vertically by spinning the pole, without drilling or additional mounting hardware. The seller specifies a height range of 19.7 to 31.5 inches. That makes cabinet-floor condition, vertical clearance, and possible interference with stored items or plumbing part of the selection decision.
No row in the matrix establishes a universal maximum sink weight. The supplied evidence explains support geometry and gives product specifications, but it does not provide a common engineering standard that converts sink material or advertised capacity into a universally safe hardware choice.
Choose Support by Sink, Countertop, Cabinet, and Project Type
Start with the sink and its expected load path, not the highest number printed on a product page. The B.B. Industries guide identifies sink weight, material, countertop composition, access beneath the countertop, and new-versus-retrofit installation as the main selection factors.
For a lighter porcelain or stainless-steel sink, perimeter clips may be appropriate when the countertop manufacturer permits their use and the installer can reach the required fastening points. For cast iron, fireclay, farmhouse configurations, or larger basins, the same guide favors structural brackets that spread the load more evenly. This is a category-level distinction, not an exact weight threshold.
Next, trace where each candidate system sends the load. Countertop-mounted clips depend on an approved connection to the countertop or its prepared mounting features. Cabinet-mounted undermount sink support brackets depend on sound cabinet walls and suitable screw locations. Rails require a usable span. Poles depend on a stable cabinet floor and uninterrupted vertical space.
Project stage narrows the choice further. Before countertop placement, the installer may have better access to the sink rim and countertop underside. With an existing countertop, cabinet-mounted brackets, rails documented for post-countertop installation, or height-adjustable supports may be more accessible. Retrofit compatibility means the hardware can be installed in that setting; it does not establish that the hardware alone completes a detached-sink repair.
Finally, compare the prospective system with the sink and countertop manufacturers’ instructions. The evidence pack contains one detailed countertop-specific example from Cambria, but it does not contain equivalent rules for every countertop material or sink. Where those instructions are missing, do not infer compatibility from a retailer’s broad wording.
Countertop Rules Can Change the Mounting Method
Countertop thickness and composition can change both the required support and the permitted fastening method. Cambria’s installation requirements provide a bounded example: for 2 cm and 3 cm Cambria applications, undermount sinks must be secured to the countertop underside with sink clips. For 1 cm horizontal applications, Cambria calls for sink-support cradles or rails and says sinks must not be mechanically fastened to the 1 cm material.
Cambria also approves support cradles or sink rails attached to perimeter walls or cabinets. Its instructions require a continuous bead of 50-year, 100% silicone around the undermount sink flange, while expressly prohibiting adhesive as the sole means of support. For 1cm applications, sinks must not be mechanically fastened to the Cambria material; Cambria requires sink support cradles or sink rails instead.
These are Cambria-specific requirements, not universal rules for quartz, granite, solid surface, laminate, or other materials. Their value is to show why a generic undermount sink bracket installation can become unsuitable when the countertop manufacturer specifies a different support path.
Before purchasing hardware, identify the countertop product and thickness, then verify the manufacturer’s current sink-mounting instructions. Also check the sink manufacturer’s requirements where available. If either set of instructions limits drilling, direct fastening, clip type, or sealant, use those limits to eliminate incompatible hardware before comparing convenience or advertised capacity.
New Installation Versus Retrofit Support
A new installation offers the broadest access because hardware can be positioned before the countertop limits movement around the bowl. Retrofit work requires a system that can reach its attachment points through the cabinet opening and fit around plumbing that may already be installed.
Several cited systems are explicitly marketed for post-countertop work. Chemical Concepts describes its cabinet-wall bracket as suitable for retrofit installations where the countertop is already placed. Kelaro’s bracket documentation says its system can be installed before or after the countertops. It lists a standard 24-inch cabinet depth and says its wood support rails can be trimmed for shallower vanity cabinets.
Cabinet-wall wedge brackets provide another retrofit configuration. Strictly Sinks’ Cinclips listing describes a bracket that wedges against the sink lip and attaches to the cabinet wall with supplied screws, without drilling holes into the countertop. The adjustable pole system is also promoted for supporting a sagging sink and requires no drilling, according to its seller.
These statements establish product access and attachment options. They do not prove that every existing sink can remain in place, that failed sealant can be left untouched, or that surrounding plumbing will tolerate repositioning. Diagnose why the sink moved before treating retrofit-friendly hardware as the entire repair.
Measure the Cabinet and Under-Sink Space Before Buying
Measure the actual installation rather than relying on labels such as “standard cabinet” or “universal bracket.” The supplied products use different horizontal spans, vertical ranges, and attachment surfaces, so a support can be the correct category and still fail to fit the cabinet.
Check the following before ordering:
- Cabinet depth and usable support span: Measure inside the cabinet at the exact height where rails or brackets would sit. Chemical Concepts and Kelaro cite a nominal 24-inch cabinet depth for their respective systems, while Kelaro says its wood rails can be trimmed for shallower cabinets.
- Sink-to-floor height: Measure from the cabinet floor to the intended contact point beneath the sink. The cited pole supports adjust from 19.7 to 31.5 inches, so a cabinet outside that range does not match that listing.
- Rim and wall access: Confirm that you can reach the sink lip and every proposed screw, clip, rail, or adjustment point through the cabinet opening.
- Cabinet-floor and wall condition: A pole depends on the floor beneath it, while cabinet-mounted hardware depends on its wall attachment. Do not assume damaged, thin, obstructed, or altered cabinet surfaces provide the same support as the product’s intended installation.
- Plumbing and disposal clearance: Map the drain, supply lines, shutoff valves, dishwasher hose, disposal, and service access. The chosen support must fit without using the drain or disposal as a structural contact point.
- Exposure to movement: Consider whether stored items or routine service could strike or displace a floor-supported pole. Customer feedback for the cited pole product includes reports of slipping or failure to remain locked.
Record the measurements as a sketch showing the sink outline, cabinet walls, floor, drain, and disposal. Compare that sketch with the product’s complete dimensions, not only its advertised span or adjustment range. For example, Home Depot’s Numhew listing gives product dimensions of 2.3 inches high, 39.4 inches wide, and 2.3 inches deep. Those dimensions are an example from one support, not a standard for other rails or brackets.
A fit check should leave room to install, tighten, inspect, and later service the hardware. A support that can be forced into an empty cabinet may still be unsuitable once the plumbing and disposal occupy their working positions.
Mechanical Support, Sealant, and Fastening Requirements
Mechanical hardware and sealant perform different jobs. The support hardware carries and restrains the sink according to its design. Sealant closes the joint between the sink flange and countertop and may assist the installed assembly, but the supplied Cambria requirements do not permit adhesive alone as sink support.
The B.B. Industries guide says professional installers typically combine clips or support brackets with a continuous bead of silicone adhesive. Cambria’s requirements make the division explicit for its material: a continuous silicone bead seals the sink flange, but adhesive cannot be the sole support.
The fastening method must match both the hardware and the surface receiving the load. The cited evidence includes three materially different approaches:
- Countertop-mounted clips secure the rim to approved mounting points beneath the countertop.
- Cabinet-mounted brackets or rails use cabinet walls, with the Chemical Concepts and Strictly Sinks examples attaching directly with screws.
- Adjustable poles stand on the cabinet floor and extend upward without drilling, according to the cited pole listing.
These approaches are not interchangeable installation recipes. A drill-free claim for a pole does not authorize omitting required clips from a countertop system. A cabinet-mounted bracket avoids drilling into the countertop, but its supplied screws still require suitable cabinet attachment locations. A clip designed for one countertop assembly does not establish permission to drill or drive fasteners into another material.
For the cited Cambria installation, the manufacturer requires 50-year, 100% silicone around the sink flange and instructs installers to remove excess with denatured alcohol immediately after installation. For 2cm and 3cm applications, it requires sink clips; for 1cm applications, it requires support cradles or sink rails and prohibits mechanically fastening sinks to the material. Apply these details only to the Cambria applications covered by that document.
For any other installation, use the selected system’s instructions together with the sink and countertop requirements. Verify the permitted sealant, surface preparation, fastener location, tightening method, and required support arrangement. The evidence pack does not provide universal curing, torque, hole-depth, or substrate rules, so those details should not be borrowed from an unrelated product.
Support Quantity and Placement Are System-Specific
There is no evidence-backed universal answer to how many undermount sink clips or brackets every sink requires. Quantity and spacing depend on the selected system, the sink geometry, attachment surfaces, and manufacturer instructions.
The B.B. Industries category guide gives one bounded example, clips installed every 6 to 8 inches around the perimeter. That figure belongs to the clip context described by that guide. It should not be converted into a placement rule for rails, continuous brackets, cabinet-wall wedges, or vertical poles.
Packaging is also not a design rule. The Menards clip listing identifies an eight-clip pack, but pack quantity alone does not prove that eight clips are correct for a particular sink.
Lay out supports only after mapping the sink perimeter, cabinet structure, drain, disposal, and service access. Follow the hardware, sink, and countertop instructions for actual quantity and placement. Do not invent equal spacing where a rail system uses designated mounting points, and do not place poles where plumbing or stored items can interfere with them.
Using Brackets for a Sagging or Detached Sink
Undermount sink repair brackets can add mechanical support to an existing installation, but a sagging or detached sink first needs a cause assessment. A new bracket does not automatically correct failed sealant, loose original hardware, unsuitable attachment surfaces, or plumbing that has shifted with the sink.
The retrofit evidence is product-specific. Chemical Concepts promotes its cabinet-mounted system for countertops already in place. Kelaro says its bracket can be installed before or after countertop placement. Strictly Sinks markets its cabinet-wall wedge bracket for installation and repair, while the cited adjustable-pole seller promotes its supports for a new sink or a sagging one. These claims show that several hardware layouts can physically address an installed sink from within the cabinet.
A bounded repair assessment should cover four connected conditions:
- Determine whether the sink has moved, whether the seal has separated, and whether clips, rails, or other original supports are missing, loose, or displaced.
- Inspect the countertop underside, sink flange, cabinet walls, and cabinet floor where the replacement system would attach or bear.
- Check the drain, supply connections, disposal, and attached hoses before moving the sink, then inspect them again after the sink has been repositioned.
- Determine whether failed sealant must be removed and replaced under the applicable sink, sealant, and countertop instructions rather than merely covered.
The available community discussion on a partially detached undermount sink describes removing old sealant, applying new sealant, raising the sink with adjustable support, and restoring mechanical brackets. It also warns that the drainpipe is not a support post and discusses disconnecting sink connections and a garbage disposal before repositioning. This is useful as a list of repair issues to inspect, but it is community guidance rather than an authoritative universal procedure.
Moving a sagging sink upward can also move the drain or disposal connection attached to it. That is why the repair should end with a leak inspection at every connection affected by the movement. The support itself should carry the sink; the drain assembly should not be treated as a brace.
The supplied evidence does not establish one permanent-repair sequence for all sinks and countertops. It does not resolve when the sink must be fully removed, which sealant applies to every material, how long each sealant must cure, or whether damaged countertop mounting points can be reused. If the sink cannot be safely held during disconnection and cleaning, the countertop is damaged, or the manufacturer’s fastening method cannot be identified, the evidence is insufficient for a controlled DIY repair.
Evaluate Load Ratings, Stability, and Durability Claims
Advertised capacity is a screening input, not proof that a support is safe for a particular permanent installation. The supplied listings claim capacities from 317 to 1,000 pounds, but they do not provide a shared test method, independently verified safe-working-load standard, or common safety factor.
The adjustable pole seller claims a capacity of 317 pounds, or 144 kilograms. Strictly Sinks lists an 800-pound maximum for its cabinet-wall wedge system. The Numhew listing advertises a maximum load of up to 1,000 pounds.
Those figures describe different products with different load paths. Without common testing information, you cannot conclude that the 1,000-pound listing is safer, more durable, or more suitable than the 317-pound or 800-pound listing. The evidence also does not clarify whether each number reflects evenly distributed loading, a single static test, the whole system, one component, or a specified cabinet and countertop assembly.
A realistic selection must account for the complete installation, including the sink, water held in the basin, attached components, cabinet attachment, countertop requirements, and possible movement during use. The evidence pack does not provide a defensible formula or universal safety margin for combining those factors. Obtain the applicable manufacturer’s capacity basis or qualified engineering guidance when the support decision depends on a precise working load.
Stability and durability require separate scrutiny. The cited pole listing describes drill-free adjustment by hand and markets the supports for sagging-sink repair. Customer feedback on that same listing is mixed, with reports that some poles stopped locking in place and a complaint describing plastic parts and questioning long-term use. These reports do not establish that every adjustable support pole will fail, but they expose a limitation in treating the seller’s 317-pound figure as proof of permanent suitability.
For a pole system, examine how the adjustment locks, which parts maintain compression, what prevents lateral displacement, and whether routine cabinet use can strike it. For cabinet-mounted rails or brackets, verify the required cabinet material and fastener locations. For countertop clips, verify that the countertop permits the attachment and that all mounting points remain accessible.
Material labels such as “stainless” are also incomplete durability evidence by themselves. The supplied sources do not include independent corrosion testing, impact testing, long-term deflection measurements, or comparative service-life data. Permanent suitability therefore cannot be established from capacity, material name, or installation convenience alone.
Choose undermount sink brackets by verified compatibility and load path first. Treat seller ratings as claims requiring context, use customer reports as warning signals rather than controlled test results, and require the sink, countertop, cabinet, and hardware instructions to agree before relying on any system as permanent support.