
How to Unclog a Toilet Safely and Know When to Stop
By Miles Carver ·
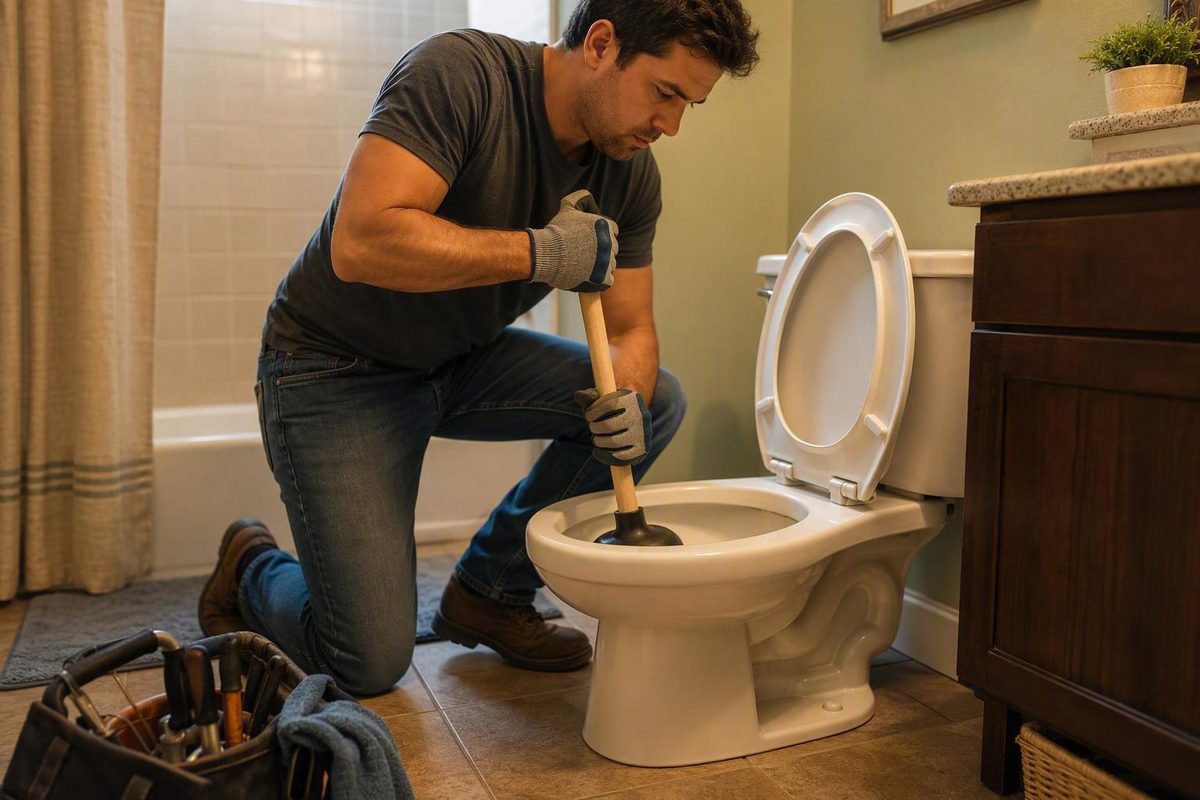
Overview
To unclog a toilet safely, stop additional water first, leave enough room in the bowl to prevent overflow, and use a flange plunger with a complete seal. If the clog does not respond, try a limited mild-clog method or a toilet auger. Stop when the blockage persists, returns, or affects other fixtures.
Use the least invasive method that fits the situation. A likely waste-and-toilet-paper clog is a reasonable candidate for plunging. If you know that a toy, hygiene product, wipe, or another solid object entered the toilet, do not assume that pushing harder is the right response. The object may need to be retrieved instead.
A practical decision path is:
- Stop the bowl from receiving more water.
- Adjust the bowl level and protect the surrounding floor.
- Plunge with a toilet-appropriate flange plunger.
- If no plunger is available, reserve hot, non-boiling water and dish soap for a mild clog.
- Use a toilet auger for a stubborn toilet-level obstruction.
- Confirm that water drains normally before attempting a routine flush.
- Call a plumber if appropriate methods fail, the clog returns quickly, or other fixtures show symptoms.
Each stage should produce an observable change. The bowl level should stabilize, begin falling, or return toward normal. A stalled or rising level means the toilet is not confirmed clear.
Step 1: Stop the Water Before It Overflows
If the toilet is clogged and the water is rising, do not flush again. Repeated flushing can add water faster than the blocked outlet can drain it, increasing the chance of an overflow. Both American Standard and Bemis advise against repeatedly flushing a clogged toilet.
Open the tank if you can reach it safely. Push the rubber flapper down over the opening at the bottom of the tank to stop tank water from entering the bowl. Ace Hardware’s clogged-toilet guidance identifies closing the flapper as an immediate overflow-control measure. You can also close the toilet’s water shut-off valve if it is accessible.
Before working on the clog:
- Put on gloves.
- Place towels or another suitable floor covering around the toilet to contain splashes.
- Move nearby items away from the work area.
- If water has already reached the floor, avoid spreading it into other areas and clean and disinfect affected surfaces after the repair.
The supplied evidence supports basic protective measures but does not establish one universal disinfection formula. Follow the directions for the cleaning product and surface involved.
The required result at this stage is simple: no additional water should enter the bowl, and the water level should stop rising. Do not begin plunging or adding water until there is enough empty capacity to work without causing an overflow.
Step 2: Prepare the Bowl and Choose the Right Tool
Before plunging, check both the bowl level and what may have caused the clog. You need enough water to cover the working edge of the plunger, but you also need empty space above the water to accommodate movement.
If the bowl is nearly full, wait to see whether the level falls. If necessary, carefully remove some water into a suitable container. Duravit’s clogged-toilet guidance recommends waiting for the level to return toward normal or removing some water before trying a remedy. If the bowl has very little water, add only enough to submerge the plunger’s edge. Ace Hardware specifically notes that the plunger edges should be underwater.
Choose a flange plunger if one is available. Unlike a flat cup commonly used on sinks, a flange plunger has an extended rubber section that fits into the toilet’s drain opening. That shape helps it form a closer seal. Scott’s unclogging guide describes a flanged plunger as the toilet-appropriate option and a non-flanged model as better suited to a sink.
Consider the suspected obstruction before applying force. Waste and toilet paper may break apart or shift under pressure. A known solid object is a different problem. Bowl behavior alone cannot reliably identify what is in the trap, so use what you actually know about what was flushed. If an object is visible and safely reachable, avoid pushing it farther into the toilet. If it is not safely retrievable, skip improvised force and seek appropriate help.
You are ready to plunge when the flange can sit over the drain with its edge submerged, the bowl has room for water movement, and there is no known object that makes pushing inappropriate.
Step 3: Plunge With a Complete Seal
Correct plunging depends on moving water while keeping the plunger sealed over the drain. If air escapes around the cup, much of the motion is not reaching the obstruction.
-
Lower the flange into the drain opening and center the plunger over it. Press down gently until the cup forms a complete seal against the bowl.
-
Tilt or compress the cup cautiously at first so trapped air can leave and water fills the working area. Keep your face and clothing away from possible splashes.
-
Hold the handle upright and begin with a controlled downward stroke. Do not jab so aggressively that you break the seal or force bowl water over the rim.
-
Pull upward without lifting the plunger away from the drain. The upward stroke matters as much as the downward stroke because it creates suction that can help dislodge the clog, according to Always Affordable Plumbing.
-
Continue repeated push-pull strokes while maintaining the seal. Bemis describes using seven to ten strokes or continuing until the water starts to drain. Treat that as one working cycle, not a guarantee that every clog will clear within a fixed count.
-
Pause and watch the bowl. Water moving down indicates progress. A stalled level, escaping air, or water moving around the outside of the cup means you should reassess the seal, bowl depth, or tool choice.
If the first cycle produces no water movement, reseat the flange and make sure its edge remains underwater. A flat sink plunger or a poorly centered flange may not seal properly. If correctly performed plunging still produces no improvement, move to the next suitable method instead of repeating the same ineffective motion indefinitely.
Step 4: Try a No-Plunger Method for a Mild Clog
If you do not have a plunger, hot water and dish soap may help with a mild waste-and-paper clog. This is a possible fallback, not a mechanical equivalent to plunging and not a guaranteed fix.
First, confirm that the bowl has enough empty capacity for anything you plan to add. Add dish soap and allow it time to reach the obstruction. Then pour hot, non-boiling water slowly, watching the water level throughout. Duravit presents dish soap and hot water as an option for a slightly clogged toilet, while Bemis cautions that the water should be hot rather than boiling.
Do not use boiling water. The supplied plumbing guidance warns that extreme heat can damage or crack toilet porcelain. Pouring slowly also gives you time to stop if the bowl begins filling rather than draining.
A toilet brush is another bounded option for a mild clog when no plunger is available. Duravit suggests placing the brush into the drain opening and rotating it in mild cases. Keep the movement controlled to limit splashing, and do not treat the brush as a substitute for a toilet auger when the obstruction is deep or stubborn.
Although some household guides suggest baking soda and vinegar, the supplied evidence does not establish a dependable recipe or show that it consistently clears toilet clogs. Avoid layering one mixture after another. If hot water and soap do not improve drainage after they have had time to act, proceed to an appropriate mechanical tool or professional help.
Success means the bowl level begins falling and continues toward normal. If it remains stalled, rises after adding water, or appears completely blocked, stop adding liquid.
Step 5: Use a Toilet Auger for a Stubborn Clog
Use a toilet auger, also called a closet auger, when correct plunging has not cleared a stubborn obstruction in or near the toilet. Ace Hardware identifies a closet auger or plumbing snake as an option for deeper clogs, but tool selection matters.
Choose an auger designed specifically for toilets. A toilet auger has a protective sleeve or covered section intended to reduce contact between exposed metal and the porcelain. An ordinary exposed metal drain snake may scratch the bowl.
-
Retract the cable so the working end sits close to the auger’s protective guide. Position that guide at the toilet drain opening.
-
Feed the cable gradually into the drain. Keep the protected portion against the bowl rather than dragging exposed cable across the porcelain.
-
Turn the handle while advancing the cable carefully. Scott’s guidance describes cranking the auger so its tube travels into the toilet pipe and works through the clog.
-
When you meet resistance, continue with controlled rotation rather than sudden force. The goal is to dislodge, break through, or engage the obstruction without damaging the fixture.
-
Retract the cable slowly. If the auger has caught material, keep it controlled as it returns through the bowl.
-
Watch the water level after removing the auger. Improved movement or a falling level indicates that the obstruction may have shifted or cleared.
Stop if the cable will not advance with controlled use, resistance feels immovable, the tool risks scraping the bowl, or drainage does not improve. A toilet auger works at the fixture and nearby passage. It is not a remedy for every blockage farther downstream.
Verify That the Toilet Is Draining
Do not treat the first downward movement as proof that the toilet is fully clear. Pause and confirm that the bowl returns toward its normal level rather than stopping unusually high.
Once the water has settled, test drainage cautiously by adding water incrementally rather than immediately making another full flush. Watch what happens before adding more. Water that moves through the bowl without causing the level to climb is a positive sign. Water that stalls or rises means the obstruction is still present or only partly cleared.
If the incremental check drains normally and the bowl returns to its usual level, restore the toilet’s water supply if you closed it. You can then consider a normal flush while remaining ready to stop incoming water if the bowl rises unexpectedly.
A successful check has two observable parts: added water drains, and the bowl level returns toward normal. A slow, stalled, or rising level is not a confirmed success. Return to the next appropriate clearing method or stop for professional help rather than risking repeated flushes.
Troubleshooting and When to Stop
When a method fails, use the failure signal to choose the next action. Do not keep repeating a technique that is correctly set up but produces no change.
If plunging moves air around the cup but not water through the drain, rebuild the seal. Confirm that a flange sits in the opening and that its working edge is submerged. If the seal holds but repeated push-pull strokes cause no drainage, the clog may be too stubborn or poorly positioned for the plunger.
If a toilet auger does not improve water movement, stop rather than forcing it farther. Ace Hardware advises professional help when the remaining clog may be deeper in the plumbing. A clog that clears but returns quickly also suggests that the underlying obstruction was not fully resolved.
Change course immediately when:
- You know or strongly suspect that a solid object was flushed.
- The bowl remains full after correct plunging and careful auger use.
- The clog returns soon after apparently clearing.
- More than one fixture is slow, gurgling, or backing up.
- Drain chemicals are already present in the bowl.
Chemicals in the bowl create a different safety condition for plunging, augering, and splash cleanup. Because the supplied evidence does not provide a complete chemical-aftercare procedure, do not add other substances or begin vigorous mechanical work blindly. Follow the product-specific safety directions or tell the plumber exactly what was used.
Consider this worked example: one toilet is clogged, but nearby sinks and showers drain normally. After you establish a proper plunger seal and get no improvement, a toilet auger is the next supported mechanical step. If the auger also fails, stop and call a plumber. Now change one input: one clogged toilet + one slow or gurgling shower = more than one affected fixture. That wider symptom pattern points away from another toilet-only remedy and toward professional assessment of the downstream drain.
Signs the Problem Is Beyond the Toilet
A plunger and toilet auger address obstructions in or near the toilet. When several fixtures are affected, the problem may be farther down the shared drain or sewer line.
Warning signs include:
- Multiple toilets, tubs, showers, or sinks draining slowly or backing up.
- A tub or shower gurgling when the toilet is used.
- Toilet water rising or bubbling when another nearby fixture drains.
- A clog that repeatedly returns after toilet-level clearing.
The Municipal Township of Mount Pleasant Sewer Authority identifies multiple backed-up drains, cross-fixture gurgling, and water appearing in another fixture during use as warning signs of a sewer-line blockage. These symptoms are escalation evidence, not a definitive remote diagnosis of the blockage’s exact location.
If several fixtures are involved, reduce water use rather than testing one appliance after another. Household toilet remedies may not reach a downstream obstruction, and adding more wastewater can worsen an existing backup. Record which fixtures are affected and what actions trigger gurgling or water movement, then give that symptom pattern to a plumber.
Prevent the Next Toilet Clog
Prevention starts with controlling what enters the toilet. Flush human waste and toilet paper only. American Standard’s toilet guidance specifically advises flushing only toilet paper in addition to the toilet’s intended waste.
Keep wet wipes, hygiene products, paper towels, food waste, and solid objects out of the bowl. Even when an item appears small enough to disappear through the opening, that does not establish that it will pass through the toilet and drainage system without contributing to a blockage.
Moderate the amount of toilet paper used in one flush. Scott notes that excessive wadded toilet paper can cause clogs, particularly when the paper is thick. Avoid compressing large amounts into one mass.
The practical rule is consistent: limit the toilet to its intended contents, avoid excessive wadded paper, and retrieve objects before they enter the drain whenever that can be done safely. These habits reduce the common inputs that toilet-level clearing methods are meant to remove.