
Diagnose Pool Heater Problems Like a Drain Clog: Start with Flow and Filters Before Risky Repairs
Fixing a pool heater usually starts with the same mindset that helps with other home-system problems: check the simple upstream causes before you assume the…
By Miles Carver ·
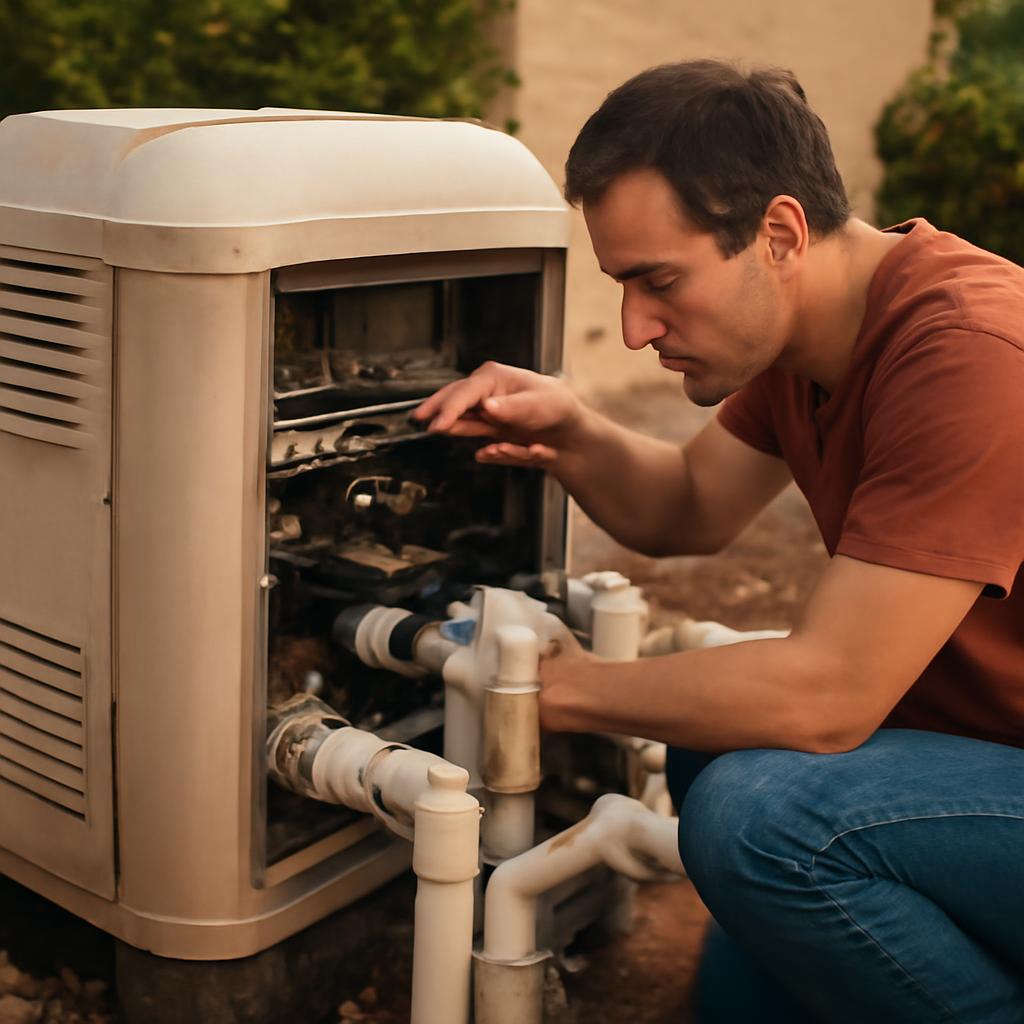
Fixing a pool heater usually starts with the same mindset that helps with other home-system problems: check the simple upstream causes before you assume the appliance itself has failed. Pool heaters depend on adequate water flow, correct settings, and safe fuel or electrical conditions. When one of those inputs is wrong, the heater may shut itself down on purpose rather than keep trying to run (Swimmingpool.com; CWK Air; Angi).
That matters because many apparent heater failures are really circulation or setup problems: a dirty filter, packed skimmer basket, closed valve, badly adjusted bypass, or pump speed that is too low for the heater’s safety controls to engage. Several homeowner guides say most heater failures come from external causes rather than normal usage alone, especially on units that are otherwise in decent condition (Swimmingpool.com; CWK Air).
This article is a symptom-first homeowner overview, not a repair manual. The safe DIY boundary is basic inspection, cleaning, confirmation of flow, and verification of settings. Once the issue points toward gas supply, combustion, venting, live electrical testing, or internal part replacement, the guidance across sources is to stop and call a qualified technician (In The Swim; Angi; Swimmingpool.com).
Understand Pool Heater Types and Failure Basics
Not all residential pool heaters troubleshoot the same way. Broad homeowner overviews commonly group them into gas heaters, electric resistance heaters, heat pumps, and sometimes solar heating systems, and the likely failure pattern changes by type (Aqua Clear Pool Care).
A simple way to separate them is this:
| Heater type | What it relies on most | Common first checks for homeowners | What often limits performance |
|---|---|---|---|
| Gas heater | Water flow, ignition, gas supply, combustion air, venting | Power, thermostat, pump operation, filter/baskets, valves, gas supply on | Ignition or pilot trouble, low gas pressure, venting or airflow issues, safety shutdowns |
| Heat pump | Water flow, power, thermostat, outdoor air temperature, unobstructed airflow | Power, thermostat, filter/baskets, valves, airflow around unit | Cold air, frosting/defrost issues, slow heat rise |
| Electric resistance heater | Water flow, power, thermostat, controls | Power, thermostat, pump/filter/baskets, valves | Electrical or control problems, flow-related shutdowns |
That breakdown is supported across the sources: gas heaters introduce combustion and venting issues; heat pumps depend heavily on outdoor-air conditions; electric resistance units avoid gas-combustion problems but still need correct electrical supply, settings, and circulation (Aqua Clear Pool Care; In The Swim; Angi; Leslie’s).
The heat-pump category deserves special mention because weather can make a healthy unit look broken. Leslie’s says pool heat pumps are ineffective below about 50°F because the refrigerant system can freeze, while Angi notes that some pool heaters may not operate when outdoor temperatures drop below about 60°F. Those are not universal specs for every heater, but they do show why cold air has to be part of the diagnosis, especially for heat pumps (Leslie’s; Angi).
Lifespan also helps with expectations, but not with diagnosis by itself. Swimmingpool.com says a pool heater can last 10 to 20 years with proper use and care, and In The Swim’s Hayward-based guidance frames about 15 years as a practical expectation for many gas heaters. That means a 10-year-old heater is not automatically done, and a newer heater is not automatically healthy (Swimmingpool.com; In The Swim).
The most useful general principle is more modest: start with the common external causes first. Multiple sources point readers to low flow, dirty filters, clogged baskets, closed valves, bad settings, or sensor problems before they jump to major internal damage (CWK Air; The Pool Guy; Swimmingpool.com). That does not mean most failures are always circulation problems. It means circulation, settings, and obvious external conditions are the safest and most productive first checks.
The safety line is firm. Gas heaters involve live flame, combustion gases, and venting. Pool heaters more broadly can involve high-voltage electrical parts in a wet environment. The homeowner-safe scope is inspection, cleaning, and confirming basics; repairs beyond that are repeatedly described as technician work (In The Swim; Angi; Swimmingpool.com).
Symptom 1: Heater Won’t Turn On or Ignite
When a pool heater will not start at all, the safest first checks are basic:
- Confirm the breaker has not tripped and the heater has power.
- Make sure the heater itself is switched on.
- Set the thermostat above the current water temperature.
- Verify the pool pump is running.
- Clean or check the filter.
- Empty skimmer and pump baskets.
- Make sure the required plumbing valves are open.
- If a bypass is installed, make sure water is not being diverted around the heater.
- On gas heaters, confirm the heater gas valve and gas supply valve are on, and that a propane tank is not empty if applicable (In The Swim; Angi; Leslie’s).
That list is more important than it looks. A heater that sees unsafe or inadequate water flow may refuse to fire at all. So a no-start condition is not automatically an ignition failure; it may be the heater correctly refusing to run (CWK Air; In The Swim).
For gas heaters, component-level causes do exist, but they belong in the technician-only possibilities bucket for most homeowners. The sources list low gas pressure, inadequate air supply, improper venting, clogged pilot tubing or orifices, thermocouple trouble, thermostat issues, and gas-valve problems among the common reasons a gas heater clicks, tries, or fails to ignite (In The Swim; Swimmingpool.com). Those are useful explanations for what a technician may be checking. They are not an invitation to start taking apart burners or diagnosing gas pressure yourself.
Error messages can help narrow the problem, but only if you treat them as model-specific clues rather than universal translations. Angi notes common messages such as “Flo” and “Lo/Hi” for flow- or pressure-related issues, while Red Rock Mechanical advises checking the heater manual because code meanings vary by brand and model (Angi; Red Rock Mechanical).
A sensible homeowner response for a no-start heater is therefore limited and clear:
- Verify power.
- Verify settings.
- Verify pump operation and water flow.
- Verify that valves and any bypass are set correctly.
- For gas units, confirm only the obvious external supply basics.
If the heater still will not start after that—or if you smell gas, see scorching, or keep getting the same code—the troubleshooting has crossed into professional service territory (CWK Air; In The Swim; Angi).
Symptom 2: Low or No Heat Despite Running
If the heater runs but the water barely warms, start with flow before you assume the heat exchanger or controls have failed. Multiple sources identify low water flow as one of the most common causes of poor heating, especially when a dirty filter, full baskets, closed valves, or a bad bypass setting prevent the pressure switch from engaging properly (CWK Air; Angi; The Pool Guy).
Angi gives about 40 GPM as a minimum operating benchmark in some cases. That is useful as a rough reference, but it should not be treated as a universal requirement for every heater. Other sources speak more generally about “adequate flow,” so your model documentation still controls (Angi; CWK Air).
The practical takeaway is simple: if the circulation system is restricted, the heater may be protecting itself rather than failing. A dirty cartridge filter or packed skimmer basket can create the same outcome a homeowner experiences as “the heater won’t heat.”
If flow looks good and the heater still will not raise temperature, the next cluster of causes is usually controls and sensing. CWK Air says thermostat or sensor problems can make a heater think the water is already warm, and notes “S” or “SEN” type errors as clues to sensor trouble. Angi and Swimmingpool.com also point to thermostat settings and high-limit or other safety-switch issues among common no-heat causes (CWK Air; Angi; Swimmingpool.com).
There are also cases where the heater is working, but the setup or weather makes the result disappointing. In The Swim notes that an undersized heater, high heat loss, or air that is too cold can keep water from reaching the target temperature even when the heater is operating. For heat pumps, Leslie’s says a healthy unit may still need roughly 24 to 72 hours to raise an average pool by 20°F under favorable conditions (In The Swim; Leslie’s).
That distinction matters because “slow” and “broken” are not the same. Heat pumps in particular are strongly tied to air temperature. Leslie’s says they are ineffective below about 50°F, and CWK Air says most struggle below about 50°F to 55°F (Leslie’s; CWK Air).
For gas heaters, poor heat output can also reflect supply or combustion-side problems. In The Swim lists inadequate gas supply, blocked air intake, improper exhaust, and debris inside the heater among the causes that can reduce output or prevent stable firing. CWK Air adds that pests such as rodents or spiders can damage wires or block small gas passages, which is why inspection for nests or debris should be done with the power off before assuming a major internal failure (In The Swim; CWK Air).
So the homeowner-safe order stays the same:
- Clean the filter and baskets.
- Confirm valves and bypass settings.
- Make sure the pump is moving water strongly enough.
- Check for obvious debris, nests, or airflow obstruction with power off.
- Consider outdoor temperature and realistic heating time for heat pumps.
If those checks do not change the symptom, the next step is service—not deeper gas or electrical diagnosis.
Symptom 3: Shutting Off or Short Cycling
A heater that starts, runs briefly, and then shuts off is often tripping a safety condition rather than randomly malfunctioning. Across the sources, the common themes are overheating, inadequate flow, pressure-switch problems, high-limit shutdowns, or related control issues (Angi; In The Swim; The Pool Guy; Red Rock Mechanical).
Poor flow is still the first thing to suspect. In The Swim lists dirty filters, closed valves, incorrect bypass settings, reversed connections, low pump speed, and pressure-switch issues among common reasons a heater cycles on and off before reaching temperature. Angi also lists dirty filters, thermostat issues, and corroded electrical terminals as possible causes of repeated shutdowns (In The Swim; Angi).
It helps to understand that a heater’s shutdown logic is not based on one single part. Angi describes a safety loop that can involve the pressure switch, high-limit switch, gas valve, thermostat, and pilot-related controls. That means short cycling can reflect a real overheating event, a true low-flow condition, or a failed switch or sensor that only behaves as if one of those conditions exists (Angi).
For homeowners, the response should stay simple and systematic:
- Turn the heater off.
- Clean or backwash the filter as appropriate.
- Empty the pump and skimmer baskets.
- Confirm all required valves are open.
- Make sure a bypass is not starving the heater.
- If you have a variable-speed pump, confirm the speed is not set too low for heater operation.
- Restore power and try a reset only if your model allows it.
Angi says a reset may be done through the breaker panel or disconnect box (Angi). But repeated resetting is not a fix. If the heater restarts and then falls back into the same short-cycle pattern, the problem is still there.
That is the point where continued DIY stops being helpful. A reset can clear a nuisance fault; it cannot correct a dirty filter, a failing pressure switch, a bad thermostat input, poor venting, or a true high-limit condition. If short cycling continues after the circulation checks, the safest next move is a qualified diagnosis (In The Swim; Angi; The Pool Guy).
Symptom 4: Leaks, Noises, or Error Codes
A puddle under a pool heater is not automatically a failed heat exchanger. This is one of the easiest expensive misreads a homeowner can make.
For heat pumps, Leslie’s says normal condensation can reach up to 9 gallons per hour. Its guide suggests checking whether the puddle contains chlorine: if it does not, you may be looking at condensation rather than leaked pool water. In The Swim likewise notes that water appearing only when the heater is firing can sometimes be condensation, though internal bypass issues or excessive flow can also contribute (Leslie’s; In The Swim; Angi).
A real leak becomes more likely when the water is clearly chlorinated, keeps appearing after the unit cools, or traces to a union, drain plug, pressure-switch area, gasket, or the heat-exchanger body. Red Rock Mechanical lists cracked heat exchangers, corrosion, and loose fittings among common leak sources. In The Swim adds that heat exchanger damage can be caused by chemical imbalance or freeze damage (Red Rock Mechanical; In The Swim; Swimmingpool.com).
Unusual noises matter too, but they are clues, not conclusions. Red Rock Mechanical says debris, loose parts, or scale buildup can cause banging or other odd sounds, while In The Swim notes that whistling may point to low gas pressure or clogged orifices (Red Rock Mechanical; In The Swim). The safe homeowner takeaway is not to diagnose the exact failed part from a sound. It is to notice that the sound exists, stop if it is severe, and include it in the service description.
Error codes should be handled the same way. They are helpful clues, but they are not universal across brands. Angi gives examples of flow-related codes, while Red Rock says to consult the heater manual for code meanings (Angi; Red Rock Mechanical). “Flo” may be straightforward, but many other codes are model-specific.
One symptom that should end DIY fast is black exhaust, soot, or a blackened heater top. In The Swim associates those signs with improper combustion, often tied to low gas pressure, poor air supply, venting problems, or debris inside the unit. That is not cosmetic dirt. It is a combustion-safety problem (In The Swim).
Basic DIY Diagnostics and Maintenance Checks
Homeowner-safe troubleshooting is mostly inspection, cleaning, and confirmation. If you stay inside that boundary, you can often tell whether the problem is in the heater itself or in the circulation system around it.
Two rules come first: inspect with the power off when you are opening the cabinet or looking for debris or pests, and never run a heat pump or similar unit without adequate water flow because running dry can cause irreparable damage (CWK Air; Leslie’s).
A useful DIY checklist looks like this:
-
Clean the circulation system first. Clean or backwash the filter as appropriate, empty the pump basket, and clear the skimmer baskets. These are the most repeated first steps in the sources because low flow is such a common heater trigger (Angi; CWK Air).
-
Confirm that water is really moving through the heater. Make sure the required valves are open and any bypass is adjusted so the heater actually gets flow. Angi’s 40 GPM figure is best treated as a rough benchmark rather than a universal spec, but it is still a reminder that the heater needs more than a trickle. On variable-speed systems, very low pump speed can also cause no-fire or cycling problems (Angi; In The Swim).
-
Inspect for pests, nests, and debris. Rodents can chew wires; spiders and insects can block small passages; leaves and nests can interfere with airflow and startup. This is an easy-to-miss cause of “mystery” failures (Swimmingpool.com; CWK Air).
-
Look for visible deterioration. Check for rust, corrosion, scorched areas, water staining, cracked unions, and obviously loose fittings. These signs do not identify the exact failed part, but they do help separate a likely repair candidate from a unit whose structure may already be compromised (The Pool Guy; Red Rock Mechanical).
-
Keep the unit clean and as dry as possible year-round. Swimmingpool.com recommends trimming foliage, keeping the heater clean and dry, sweeping under the burner tray, cleaning leaves from the heat exchanger area, and using off-season protection without trapping moisture. In The Swim similarly emphasizes keeping the heater clean, dry, and protected from rodents (Swimmingpool.com; In The Swim).
If you do those steps and the heater still shows the same symptom, you have learned something useful even if you have not fixed it: the problem is less likely to be a simple circulation or housekeeping issue. That makes the next service call more targeted and usually more worthwhile.
Repair vs. Replace: Cost Thresholds and Signs
The best repair-versus-replace decision is not based on age alone. It is based on age, condition, failed part, and what the next likely failure looks like.
Repair usually makes sense when the heater is still structurally sound and the problem points to a replaceable component, flow issue, sensor, ignition issue, or control-related problem. The Pool Guy makes that exact distinction, and Swimmingpool.com similarly notes that repair becomes less attractive when the needed work involves major components such as the heat exchanger, pilot system, or gas valve (The Pool Guy; Swimmingpool.com).
Replacement becomes easier to justify when the unit is visibly corroded, leaking from the exchanger or body, suffering repeat failures, or simply asking for a major repair on top of age-related wear. That general logic lines up with the broader lifespan guidance of roughly 10 to 20 years with good care, without turning age into a hard cutoff (Swimmingpool.com; The Pool Guy).
The evidence for exact repair pricing is much weaker than the evidence for symptoms and safety, so exact numbers should be handled carefully. One Trouble Free Pool forum thread described minor-part fixes such as igniters or sensors coming in under $1,000, a heat-exchanger replacement quote of about $1,500, a comparable new unit around $3,000, and a professional diagnosis visit around $100. Those figures are useful only as an anecdotal example of how quickly the economics can change between a small-part repair and a major component repair; they are not reliable market benchmarks (Trouble Free Pool).
So the practical homeowner rule is softer than “repair below X, replace above Y”:
- Lean toward repair when the heater is otherwise clean and structurally sound, the problem appears isolated, and the diagnosis points to one replaceable issue.
- Lean toward replacement when the heater has exchanger or body leaks, meaningful corrosion, multiple recent failures, or a repair cost that starts to look large relative to the unit’s age and condition.
A paid diagnosis can still save money even if you expect the answer to be replacement, because it separates a simple external-flow or control problem from a major structural failure.
Safety Rules and When to Stop DIY
This is the most important section because pool-heater troubleshooting gets dangerous faster than many homeowners expect.
Gas heaters involve flame, combustion gases, and venting. In The Swim explicitly says repairs on gas pool heaters should be performed by qualified personnel because the equipment can be hazardous by combustion or exhaust. The same source warns that improper indoor installation can create carbon-monoxide danger and requires correct venting and CO detectors (In The Swim).
Pool heaters also involve high-voltage electrical components. CWK Air warns that these systems combine electricity with volatile gas systems, and Angi notes that electrical troubleshooting around wet equipment is risky and may be better handed off to a professional (CWK Air; Angi).
Stop DIY and call a qualified pool or gas technician when you have any of the following:
- A gas smell
- Soot, black exhaust, or a blackened heater top
- Persistent error codes after cleaning and flow checks
- Water leaking from inside the cabinet or from the exchanger/body area
- Repeated breaker trips
- Severe banging, whistling, or other concerning noises
- Any issue that would require gas-pressure testing, multimeter testing, internal electrical work, or replacement of internal parts such as a gas valve, igniter, control board, pressure switch, or high-limit switch (CWK Air; Angi; In The Swim).
The useful comparison to other home troubleshooting is only the order of operations: check the simple, upstream causes first. The difference is that the stop point comes much sooner here, because pool heaters add combustion and high-voltage risk. In practice, the safest sequence is: confirm power, settings, flow, baskets, filter, valves, bypass, weather limits, visible debris, and obvious damage. If those checks do not solve it, get a real diagnosis before buying parts or a replacement heater (Swimmingpool.com; Angi; In The Swim).
Common homeowner questions:
Does low water flow cause most heater shutdowns?
Low water flow is one of the most repeated causes across the sources, especially for heaters that will not fire, shut down quickly, or show flow-related codes. Dirty filters, clogged skimmer or pump baskets, closed valves, incorrect bypass settings, and low pump speed can all prevent the pressure switch from engaging. It does not explain every shutdown, but it is one of the first things to check (CWK Air; Angi; In The Swim).
How to tell heater condensation from a real leak?
Start with the heater type. On heat pumps, Leslie’s says normal condensation can reach up to 9 gallons per hour and suggests checking whether the puddle contains chlorine. In The Swim also notes that water appearing only while the heater is firing can sometimes be condensation rather than a failed component. If the water is chlorinated, persistent, or clearly tracing to fittings or the exchanger/body area, treat it as a real leak and call for service (Leslie’s; In The Swim).
What is the minimum flow for pool heaters?
One source, Angi, gives about 40 GPM as a minimum operating benchmark in some cases. Because the other sources describe the requirement more generally as adequate flow, the safest reading is that 40 GPM is a rough reference, not a universal spec. Your heater manual remains the final authority (Angi).
Can I fix a pool heater myself if it’s 10 years old?
Sometimes at the basic-check level, yes. A 10- to 20-year lifespan is possible with maintenance, so age alone does not rule out repair. But safe DIY is still limited to cleaning, flow checks, settings, and visible inspection. One forum example described older-heater repairs with minor parts costing less than $1,000, while a major repair such as a heat exchanger around $1,500 pushed the decision closer to replacement near $3,000. Treat those numbers as anecdotes, not pricing guidance. If the unit is structurally sound and the issue is minor, repair may still make sense; if it is rusty, leaking, or stacking failures, replacement becomes easier to justify (Swimmingpool.com; Trouble Free Pool; The Pool Guy).
Why won’t heat pumps work in cold weather?
Because a heat pump transfers heat from outdoor air instead of generating heat directly. When the air gets too cold, there is less usable heat to extract and the refrigerant system can frost or freeze. Leslie’s says heat pumps are ineffective below about 50°F, and CWK Air says most struggle below about 50°F to 55°F (Leslie’s; CWK Air).
Sources
- Third Party · Austin Pool Heater Installation | Heat Pump Installation and Repairs | Aqua Clear Pool Care.
- Troubleshooting Guide · Pool Heater Not Working: 8 Common Issues | Angi.
- Third Party · Common Pool Heater Problems and How to Spot Them | Red Rock Mechanical.
- Third Party · What To Do When Your Pool Heater Stops Working | Swimmingpool.com.
- Third Party · Pool Heater Repair - The Pool Guy.
- Third Party · Gas Pool Heater Troubleshooting | In The Swim.
- Commercial Blog · Why is My Pool Heater Not Heating? 5 Common Culprits.
- Commercial Blog · Pool Heat Pump Troubleshooting Guide.
- Forum Thread · Repair Pool Heater? | Trouble Free Pool.