
Why Adding a Stand Might Make Your Sump Pump Start – Real Reasons and Tests to Run
If your sump pump started working again right after you put a stand, brick, or paver under it, the stand probably did not “repair” the pump in the literal…
By Miles Carver ·
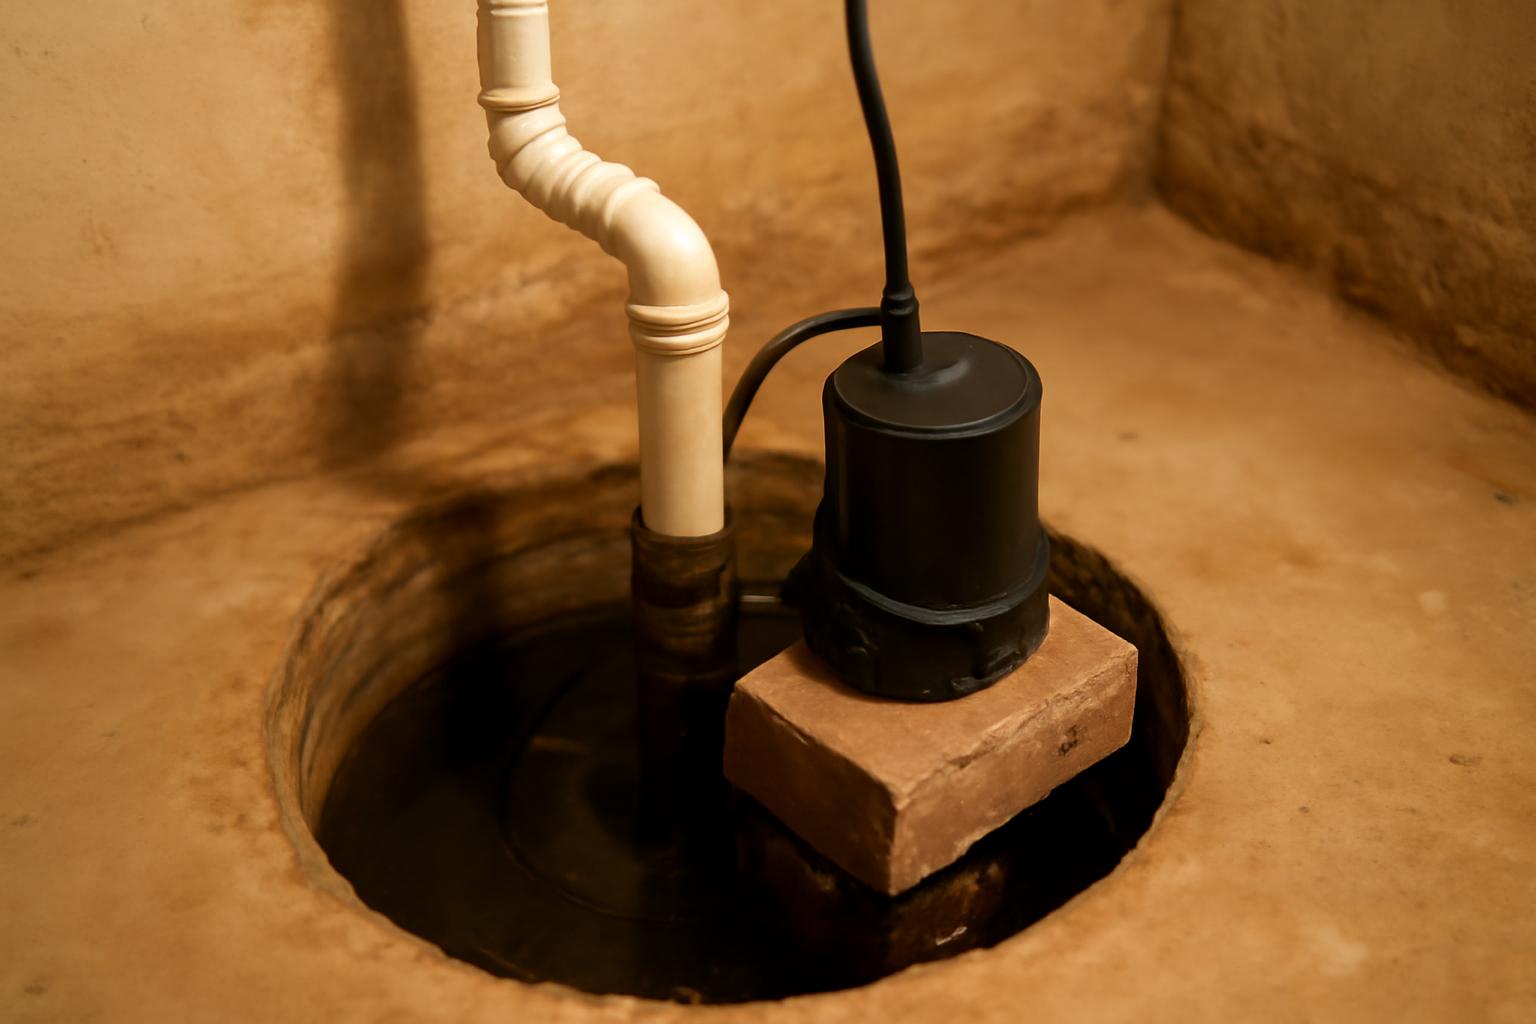
If your sump pump started working again right after you put a stand, brick, or paver under it, the stand probably did not “repair” the pump in the literal sense. In the available installation guidance and homeowner discussions, stands are presented mainly as placement tools: they help keep a pump stable, level, and slightly above loose sediment, but they are not described as a proven fix for an intermittent no-start problem. That framing is consistent with homeowner discussion about stand necessity in Home Improvement Stack Exchange’s sump pump stand thread.
That matters because the next heavy rain is what really counts. A pump that comes back to life after being lifted or re-centered may simply have had a float that was rubbing, sticking, or hanging up in a bad position. If the underlying problem is a sticky switch, worn contacts, weak motor, clogged discharge path, or intermittent power issue, the improvement may be temporary. So the useful way to read this before-and-after moment is not “the stand fixed it,” but “moving the pump changed something important, and now I need to find out what.”
The good news is that this kind of symptom usually points you toward a manageable set of causes. Once you separate those, the mystery gets much smaller.
When to Call a Plumber: The Drain Symptoms That Mean Stop DIYing: Most drain clogs are DIY-fixable in under 30 minutes. These seven symptoms are the exceptions — signs of main-line, sewer, or structural problems that get worse if you wait.
Common Reasons Your Sump Pump Fails to Start
When a sump pump refuses to turn on until you touch it, lift it, or otherwise intervene, the usual causes are still the ordinary ones. The float switch may be stuck or obstructed. The outlet may be dead or the breaker tripped. Sediment or debris may be interfering with the mechanism. Or the pump may have shifted just enough in the pit that the switch can no longer complete its normal travel. Basement Systems specifically lists clogged or jammed float switches, uncovered pits collecting dirt and debris, and pump vibration causing a unit to lean in a way that disables the switch as common failure patterns in the field Basement Systems’ overview of common sump pump problems.
Power problems are easy to underestimate because they can hide behind more obvious mechanical symptoms. If you jiggle the pump and it starts, it is tempting to assume you freed the float. But if the plug was loose, the outlet intermittent, or the breaker previously tripped, handling the pump could also have changed the power connection. That is why a dead outlet or tripped breaker belongs near the top of any troubleshooting list before you assume the motor or switch has failed.
Debris creates trouble in more than one place. It can collect in the pit and physically block the float. It can accumulate near the intake or filter and keep the pump from moving water properly. It can also interfere with the check valve or discharge line, which can make a running pump seem ineffective or inconsistent.
Position is the overlooked category. Some pumps do not stay exactly where they were first set. If that puts the float too close to the wall, discharge pipe, or cord bundle, the switch may hang just enough to prevent activation. From the homeowner’s perspective this feels random: the pump works for weeks, then misses one cycle, then works again after a nudge. But that pattern fits a position-dependent problem very well.
One helpful way to think about it is this: a sump pump can fail to start because it never receives the “turn on” signal, because it receives the signal but has no power, or because it starts yet cannot pump effectively. Those three paths can look similar when you are standing over a pit, but they lead to different fixes. A stand might influence the first path by improving float clearance. It does not directly solve the second or third.
How Float Switch Problems Prevent Activation
The float switch is the most common suspect when a sump pump ignores rising water. Its job is simple in principle: as the water rises, the float rises with it and triggers the pump. In real sump pits, though, the float can snag on grime, rub the basin wall, catch on a cord, hit the discharge pipe, or stick after a long dry period with little movement. Basic troubleshooting guidance for pumps that will not start after dormancy specifically points homeowners toward stuck, tangled, or obstructed floats and recommends a careful manual float-lift test as an early check, with the warning not to force the float or hold it up for more than a few seconds Comfort Air’s sump pump troubleshooting guide.
That is why “it works when I lift it myself” does not fully clear the float system. Manual lifting tells you something important, but it is only one part of the diagnosis.
The switch design also affects what you should watch for. On a float that travels along a guide or rod, inspect the float’s full path for rubbing or buildup. On a piggyback-style or corded float arrangement, make sure the cord has not become a snag point and that the float has room to move without tangling. On a pump with an integrated switch housing, an intermittent start that responds to tapping can point more toward internal switch parts than toward basin clearance alone. The exact design differs by pump, but the diagnostic theme is the same: the trigger must move fully and consistently without obstruction.
That is where the well-known “tap test” becomes useful as a clue, not a fix. In a Home Improvement Stack Exchange case, the homeowner described a pump that often needed the switch housing tapped before it would start, even though manual float lifting made the unit run. Suggested causes included sticky relay or snap-switch parts, dirt or corrosion in the mechanism, and burned or pitted contacts rather than a dead motor. It is still forum evidence, not a controlled technical bulletin, so it should be treated cautiously. But it does illustrate a pattern many homeowners recognize: if tapping the housing wakes the pump up, the problem may be inside the switch assembly rather than below the pump the Stack Exchange discussion about pumps that need tapping to start.
Cheaper models may be more prone to stuck switches, according to the Basement Systems overview cited earlier, but the practical takeaway is broader than brand. A float system can fail at three different points: physical float travel, mechanical transfer inside the switch assembly, and the electrical contact that finally powers the motor. A stand may affect the first of those. It does not directly repair the second or third.
Why Repositioning During Stand Install Might Restart the Pump
Yes, moving the pump to add a stand may have been exactly what brought it back to life. Installation guidance commonly says the pump should sit on a level, solid base and that its components—especially the float switch—should not contact the sides of the basin. If handling the pump restored that clearance, the result could easily look like the stand “fixed” the problem even though what really changed was float travel Valu Home Centers’ sump pump installation guide.
It helps to separate three different effects that people often lump together under “adding a stand.” The first is elevation above loose sediment. The second is leveling the pump on a hard surface. The third is simple repositioning: moving it a little away from a wall, pipe, or debris pocket.
That is also why a pump may seem to recover after a nudge, a twist, a lifted float, or even a light tap. All of those actions can alter geometry or free a sticky part. They do not prove that the pump is now trustworthy. They only tell you that position or switch movement is involved somewhere in the chain.
What the available evidence does not show is reliable support for the idea that a small amount of elevation by itself cures intermittent startup failures. The stand discussion in homeowner forums is mostly about debris avoidance, stability, and whether a commercial stand is necessary at all. That is useful context, but it is very different from a proven repair theory. So if your pump began working after you installed a stand, the safer interpretation is that the installation process changed alignment or clearance.
The next step, then, is not to admire the stand. It is to confirm repeatability. If the pump now activates on its own through several normal water-rise tests, the new position may genuinely have solved a clearance problem. If it misses even one cycle unless touched, the underlying fault is still present.
The Role of a Solid Base Under Your Sump Pump
A solid base under a sump pump is still a good idea—just not for the magical reason people sometimes assign to it. The best-supported arguments for bricks, concrete, or a purpose-made stand are stability and debris control. Installation-oriented guidance says the pump should sit on a hard, level bottom rather than directly on earth or loose gravel, which can contribute to impeller wear or jamming. Ferguson’s installation guide also gives useful basin benchmarks: about 22 inches deep, more than 14 inches in diameter, and 18 inches recommended for better float travel Ferguson’s sump pump installation guide.
That guidance lines up with the practical case for a stand or brick. A hard, level base reduces the chance that the intake will sit directly in grit. It gives the pump more stable footing. Those are preventive benefits, not emergency repairs.
You do not need to turn that into a universal rule that every sump pump requires a branded stand. The available homeowner discussion is mixed. Some people report years or even decades of normal service with pumps sitting directly on the pit bottom. Others prefer a brick or stand to keep the intake off sediment. Some pumps also have built-in feet that already lift them slightly. So the stronger takeaway is not “a stand is mandatory.” It is “the pump needs a stable, level, debris-minimizing setup with enough room for the switch to work.”
That means bricks can often do the job just fine if they are stable, level, and do not interfere with the float or intake. A commercial stand may look neater or fit a particular model better, but the core function is the same: create good footing and preserve switch clearance.
In other words, a base is best thought of as part of good installation practice. It can reduce future problems and may indirectly expose or relieve a positioning issue. It should not be treated as a substitute for diagnosing a sticky switch, a bad outlet, or a blocked discharge line.
Pedestal Pumps and Startup Movement Issues
Pedestal pumps deserve separate treatment because their layout changes the troubleshooting picture. Unlike submersible pumps, the upper motor assembly is above the pit, which makes the unit easier to inspect, easier to service, and easier to notice if it starts making unusual noise or vibrating excessively. The tradeoff, according to a commercial overview of pedestal pumps, is that they are more exposed, need space around them, and can be noisier in use Custom Care Plumbing’s overview of pedestal pump pros and cons.
What we can say with confidence from the evidence pack is narrower than many broad online claims. There are forum examples of pedestal pumps moving, twisting, or tipping during operation in tight pits, and forum replies suggest wider bases, boards across the pit, straps, or other restraints as possible stabilization methods. But that is still anecdotal evidence, so it should be treated as setup-specific illustration, not proof that pedestal pumps generally behave that way in all installations. A DIY Chatroom thread, for example, describes one pedestal pump that knocked itself over on startup, but it does not establish how common that is across brands or pit designs the DIY Chatroom discussion of a pedestal pump tipping on startup.
The most careful conclusion is this: if you have a pedestal pump in a small or awkward pit and the unit visibly shifts on startup, stability becomes a real installation issue. Movement can reduce float clearance, bring the unit closer to the wall, or leave the pump operating in a bad position. In that situation, a wider or more secure base may matter more than it would for some submersible setups.
That does not mean startup movement is the default explanation for every pedestal problem. Nor does it mean a stand cures electrical or switch faults. It simply means that, for pedestal models, physical stability deserves special attention because the motor assembly is exposed and the unit’s position is easier to disturb.
There is one more practical distinction worth keeping in mind. Because the working parts are more visible, pedestal pumps make some problems easier to spot early. If the unit starts vibrating more than usual, scraping, twisting, or operating louder than normal, you are more likely to notice it before the next storm reveals the problem the hard way.
Step-by-Step Tests After Your Pump Starts
Once the pump begins working again, do not stop at “great, fixed.” This is the moment to test it while the failure is still fresh in your mind. Start with electricity. Confirm the plug is fully seated, test the outlet with another device if you are unsure, and check or reset the breaker if the pump was completely dead. If your pump has two cords, basic troubleshooting guidance says you may be able to test the pump cord separately to listen for humming; if it has a single cord, a water-rise test is the more appropriate basic check WaterSmart’s sump pump troubleshooting guide.
After power, move to a realistic activation test. The best homeowner test is usually to pour water into the pit and watch the pump cycle automatically. That shows more than a manual float lift because it lets you see whether the float rises naturally without rubbing, whether the pump starts without your hand on it, and whether the unit shuts off correctly at the end of the cycle. A manual float-lift test can still be useful, especially after a long dry spell, but it should be brief and gentle rather than a prolonged forced run.
Before touching anything inside the basin, unplug the pump, and never run it dry. Those are not optional cautions. Ferguson’s installation guidance also says never use an extension cord, that the outlet should be on a dedicated circuit, and that the receptacle should be at least 4 feet off the floor, with typical pump cords in the 8- to 10-foot range Ferguson’s safety and installation guidance.
As you test, inspect the pit itself. Remove obvious debris. Look for stones, sludge, cord loops, or anything else that could block float travel. If the basin is dirty enough that you cannot clearly see how the float moves, you do not really know whether the problem is solved.
Then inspect the discharge side. A motor that runs is not enough; the water level should drop in a normal, convincing way. If the pump starts but water leaves slowly, look toward the discharge line, the check valve, or internal clogging rather than assuming the startup issue is over. Installation guidance also recommends a 1/8-inch relief hole drilled 1 inch above the pump flange to help prevent air lock, and says to test the system by filling the sump to the level that normally triggers activation rather than running the pump without water Valu Home Centers’ installation instructions.
A good post-repair check is to watch for four specific things:
-
Does the float rise freely without rubbing? Watch the full path, not just the top or bottom of travel.
-
Does the pump start without being touched? If you still need to bump, twist, or tap it, the fault is still intermittent.
-
Does the water actually leave the pit at a normal pace? A running motor is only half the job.
-
Does the pump shut off normally? A float that turns the pump on but fails to turn it off creates a different reliability problem.
If you want an even clearer decision tree, use this one:
- Manual float lift starts the pump, but a natural water rise does not: suspect float travel, cord interference, pit clearance, or a switch that only fails in normal motion.
- Neither manual lift nor a natural water rise starts it: move back to power, switch failure, or motor problems.
- The motor runs but the water does not leave well: investigate the discharge line, check valve, intake clogging, or pump internals.
That kind of repeatable testing tells you much more than the one dramatic moment when the pump happened to wake up after you installed the stand.
Preventing Future Sump Pump Failures
The most effective prevention is not glamorous: keep the pit cleaner, keep the pump positioned well, and reduce the number of ways the float can get into trouble. If the sump basin is open, dirt and stray debris can accumulate over time. Basement Systems specifically warns that uncovered pits tend to collect dirt and debris, and that buildup can clog or jam the switch area and other pump parts. Basement Systems’ article on common sump pump failures.
The installation details matter too. Ferguson’s guide says the pit should ideally be about 22 inches deep, more than 14 inches in diameter, with 18 inches recommended for better float movement. It also says cords should be secured so the highest zip tie stays below outlet height, a weep hole should be used in the discharge line to reduce air-lock risk, and a check valve older than about 5 to 7 years is a sensible replacement candidate during pump work Ferguson’s installation benchmarks and maintenance details.
That sounds like a pile of small details, but they all tie back to reliability:
- A cleaner basin means fewer switch snags and fewer intake clogs.
- A stable, level pump base means less shifting and less float interference.
- Tidier cord routing means fewer opportunities for tangles.
- A healthy discharge path and check valve mean the pump can actually empty the pit once it starts.
- A backup plan for outages matters because a perfect pump is still helpless with no power.
Seasonal testing is especially important after long dry periods. A pump that sits idle for months is exactly the kind of pump that may surprise you with a sticky float or unnoticed power problem the next time heavy rain arrives. Testing before the wet season is easier than diagnosing a failure while water is rising.
This is also the best place to put the stand in perspective. A stand belongs under “good setup” and “future prevention.” It helps create a better operating environment. That is worthwhile. It just is not proof that the underlying no-start condition has been permanently repaired.
Signs You Need a Professional Inspection
DIY troubleshooting makes sense up to a point. After that, the issue becomes less about convenience and more about flood risk. If the pump passes several water-rise tests cleanly, you may have been dealing with a float-position issue that repositioning genuinely solved. But if the behavior remains inconsistent, the safer assumption is that the failure is still there.
One red flag is a pump that runs but does not move water effectively. That can point away from the float and toward the discharge line, check valve, or internal pump problems. In a DoItYourself forum case about a pedestal pump, the unit ran but failed to pump because a loose check-valve disk had broken free and was blocking discharge. That is only one anecdotal example, not a universal diagnosis, but it is a useful reminder that “I hear the motor” and “the system is working” are not the same thing the DoItYourself forum discussion on securing a pedestal sump pump.
Professional help is a smart next step if any of the following are true:
- The pump fails repeated water tests even after cleaning and repositioning.
- The float seems to move freely, but the pump still only starts when tapped or manually forced.
- The pump runs but the water level barely drops.
- The basin is so tight that the float has little room to travel.
- The unit overheats, trips power repeatedly, or shows wiring damage.
- A pedestal pump continues to shift or tip despite reasonable attempts to stabilize it.
There is also a practical repair-versus-replace threshold. If the problem appears confined to a replaceable float or snap-switch assembly, some pumps may justify that repair. If the switch is not separately serviceable, the contacts are failing, or the pump is already behaving like a disposable sealed unit, replacement may be the more realistic answer. Basic homeowner testing can point you in that direction, but it usually cannot settle it with certainty.
The bottom line is repeatability. One lucky restart after moving the pump is not the same thing as a pump you can trust through a storm. If you cannot get consistent, automatic cycling without touching the unit, do not assume the stand solved it.
A short way to summarize the whole issue is this: the stand may have helped, but probably by changing the pump’s position, level, or float clearance—not by curing the pump. Treat the restart as a clue, run repeatable tests, and keep troubleshooting until the pump proves it can cycle on its own every time.
Will manually lifting the float tell me if the pump motor works?
It can tell you something useful, but not everything. If you briefly lift the float and the pump starts, that usually shows the motor will run when the switch is actuated, which points suspicion toward float travel or switch behavior rather than a totally dead motor. But it does not prove the pump will cycle normally during a real water rise, and it does not rule out an intermittent switch fault. That is why homeowner troubleshooting advice pairs a manual lift with a normal water test rather than treating manual lifting as a complete diagnosis Comfort Air’s guidance on careful float testing.
Can bricks replace a commercial sump pump stand?
Often, yes. The evidence supports the basic idea that a hard, stable, level base—whether that is brick, concrete, or a purpose-made stand—can help keep the pump out of loose sediment and improve stability. The important question is not branding. It is whether the base is solid, level, and leaves full room for the float and intake to work properly. That is the practical conclusion reflected in the homeowner discussion about stand necessity cited earlier.
Why does my sump pump need tapping to start?
In the Stack Exchange example discussed above, tapping the switch housing could wake the pump up even when the float appeared to move and manual lifting made the unit run. Suggested causes included a sticky relay, dirty or corroded contacts, or a failing float or snap-switch assembly. Tapping may jostle the bad part into working temporarily, but it is not dependable repair the Stack Exchange thread on tapping a sump pump to make it start.
Does a lid on the sump pit prevent switch clogs?
It can help reduce them by keeping dirt and debris out of the basin. An uncovered pit is simply more exposed to the dust, grit, and stray material that can eventually work its way into the float switch area or other pump parts. A lid will not rescue a worn switch, but it is a sensible prevention step if your basin is open and tends to get dirty Basement Systems’ warning about uncovered sump pits and debris buildup.
Are pedestal pumps more likely to tip without a base?
They can be harder to stabilize in some tight or awkward setups, but the evidence here is mostly anecdotal, so it is better not to overgeneralize. Forum reports describe pedestal pumps that twist, move, or tip during operation and suggest wider bases or restraints, while other commenters say a properly placed unit on a solid base should remain stable. The safest takeaway is practical rather than universal: if your pedestal pump visibly shifts on startup, treat stability as a real installation issue and correct it before trusting the system.