
Understanding Septic Tank Risers for Easier Home Septic Maintenance
If your septic tank has to be uncovered every time it is pumped or inspected, a septic tank riser is the retrofit designed to fix that problem. In plain terms,…
By Miles Carver ·
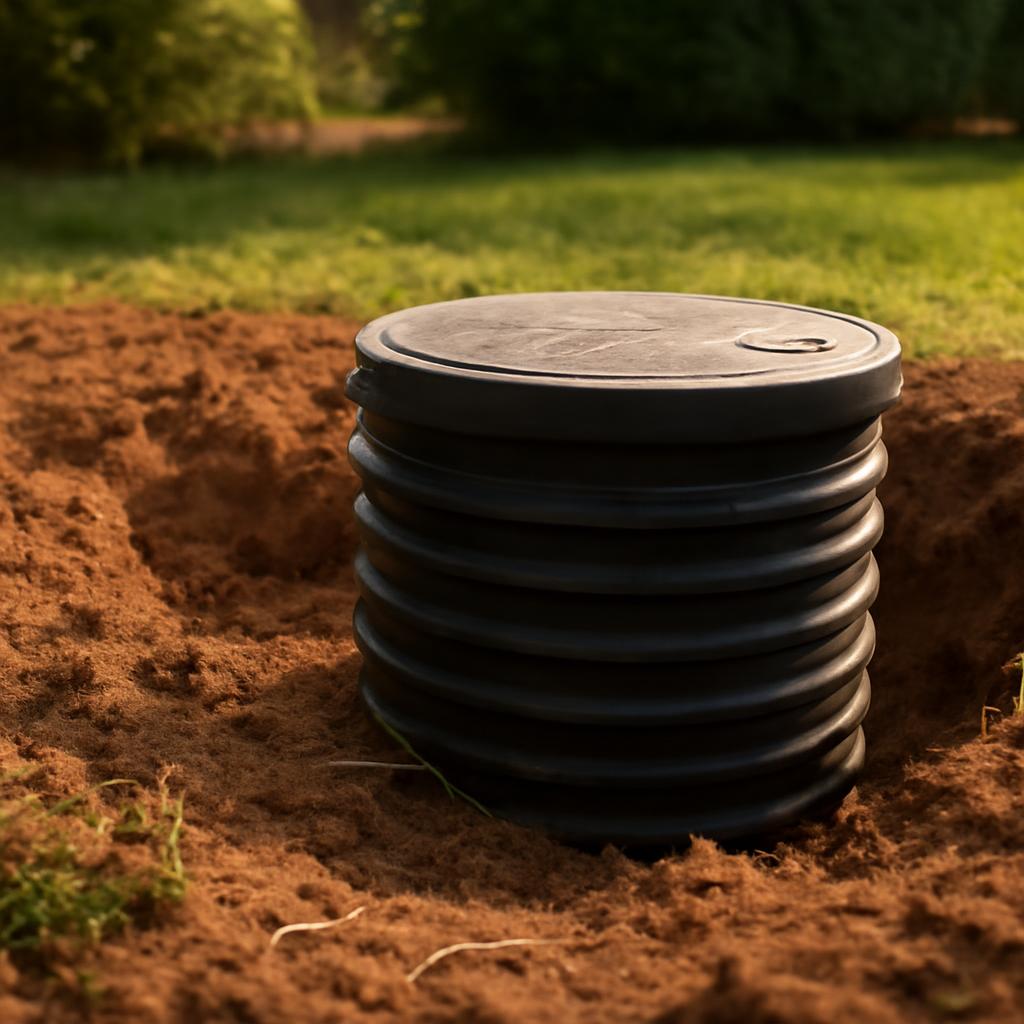
If your septic tank has to be uncovered every time it is pumped or inspected, a septic tank riser is the retrofit designed to fix that problem. In plain terms, a riser extends a buried septic access opening up to ground level so the tank can be opened without repeated digging. Multiple homeowner and seller guides describe risers this way, and several note that buried lids on older systems are commonly around 6 to 24 inches below grade or, in other summaries, 12 to 24 inches below grade (Fresh Water Systems; D&H Septic; The Septic Guide; Van Delden Wastewater Systems).
That convenience is the main reason homeowners add risers, but the job is more than dropping a plastic collar in the ground. Fit, sealing, lid security, burial depth, and site safety all matter. So does knowing when a straightforward shallow retrofit may be reasonable for a careful homeowner and when the safer move is to call a septic contractor.
What Are Septic Tank Risers?
A septic tank riser is a large-diameter vertical extension installed over a septic tank access opening so the opening reaches the surface for pumping, inspection, and related service (Fresh Water Systems; Ability Septic; D&H Septic). The tank itself does not change. The riser simply turns a buried access point into one that can be reached at grade or near grade.
For many homeowners, that is the whole value proposition: easier access. Instead of a service crew locating lids, digging them up, and then starting the actual septic work, the lid is already reachable.
Most residential retrofit systems in the evidence are plastic or polyethylene rather than concrete. That does not mean concrete risers no longer exist; several sources say both materials are used. But plastic is repeatedly presented as the more common retrofit choice for homes because it is lighter and easier to handle (Ability Septic; Van Delden Wastewater Systems; D&H Septic). Aero-Stream, for example, says its plastic riser rings typically weigh less than 30 pounds and its covers less than 10 pounds, in contrast to much heavier concrete components used in the same role (Aero-Stream).
A typical residential riser kit commonly includes:
- an adapter ring or base flange,
- one or more riser sections,
- a lid,
- sealant such as butyl rope,
- and fastening hardware such as screws (Septic Solutions; Fresh Water Systems; D&H Septic).
Septic Solutions, for instance, describes its complete Polylok packages as kits for existing concrete tanks (Septic Solutions). That matters because the basic concept is universal, but the parts are not. Opening size, tank material, opening shape, adapter style, and brand-specific connection details can all affect whether a kit will fit.
The useful homeowner takeaway is simple: a septic tank riser is an access extension, not a universal one-size-fits-all part.
Do You Need a Septic Tank Riser?
You should consider a riser when your septic lids are buried deeply enough that every pumping or inspection starts with locating and digging. Multiple homeowner-facing sources describe that as the classic use case, and they place many buried lids in roughly the 6- to 24-inch or 12- to 24-inch range on systems without risers (The Septic Guide; Van Delden Wastewater Systems; Fresh Water Systems).
Older systems are the usual candidates. Several sources say many newer septic installations already include risers, while older tanks, especially older concrete tanks, often do not (Fresh Water Systems; Ability Septic; The Septic Guide). If your home is older and nobody can identify the lid location without probing records or digging, buried access is a strong possibility.
Common signs a riser would help include:
- pumping crews spending time locating the lids before work can begin,
- repeated digging that damages grass or landscaping,
- maintenance being postponed because access is inconvenient,
- or slower response during service calls because the tank opening is not immediately reachable (Ability Septic; Van Delden Wastewater Systems).
Not every tank needs one. If the access lid is already exposed or already sits at grade, the main benefit of a riser may already be present. In that case, a homeowner might still replace or add a riser for a better seal, a different lid style, or easier long-term service, but it is no longer the obvious fix for buried access.
It is also worth confirming how many service openings your tank has before you buy anything. Some homeowner guides say residential tanks commonly have two access points, often described as inlet and outlet openings (The Septic Guide). If you are considering only one riser at first, ask your pumping company which opening they need most often on your specific system, especially if the tank has an effluent filter that is serviced through one access point. That is a practical planning question, not a universal rule.
A good pre-purchase checklist is:
- Are the lids buried?
- How deep are they below grade?
- How many access openings need service?
- Is the tank top and opening in sound condition?
- Do you want a full retrofit kit or only additional riser sections?
Those questions matter more than brand names.
Types and Sizing Septic Tank Risers
Most homeowner shopping comes down to four variables: opening diameter, total height to grade, opening shape, and lid type.
The common residential diameters shown across retailer listings and homeowner guides are 16-inch, 20-inch, and 24-inch. In the evidence, 20-inch appears most often for residential use, 24-inch is common on larger openings, and 16-inch appears more often on smaller or older access ports (Wholesale Septic Supply; The Septic Guide; Home Depot).
Many systems use stackable sections to match burial depth. Seller listings in the evidence show kits and components spanning shallow extensions through roughly 26 inches in common 20- and 24-inch systems, while Aero-Stream’s 24-inch system is offered from 7 inches to 50 inches tall in 3-inch increments (Septic Solutions; Wholesale Septic Supply; Aero-Stream).
The most important sizing step is measuring the actual tank opening with the cover removed. Multiple guides say measurement should be taken directly at the tank, not guessed from memory or based on what a neighbor used (Aero-Stream; D&H Septic; Fresh Water Systems). Some seller and homeowner guides also suggest moving up to the next standard size when the opening falls between standard sizes. Fresh Water Systems gives 22 inches to 24 inches as an example (Fresh Water Systems).
For non-round openings, measurement can be more brand-specific. Van Delden says diagonal measurement can help with square or rectangular openings, while Aero-Stream says its base flange fits round or square openings up to 24 inches (Van Delden Wastewater Systems; Aero-Stream). Treat that as a compatibility check, not a universal shortcut. When the opening is not a simple round port, matching the adapter to the tank matters as much as nominal diameter.
Lid options vary too. Retail and manufacturer pages show:
- flat lids,
- domed lids,
- standard lids,
- heavy-duty lids,
- and, on some product lines, safety barriers or safety lids (Wholesale Septic Supply; Septic Solutions; Aero-Stream).
That is why “I need a 20-inch riser” is not a complete shopping decision. Before buying, confirm:
- exact opening diameter,
- opening shape,
- depth from tank top to finished grade,
- whether you need a brand-specific adapter,
- whether the kit includes a lid,
- whether sealant and hardware are included,
- and whether the lid style matches how the area will be used.
If you want one simple rule from this section, it is this: measure first, buy second.
Septic Tank Riser Costs
Riser pricing gets confusing when shoppers compare unlike items. A single riser ring, a complete kit, and a full installed job are three different things.
For complete residential retrofit kits, the evidence supports a broad planning range of about $100 to $400 depending on diameter, height, lid style, and whether the package includes the adapter, lid, sealant, and hardware (The Septic Guide; Septic Solutions; Wholesale Septic Supply). Big-box and marketplace listings fall into that same general band, but those listings are snapshots that vary by seller, bundle contents, shipping, and date captured (Home Depot; Amazon).
If you are buying components separately, entry pricing can be much lower. Drainage Direct lists individual riser sections from $39 to $95, plus a $5 gasket for certain 24-inch parts (Drainage Direct). But a low section price does not equal a finished installation cost. Once you add an adapter, lid, sealant, hardware, and possibly additional sections, the total can move closer to full-kit pricing.
Professional installation varies more than parts cost. Several service-oriented sources place typical professional installation around $300 to $400, while D&H Septic gives a wider Georgia planning range of $250 to $650 tied to tank depth, number of access ports, and soil conditions (Fresh Water Systems; Van Delden Wastewater Systems; D&H Septic).
For budgeting purposes, it helps to break the job into three buckets:
- Parts only: sections, lid, adapter, sealant, hardware.
- Digging and installation labor: locating, excavating, cleaning, fastening, sealing, backfilling.
- Site variables: deeper burial, poor access, multiple openings, difficult soil, and any local requirements.
That is more durable than memorizing a few product listings that may change next month.
DIY Installation Steps for Septic Tank Risers
A homeowner can install a septic tank riser in some situations, but the best evidence-supported description is that the project is challenging rather than casual. Angi rates it as challenging, estimates about 1 day, and gives a project cost range of $100 to $500 depending on the kit and circumstances (Angi).
The commonly listed tools and supplies are straightforward:
- shovel,
- soil probe,
- measuring tape,
- electric drill,
- wrench,
- broom or brush,
- wire brush,
- butyl sealant rope,
- and the riser kit itself (Angi; D&H Septic).
The basic installation sequence is fairly consistent across homeowner guides and product tutorials:
- Locate the tank and expose the opening. Use any available records, prior service information, or professional help if the location is uncertain. Dig carefully enough to uncover the access point without damaging the area around it (D&H Septic; Angi).
- Remove soil and clean the tank rim. The sealing surface needs to be free of dirt and debris for the adapter or base to sit properly (Angi; Fresh Water Systems).
- Measure the opening and burial depth again. Confirm fit before fastening anything (D&H Septic; Aero-Stream).
- Apply sealant and install the adapter ring or base flange. Multiple guides mention butyl rope or similar sealant to help create a watertight connection, followed by screws or other approved fasteners (Fresh Water Systems; D&H Septic; Angi).
- Add the riser sections needed to reach grade. Use manufacturer-approved sections and stacking method for the system you bought (Septic Solutions video; Aero-Stream).
- Secure the lid. Follow the product instructions for screws, twist-lock features, or other lid fasteners (Angi; Fresh Water Systems).
- Backfill gently. Fill around the riser enough to stabilize it without forcing it out of position or stressing the assembly (D&H Septic).
Final height is not perfectly uniform across sources. Angi says risers are commonly set flush or slightly above ground, while Aero-Stream says its watertight kits may be positioned above, at, or below grade (Angi; Aero-Stream). The practical takeaway is to follow the product instructions and any local requirements rather than assuming one height works everywhere.
A few buying and install cautions are worth keeping together:
- Do not assume one brand’s adapter fits another brand’s riser.
- Do not assume a “kit” always includes the same parts.
- Do not assume every riser can be cut on site. Angi discusses cutting rings in a general DIY context, but Aero-Stream explicitly says its risers cannot be cut or altered on site (Angi; Aero-Stream).
If you want to see the sequence before buying, the Septic Solutions Polylok installation video shows the basic retrofit concept. It is useful for understanding the process, but it is not a substitute for confirming fit on your own tank.
Safety and DIY Thresholds for Riser Installation
This is the part of the topic where homeowners should be conservative.
Even though a riser is a relatively simple product, the work exposes you to a septic tank opening. The hazards called out across the evidence include toxic or unpleasant sewage fumes, heavy or awkward lids, digging near buried utilities, and the risk of leaving an open tank unattended (Fresh Water Systems; Angi). Fresh Water Systems specifically says not to work alone and not to leave the tank open, while Angi advises checking for utility lines before digging and using safety gear such as gloves, goggles, and a respirator mask (Fresh Water Systems; Angi).
- the lid location is already known,
- the access opening is shallow,
- the tank top appears sound,
- the soil is easy to excavate,
- and the riser kit clearly matches the opening (D&H Septic).
D&H Septic recommends professional help for deeper tanks, damaged openings, noticeable odors, leaks, and difficult soil, and that guide uses burial deeper than about 2 feet as a practical point where professional help becomes more advisable (D&H Septic). That is not a universal legal threshold, but it is a reasonable caution from a service guide.
Professional installation is the better call when:
- the lid is deep or hard to locate,
- the tank opening is cracked, uneven, or deteriorated,
- odors or moisture suggest sealing problems,
- the soil is unstable or wet,
- utilities may be in the dig area,
- or local rules require a particular installation method or professional involvement (Fresh Water Systems; D&H Septic; The Septic Guide).
On code questions, the evidence only supports a cautious answer: requirements vary. Some seller and service guides say certain states or municipalities may require risers or may affect whether professional installation is needed in some situations, but the evidence pack does not establish one national rule (Fresh Water Systems; Ability Septic; The Septic Guide). In practice, that means checking local septic rules before you buy or dig.
After installation, do not assume the job is done forever. Fresh Water Systems and D&H both recommend periodic visual checks and keeping the access area clear (Fresh Water Systems; D&H Septic). If you notice movement, water intrusion, or odor, that is a reason to stop treating it like a DIY detail and get the installation checked.
Maintenance and Common Riser Issues
A properly installed riser is low-maintenance, but it still needs periodic attention.
Fresh Water Systems recommends annual checks and specifically warns about mower damage, mulch buildup, and plants around the riser (Fresh Water Systems). Aero-Stream gives more frequent brand-specific guidance for its own system, recommending cover inspection about every 6 months and cover replacement every 3 years (Aero-Stream). That replacement interval should be read as manufacturer advice for that product line, not as a universal rule for every riser.
The most common warning signs are practical and visible:
- septic or sewage odor near the lid,
- signs of leakage or water intrusion,
- a riser that has shifted or no longer sits level,
- or wet or pooling ground around the access point (D&H Septic).
Two cautions matter here.
First, avoid heavy loads. Aero-Stream explicitly warns against heavy loads or traffic over its risers (Aero-Stream). More broadly, many retail listings emphasize size and price but do not provide detailed traffic or load ratings (Home Depot; Wholesale Septic Supply).
Second, remember what a riser can and cannot fix. If the only problem is buried access, a riser helps a lot. If you have sewage odor, surfacing wastewater, wet ground away from the lid area, or broader system symptoms, the issue may be beyond the access point. DrainFinder’s own guide to drain field replacement cost notes that wet ground, sewage odors, backups, and surfacing wastewater can indicate larger septic or field malfunctions that need professional diagnosis rather than an access retrofit.
A riser makes regular pumping and inspection easier. It does not replace either one.
Brands and Availability
Septic tank risers are sold through specialty septic suppliers, big-box retailers, and major marketplaces. In the evidence, recurring brand names include Polylok, Tuf-Tite, VPC, Aero-Stream, and Norwesco (Septic Solutions; Wholesale Septic Supply; Home Depot; Amazon).
That availability is helpful, but it can also mislead shoppers because similar-looking listings may be very different products. Depending on the seller, you may be looking at:
- a complete retrofit kit,
- only an extension ring,
- only a lid,
- a system intended for an existing concrete tank,
- or a brand-specific diameter and adapter format (Septic Solutions; Aero-Stream; Home Depot).
A few examples of how product lines differ:
- Septic Solutions’ complete Polylok packages are marketed for existing concrete septic tanks (Septic Solutions).
- Aero-Stream centers its riser system around a 24-inch format (Aero-Stream).
- Wholesale Septic Supply’s Tuf-Tite offerings span 16-, 20-, and 24-inch kits with different heights and lid options (Wholesale Septic Supply).
- Big-box and marketplace pages mix brands, bundle types, and component listings in the same results, which makes comparison shopping harder (Home Depot; Amazon).
So there is no single universal “best” riser supported by this evidence. The right choice depends on compatibility with your tank opening, required height, included parts, and lid style. For homeowners, fit matters more than brand familiarity.
What diameter riser do I need for my septic tank?
Measure the actual tank opening first. The common residential diameters in the evidence are 16, 20, and 24 inches, with 20 inches appearing most often and 24 inches common on larger openings (The Septic Guide; Wholesale Septic Supply). Some guides suggest going to the next standard size up if your measurement falls between standard sizes; Fresh Water Systems uses 22 inches to 24 inches as an example (Fresh Water Systems). For square or non-round openings, confirm the adapter requirements carefully because fit may depend on more than diameter alone (Aero-Stream; Van Delden Wastewater Systems).
Are septic tank risers required by code?
Not everywhere, and the evidence does not support one nationwide answer. Some homeowner and seller guides say local rules can vary by state or municipality and may affect whether risers are required or whether professional installation is expected in some cases (Fresh Water Systems; Ability Septic). The safe homeowner move is to check local septic rules before replacing lids, changing access height, or exposing the tank as part of other work.
Can I install a riser during septic pumping?
Usually yes, and several service-oriented sources describe that as a practical time to do it because the tank opening is already exposed and can be measured and inspected at the same visit (Ability Septic; D&H Septic). It can also reduce duplicate digging if the service company is already on site.
Plastic or concrete risers for homes?
For residential retrofits, plastic is the more common choice in the evidence because it is lighter and easier to handle. Several sources describe plastic or polyethylene risers as common for homes, while concrete remains an option but is heavier and less DIY-friendly (Ability Septic; Van Delden Wastewater Systems; Aero-Stream; D&H Septic). The right choice is the one that fits your tank opening, required height, and installation plan.
How to locate a buried septic tank lid?
For a more detailed walkthrough, see how to find a buried septic tank.
Start with any site plan, as-built drawing, inspection record, or prior pumping record you have. If the location is uncertain, homeowner guides mention careful probing and measured digging, but they also recommend professional help when the tank location is not clear or utilities may be nearby (D&H Septic; Angi). If you do not know where the tank is, this is often the point where calling a septic professional is safer than turning the yard into a search project.
Septic tank risers are a practical upgrade when buried lids are making routine maintenance harder than it needs to be. The idea is simple: bring the access point to grade. The outcome, though, depends on careful measurement, compatible parts, a secure sealed installation, and a realistic view of DIY limits. If the opening is shallow and straightforward, a homeowner may be able to handle the retrofit. If it is deep, damaged, hard to locate, or raises safety or code questions, professional evaluation is the safer move.