
Moisture Mapping Tracks Drying, Not Mold
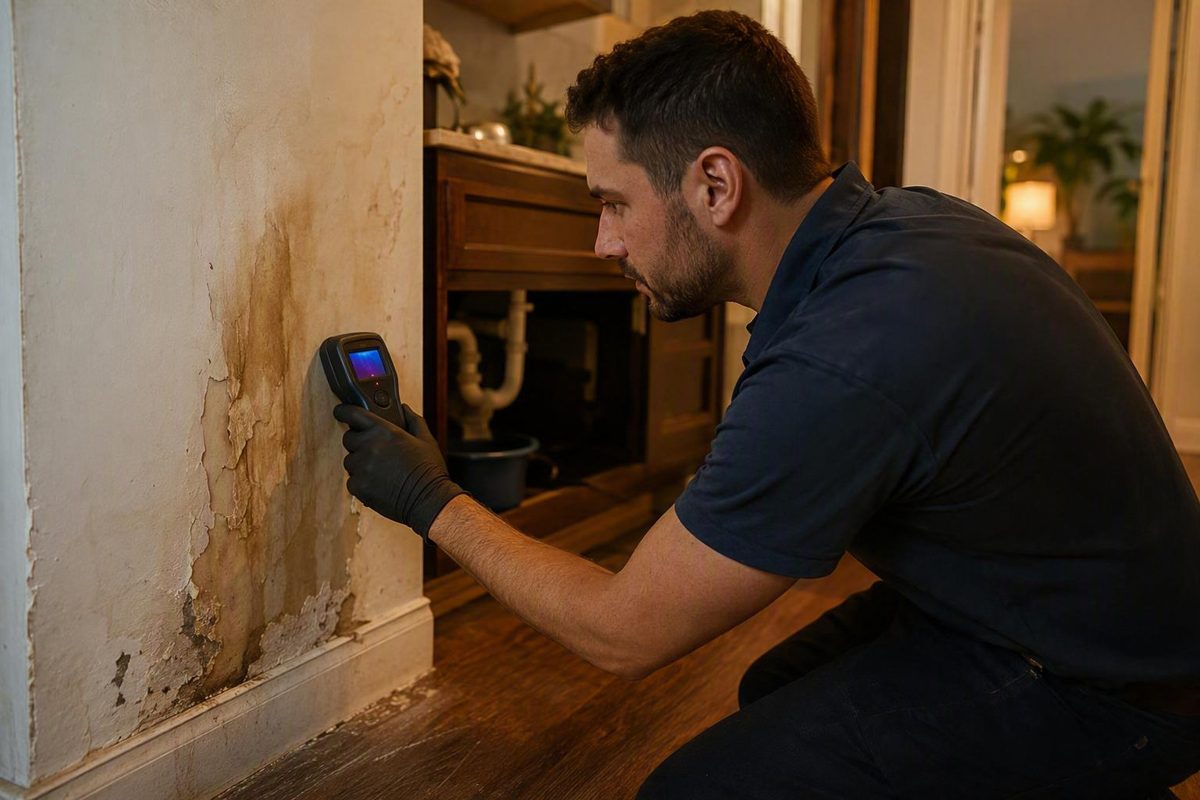
Drywall, wood, concrete, tile assemblies, insulation and flooring respond differently, so one number cannot be a universal dry threshold.
Moisture mapping is a repeatable way to record where building materials are wet, where they appear dry, and whether the wet area is shrinking during restoration. A useful map combines a room sketch or floor plan, labeled measurement points, instrument readings, photographs, material types, and dates. It can guide drying and help reveal moisture beyond the visible stain, but it does not by itself identify mold, certify that a building is safe, or prove exactly what caused the water intrusion.
The first priority is not taking readings. It is making the area safe and stopping the source when that can be done without entering water or approaching damaged electrical equipment.
What a moisture map is—and is not
A moisture map is a visual record of measured conditions. The map might be a paper floor plan, an annotated photo, or a digital diagram. The important part is that each reading can be tied to a specific place and material, then checked again later.
Tramex describes moisture maps as photographs or drawings overlaid with a grid of readings. That structure answers practical questions:
- Which walls, floors, ceilings, cabinets, or trim show elevated readings?
- Where does the affected zone appear to end?
- Which unaffected, like-for-like materials provide a dry reference?
- Are readings at the same points moving toward that reference over time?
- Do the readings support opening a cavity or changing the drying plan?
The map should document observations, not overstate them. A cool thermal pattern can have several causes. A high meter reading may be influenced by the material, salts, metal, density, or the instrument’s scale. Water may also travel inside an assembly and appear far from the original leak. A competent interpretation considers the plumbing event, visual signs, material construction, ambient conditions, and confirmation readings together.
The instruments used in moisture mapping
No single device answers every question. Restoration professionals commonly combine these tools:
Infrared camera
An infrared camera displays surface-temperature differences. Evaporation and wet materials can create useful patterns, so a thermal scan can help locate areas that deserve closer inspection. But the camera does not see through walls or directly measure moisture. Sun exposure, insulation gaps, air leaks, HVAC, pipes, and reflective surfaces can also create temperature differences. Suspect areas need confirmation with a suitable moisture meter.
Pinless moisture meter
A pinless, or non-invasive, meter is useful for scanning a larger surface and comparing nearby areas without making probe holes. It can help trace the apparent boundary of a wet zone. Readings are often comparative rather than a universal percentage, and the sensing depth and response vary by model and material. Metal fasteners, corner bead, wiring, and material thickness can distort the result.
Pin-type moisture meter
A pin meter measures between probes inserted into a material. It can help confirm conditions at a selected depth and, for compatible materials and scales, provide more material-specific information. Probe holes are invasive, however, and readings still require the correct meter setting and interpretation. Do not probe a wall or floor where hidden electrical wiring, plumbing, waterproofing, or hazardous material may be present.
Thermo-hygrometer
A thermo-hygrometer records air temperature and relative humidity; some instruments also calculate other psychrometric values. These readings describe the drying environment rather than the moisture content of a wall or floor. Protimeter’s overview lists moisture meters, a hygrometer, cameras, and mapping software as complementary tools, not substitutes for one another.
How a defensible moisture map is made
1. Complete a safety screen
Before entering, look for standing water near electrical equipment, a sagging ceiling, shifting floors or walls, gas odor, sewage, chemical contamination, and unstable materials. Do not touch a wet panel, switch, receptacle, appliance, or extension cord. If the main power can only be reached by entering water, leave it alone and call an electrician.
2. Stop and document the water source
Shut off a safe, accessible fixture valve or building water supply when appropriate. A licensed plumber may be needed for a concealed leak, drain or sewer backup, failed water heater, supply-line failure, or uncertain source. Record when the water was discovered, when the source stopped, and whether more water could still be entering.
3. Sketch the area before drying changes it
Draw the room boundaries and label walls, floor sections, ceiling areas, doors, fixtures, cabinets, and adjoining rooms. Mark the apparent source and visible damage. Take wide photos for orientation and close photos of staining, swelling, delamination, or other conditions. Avoid claiming that a stain proves the present location or age of a leak.
4. Establish a useful dry reference
Compare affected material with an apparently unaffected sample of the same material in a nearby, similar environment. Drywall should be compared with similar drywall, not wood; one flooring system should not be compared blindly with another. Record the reference location and reading. A reference is a practical baseline, not a universal pass/fail number.
5. Scan, confirm, and label points
Use a consistent grid or named locations such as “north wall, 30 cm above floor.” A broad non-invasive scan can locate patterns; selected points can then be confirmed with the appropriate meter where safe. Record the meter make/model, mode or scale, material, reading, date, time, and exact point. The initial map should extend into adjacent areas that appear unaffected so the wet boundary is not defined only by what is visible.
6. Repeat under comparable conditions
Return to the same points with the same instrument and settings when possible. Magicplan’s mapping guidance emphasizes consistent meters, initial documentation, dry standards, and repeated readings. Trends are more useful when the location, material, device, and method stay consistent.
How to interpret the pattern
A map is most useful as a series, not a one-time picture. Look for:
- Extent: elevated readings that continue beyond the visible stain may indicate a larger affected area.
- Direction: a trail across a ceiling, down a wall, or beneath flooring can guide further investigation, but it does not prove the source on its own.
- Trend: readings that move toward the like-for-like dry reference support drying progress; a flat or rising area deserves investigation.
- Outliers: one isolated high reading may reflect a fastener, pipe, conductive material, or measurement error. Recheck it with another method before making an invasive decision.
- Material response: drywall paper, wood, concrete, tile assemblies, insulation, and flooring respond differently. One number cannot serve as a universal dry threshold across all materials and meters.
A professional should reconcile readings with the assembly design and the loss history. For example, the surface of a floor can appear dry while moisture remains under a finish or inside a multi-layer assembly. Conversely, a thermal anomaly may disappear when HVAC or sunlight conditions change even though no water was present.
Moisture mapping is not mold clearance
Moisture mapping finds and tracks damp conditions; it does not identify mold species, measure a person’s exposure, or certify that remediation is complete. The EPA says mold growth depends on moisture and recommends drying wet areas and materials within 24–48 hours when possible. That is a reason to act promptly, not a guarantee that mold will or will not be present at a particular hour.
The EPA also notes that visible mold usually does not require sampling, that there are no federal airborne mold limits, and that any sampling should be designed and interpreted by an experienced professional. A drying log therefore cannot be relabeled as a mold test or clearance report. Suspected hidden growth, significant visible growth, persistent odor, health concerns, or invasive work may call for a qualified mold or indoor-environmental professional under applicable local rules.
Electrical, sewage, and structural stop conditions
Some water losses are not safe DIY mapping projects.
- Electrical hazard: The CDC’s flooded-home guidance says never operate electrical controls or equipment while standing in water. If standing water blocks access to the main disconnect, call an electrician. Electrical systems and wet equipment should be checked before re-energizing when damage is possible.
- Sewage or floodwater: Treat sewer backups and floodwater as potentially contaminated. The CDC warns that floodwater can contain sewage and other waste. Keep people and pets out, avoid spreading contamination through the building, and use a qualified remediation firm for cleanup and material removal.
- Structural warning signs: Leave an area with a sagging ceiling, buckled flooring, shifting walls, falling material, or other signs of instability. Water-loaded finishes can fail without warning. Contact emergency services or a qualified structural/building professional as the situation warrants.
- Unknown cavity hazards: Do not drill, cut, or remove finishes merely to chase a meter signal. Hidden wiring, plumbing, contaminated materials, and regulated building materials require an appropriate inspection and safe work plan.
What a complete moisture-map record should contain
Whether a homeowner is documenting a small clean-water leak for a plumber or a restoration contractor is managing a larger loss, the record should make the observations reproducible:
- address or project identifier and the date/time of each visit;
- water source, discovery time, and source-control status;
- rooms and building assemblies examined;
- a labeled sketch, grid, or annotated photographs;
- material type at every measurement point;
- instrument make/model, mode, scale, and relevant settings;
- initial readings and like-for-like dry-reference readings;
- repeated readings at the same labeled points;
- ambient temperature and relative humidity where relevant;
- photographs before, during, and after drying;
- safety exclusions, inaccessible areas, and uncertainties;
- actions taken, equipment placement, and recommendations for further inspection.
The best moisture map is not the one with the most colored squares. It is the one another qualified person can follow: what was measured, where, with which tool, under what conditions, and how the readings changed. Used that way, moisture mapping supports better plumbing investigation and drying decisions while keeping a clear boundary between measured evidence and professional diagnosis.